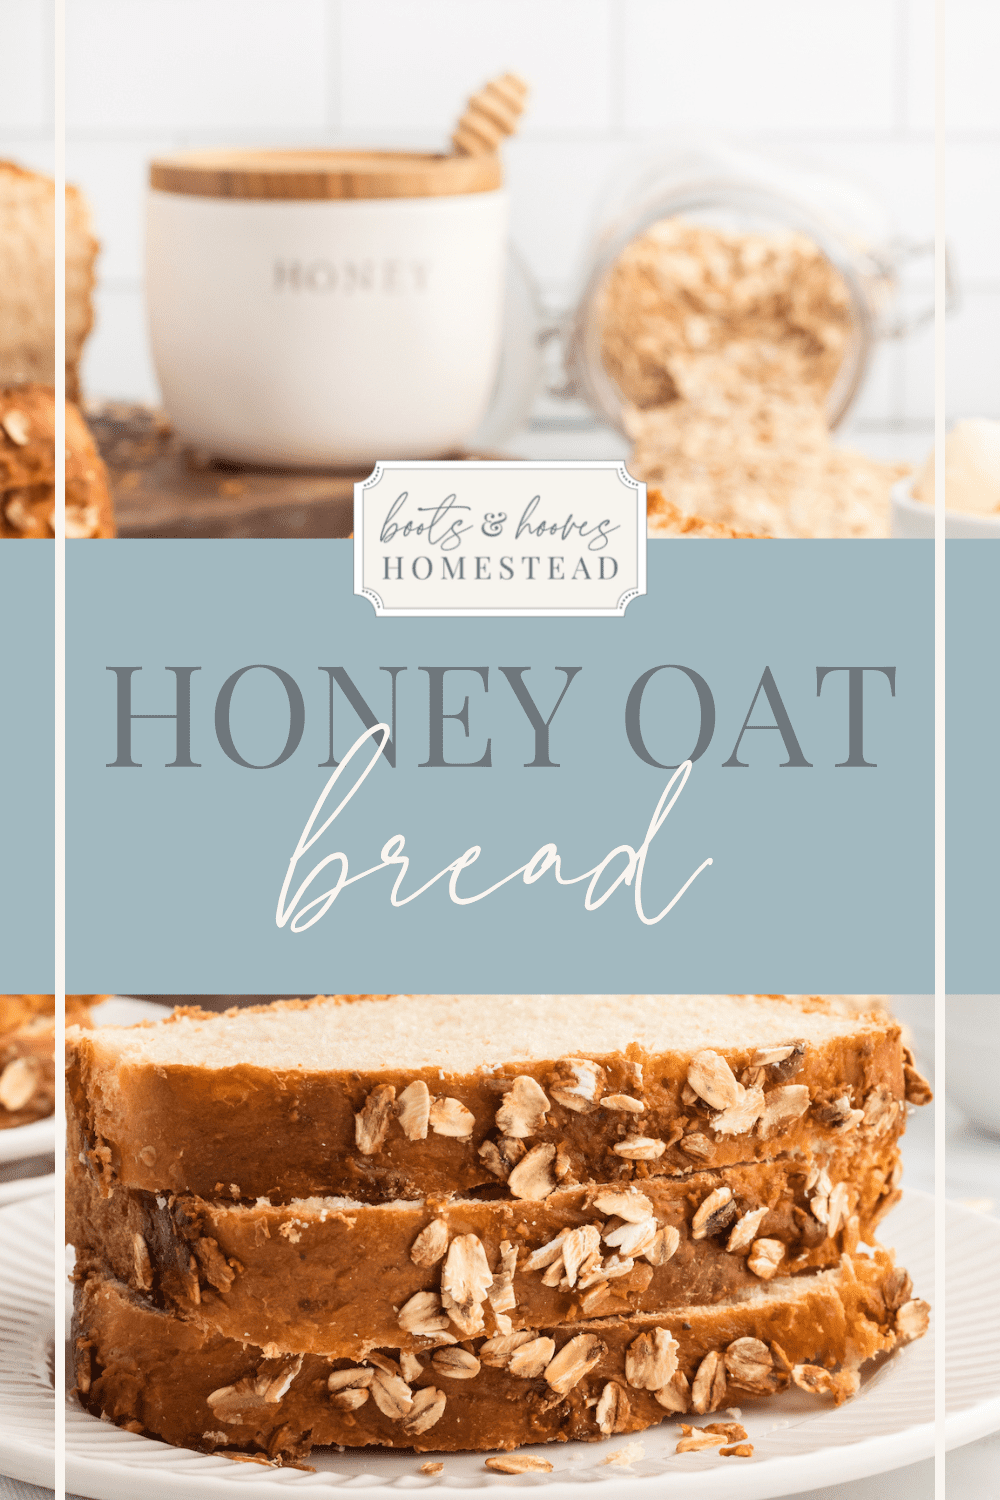
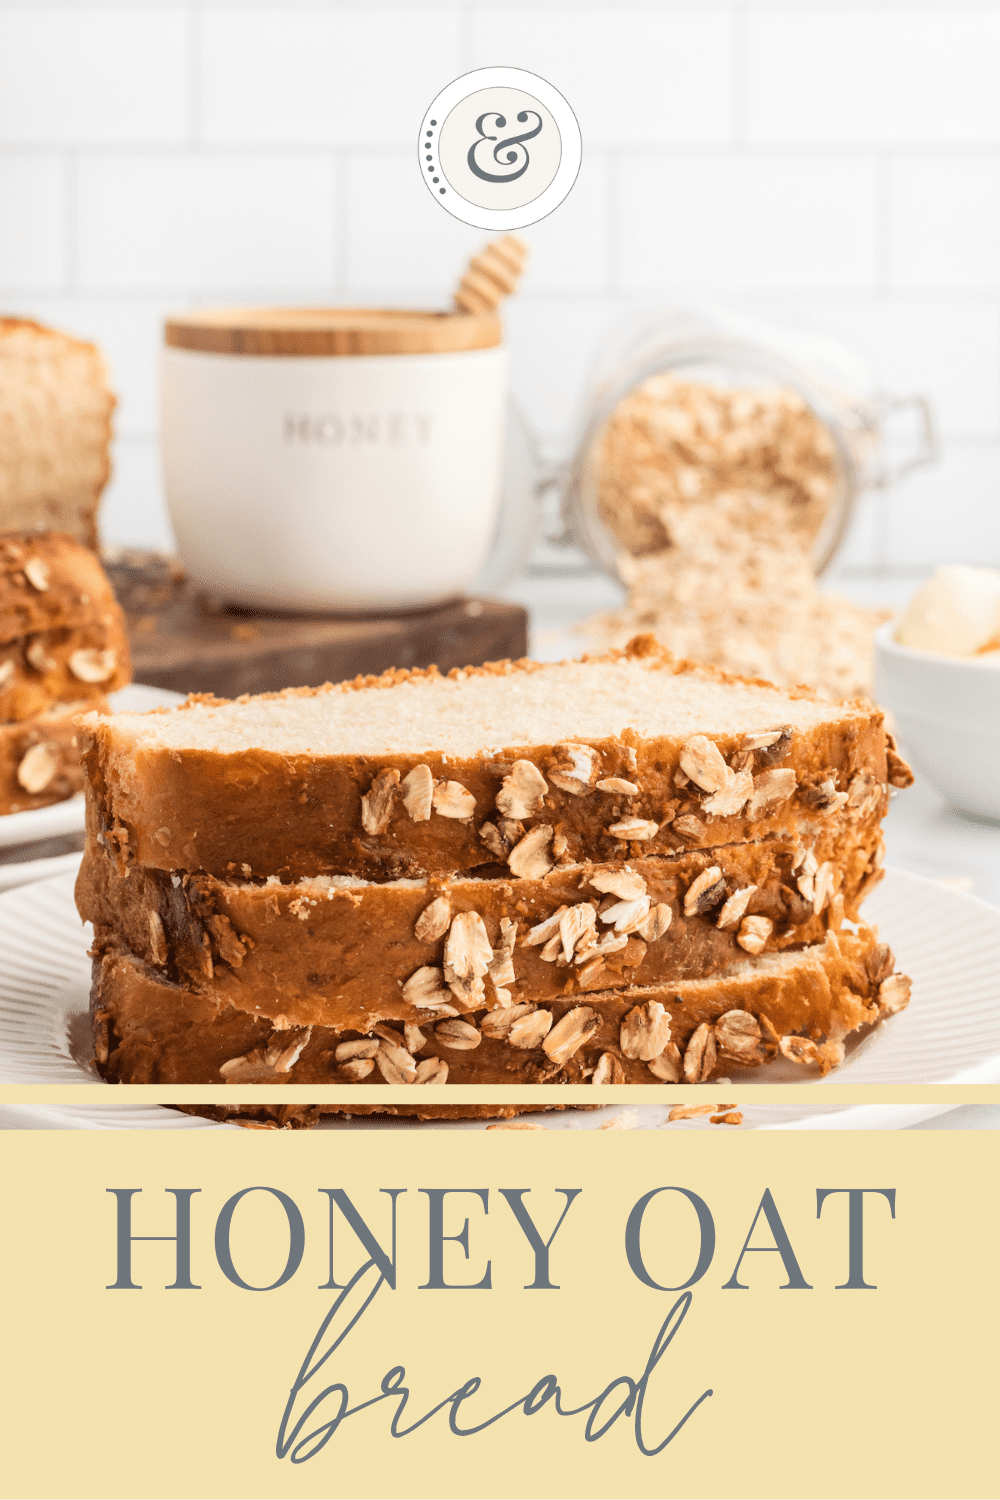
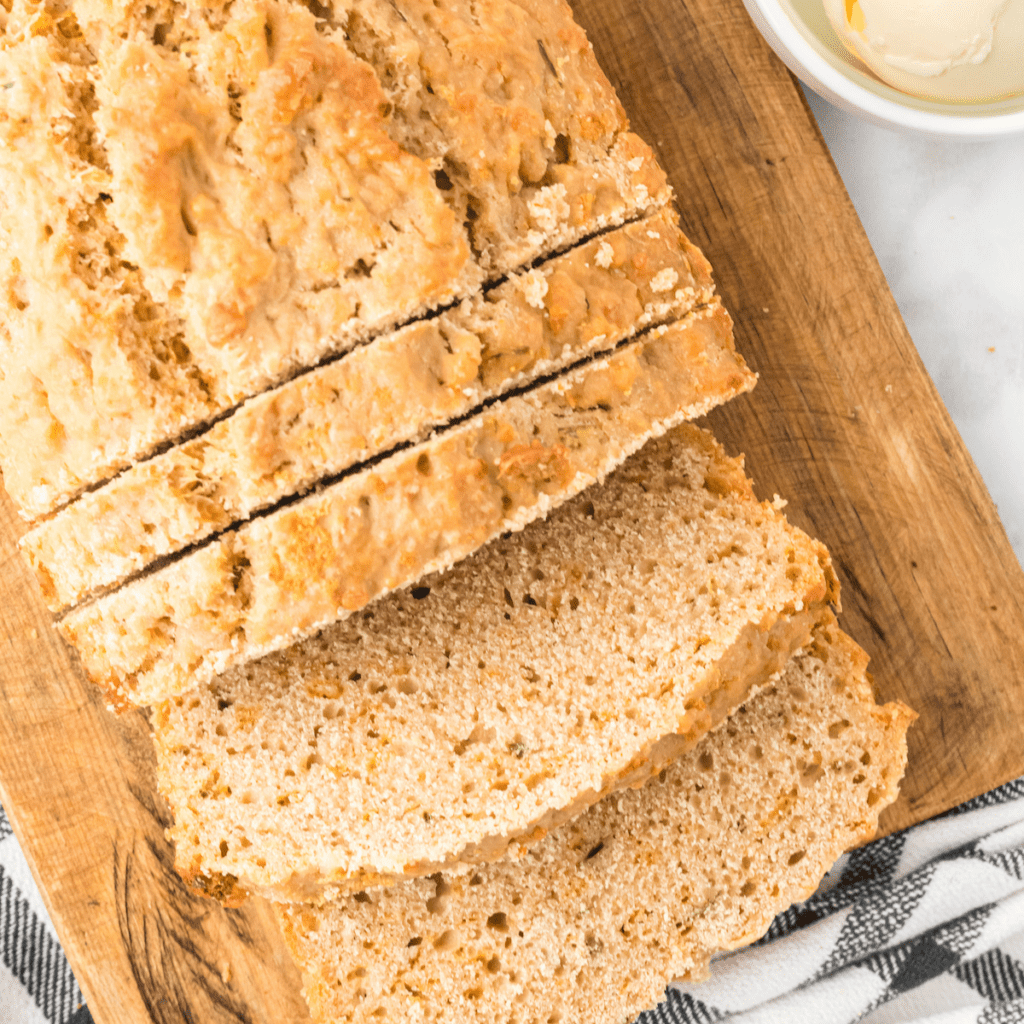
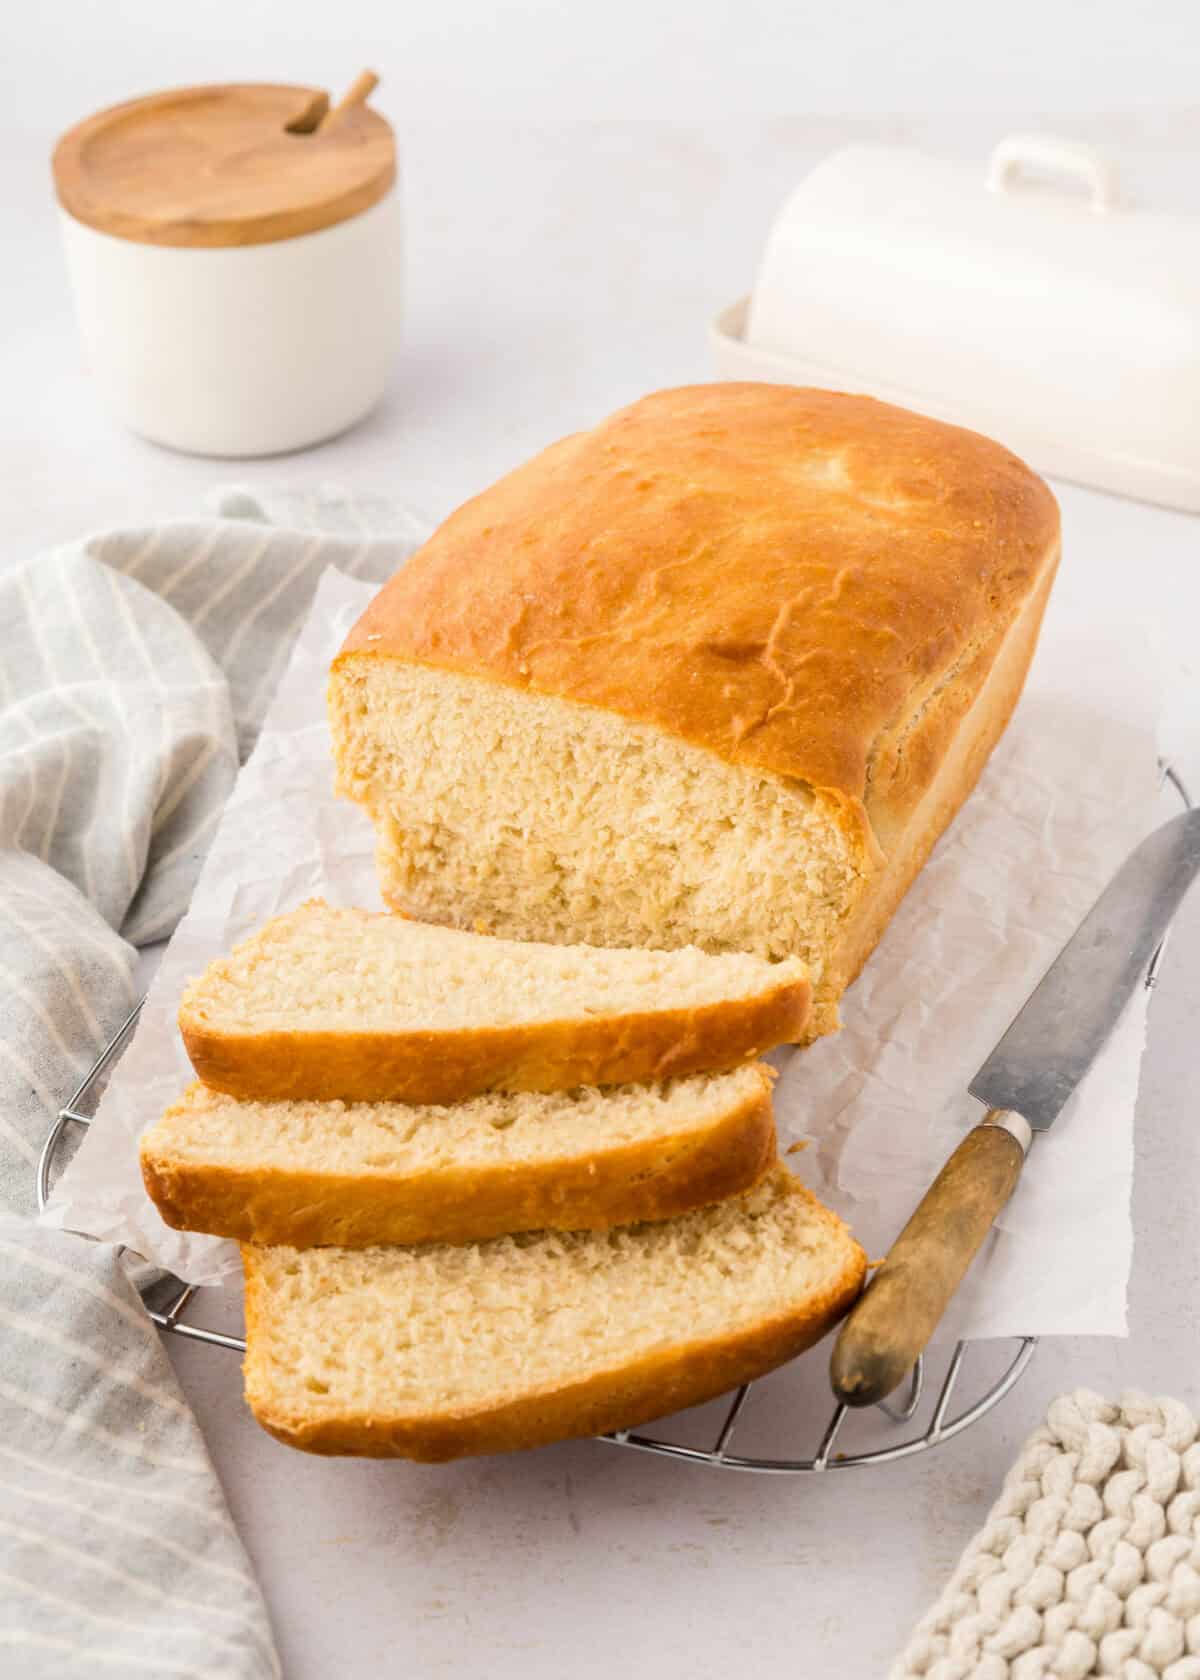
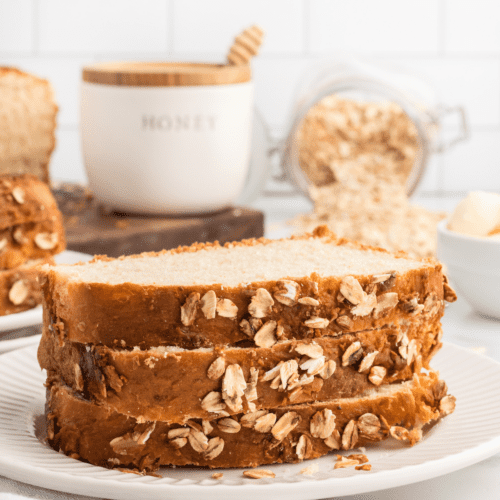
Honey Oat Bread (delicious + easy sandwich loaf)
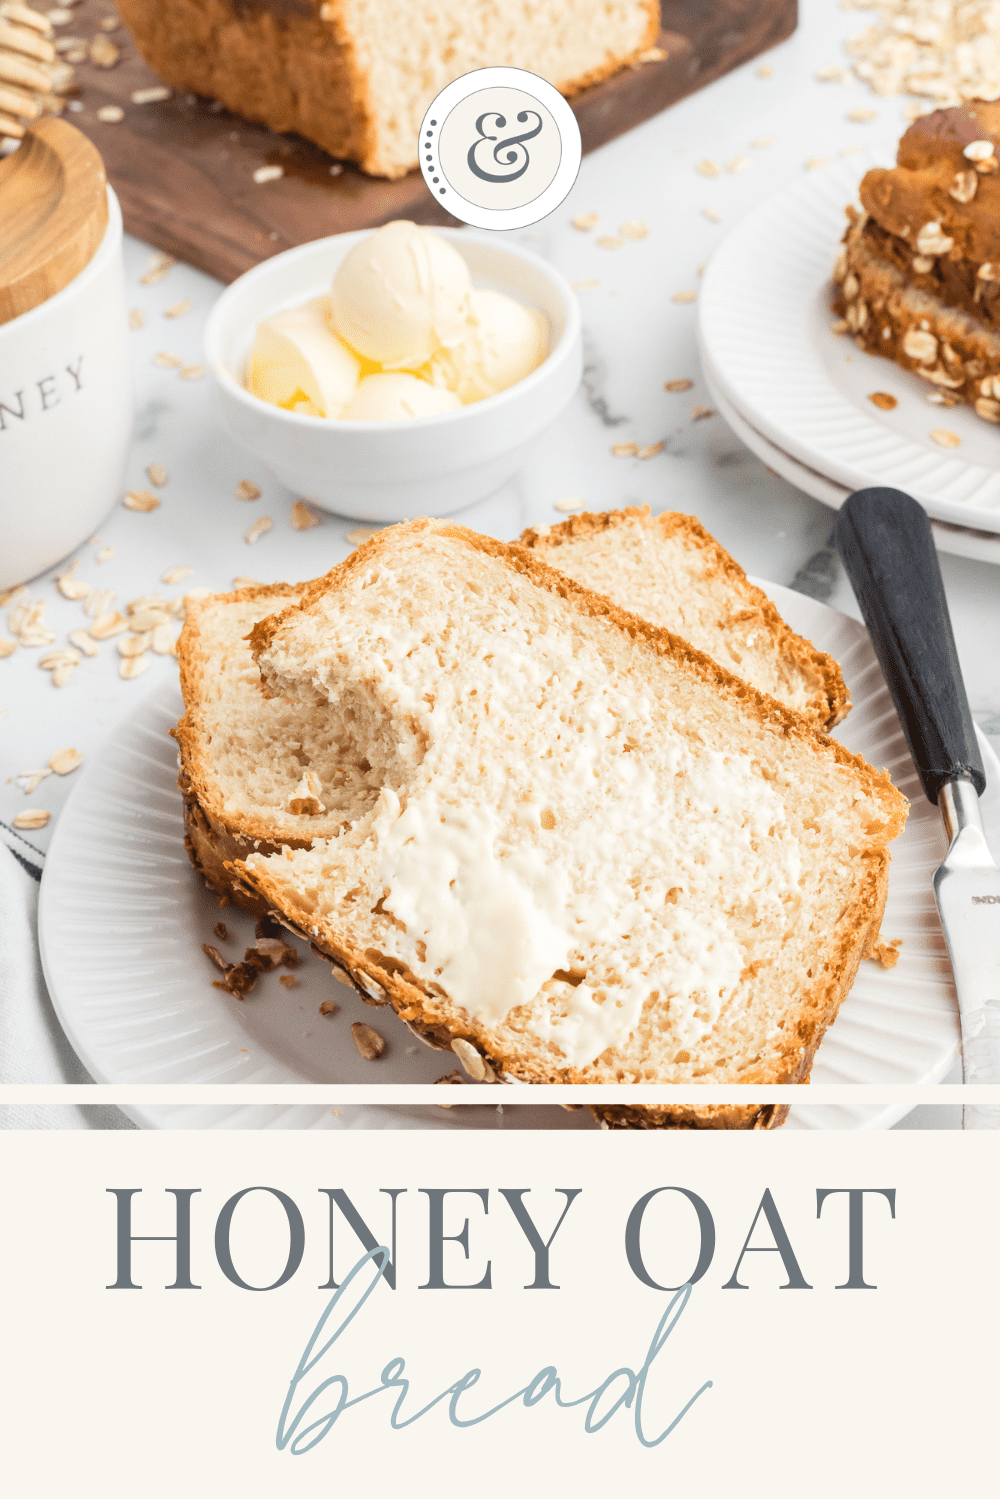
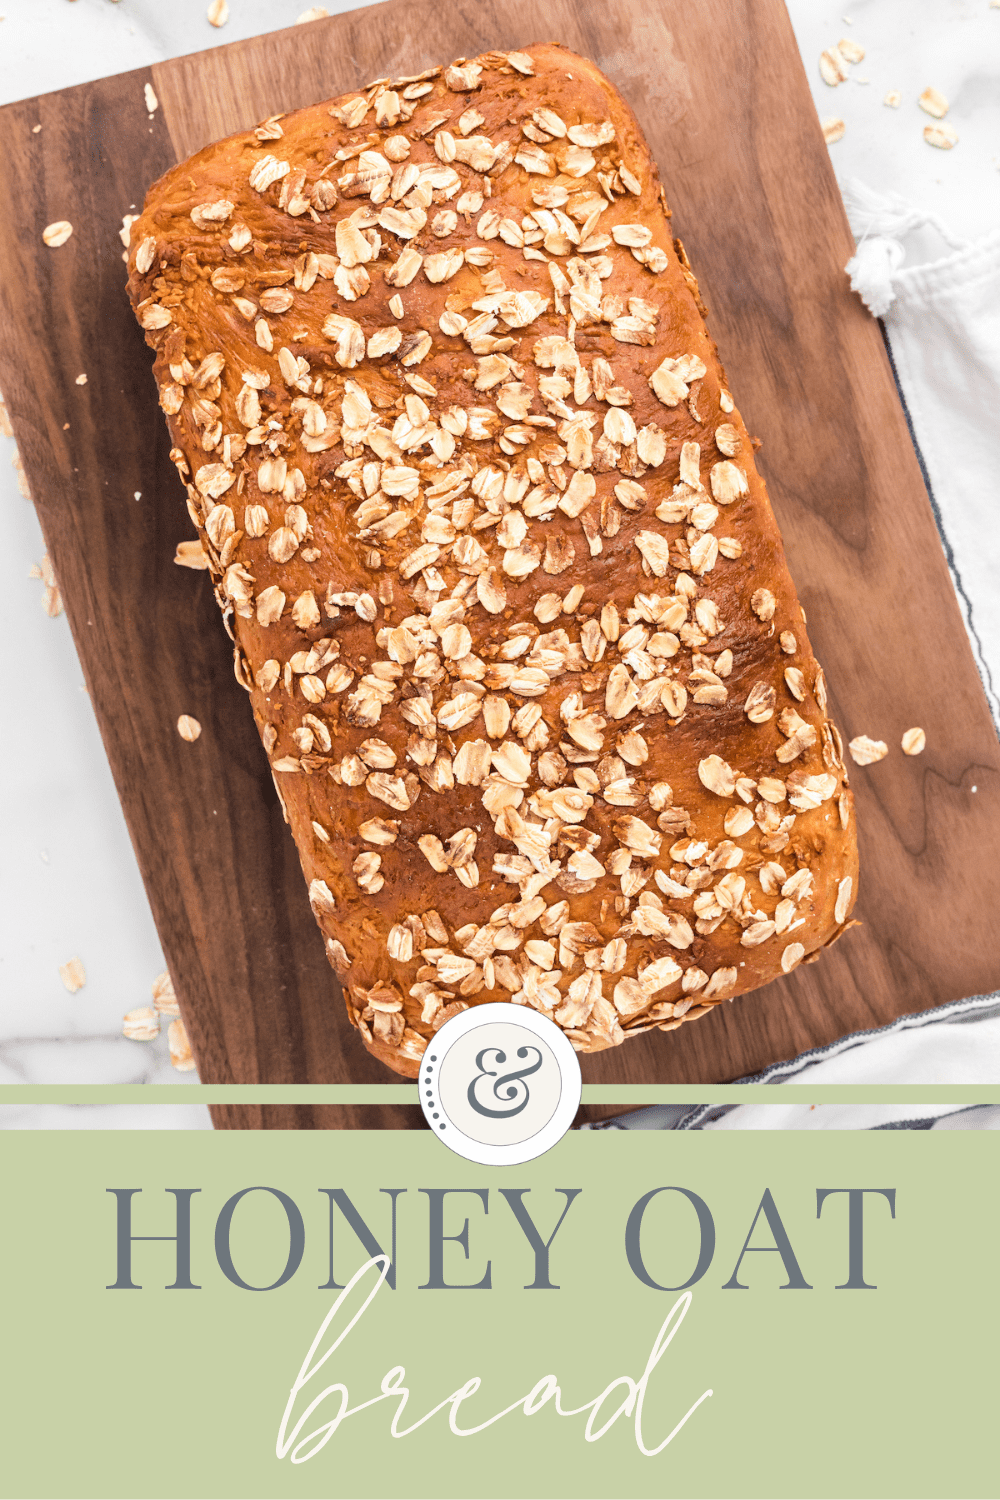
This easy to bake homemade honey oat bread is free of processed sugar. It is incredibly delicious and slightly sweetened with a bit of natural honey.
This homemade, light and fluffy bread is great toasted with a bit of butter. It’s simple to prepare, and features oats and honey.
It’s been a reader favorite for a reason! Give it a try and see just what makes it so deliciously good!
This post has been updated from its original publish date of September 15, 2016. It has been updated to provide better photos, additional helpful information and step by step instructions.
Honey Oat Bread Recipe
This recipe has been a long time family and reader favorite. Just see what a few had to say on Pinterest…
What readers say:
“I’ve failed at a few bread recipes now and almost gave up on homemade bread all together. I tried this one today and got 10/10 ratings on flavor, texture, and just over all likeness 🙂 thank you for sharing the recipe!! Gave me a new boost of confidence and motivation!!”
— Gina
“This was incredible. I picked up some triple berry jam and apple butter on our vacation to Tennessee and wanted to make fresh bread to go with it. This was so easy to make and paired perfectly with some butter and jam. I’ll definitely be making it again and again.”
— Megan
“This sandwich bread was amazingly easy to make. I don’t have a mixer so I have to knead by hand and by the end of 10 minutes my arms were burnin’! Both my husband and my son CANNOT stop eating this! It’s been 3 days and I’m already going to make 2 more loaves today. This is my go to recipe from now on! Thanks for posting!”
— Allison
This simple bread recipe is a hit with my entire family, can easily be made and kneaded in a stand mixer or by hand – totally your preference.
I thoroughly enjoy kneading by hand, but sometimes we don’t always have the time for that. I usually make a loaf about once or twice a week because my family likes it that much.
Around our home, we try to avoid as many processed or sugar filled foods as possible and since sugar is found in nearly everything — including bread, so I like to bake my own.
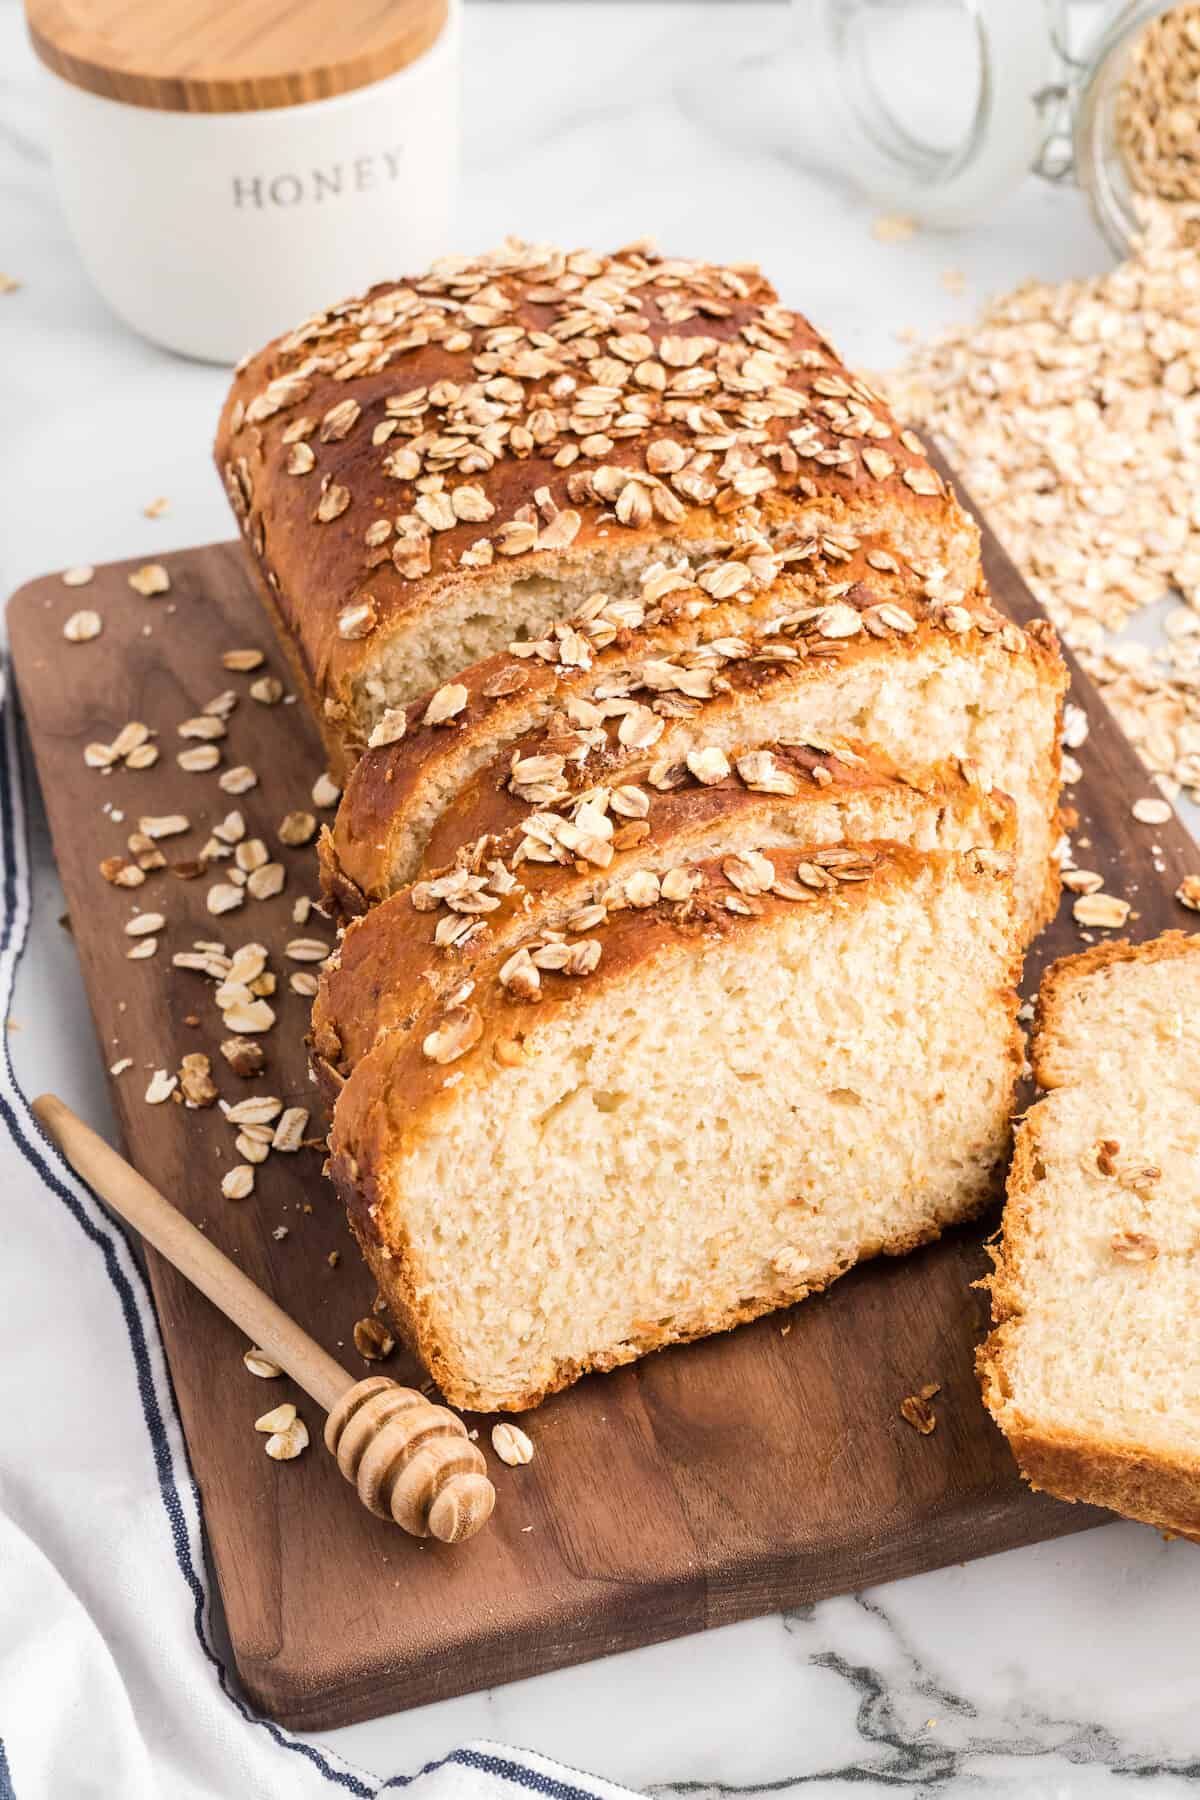
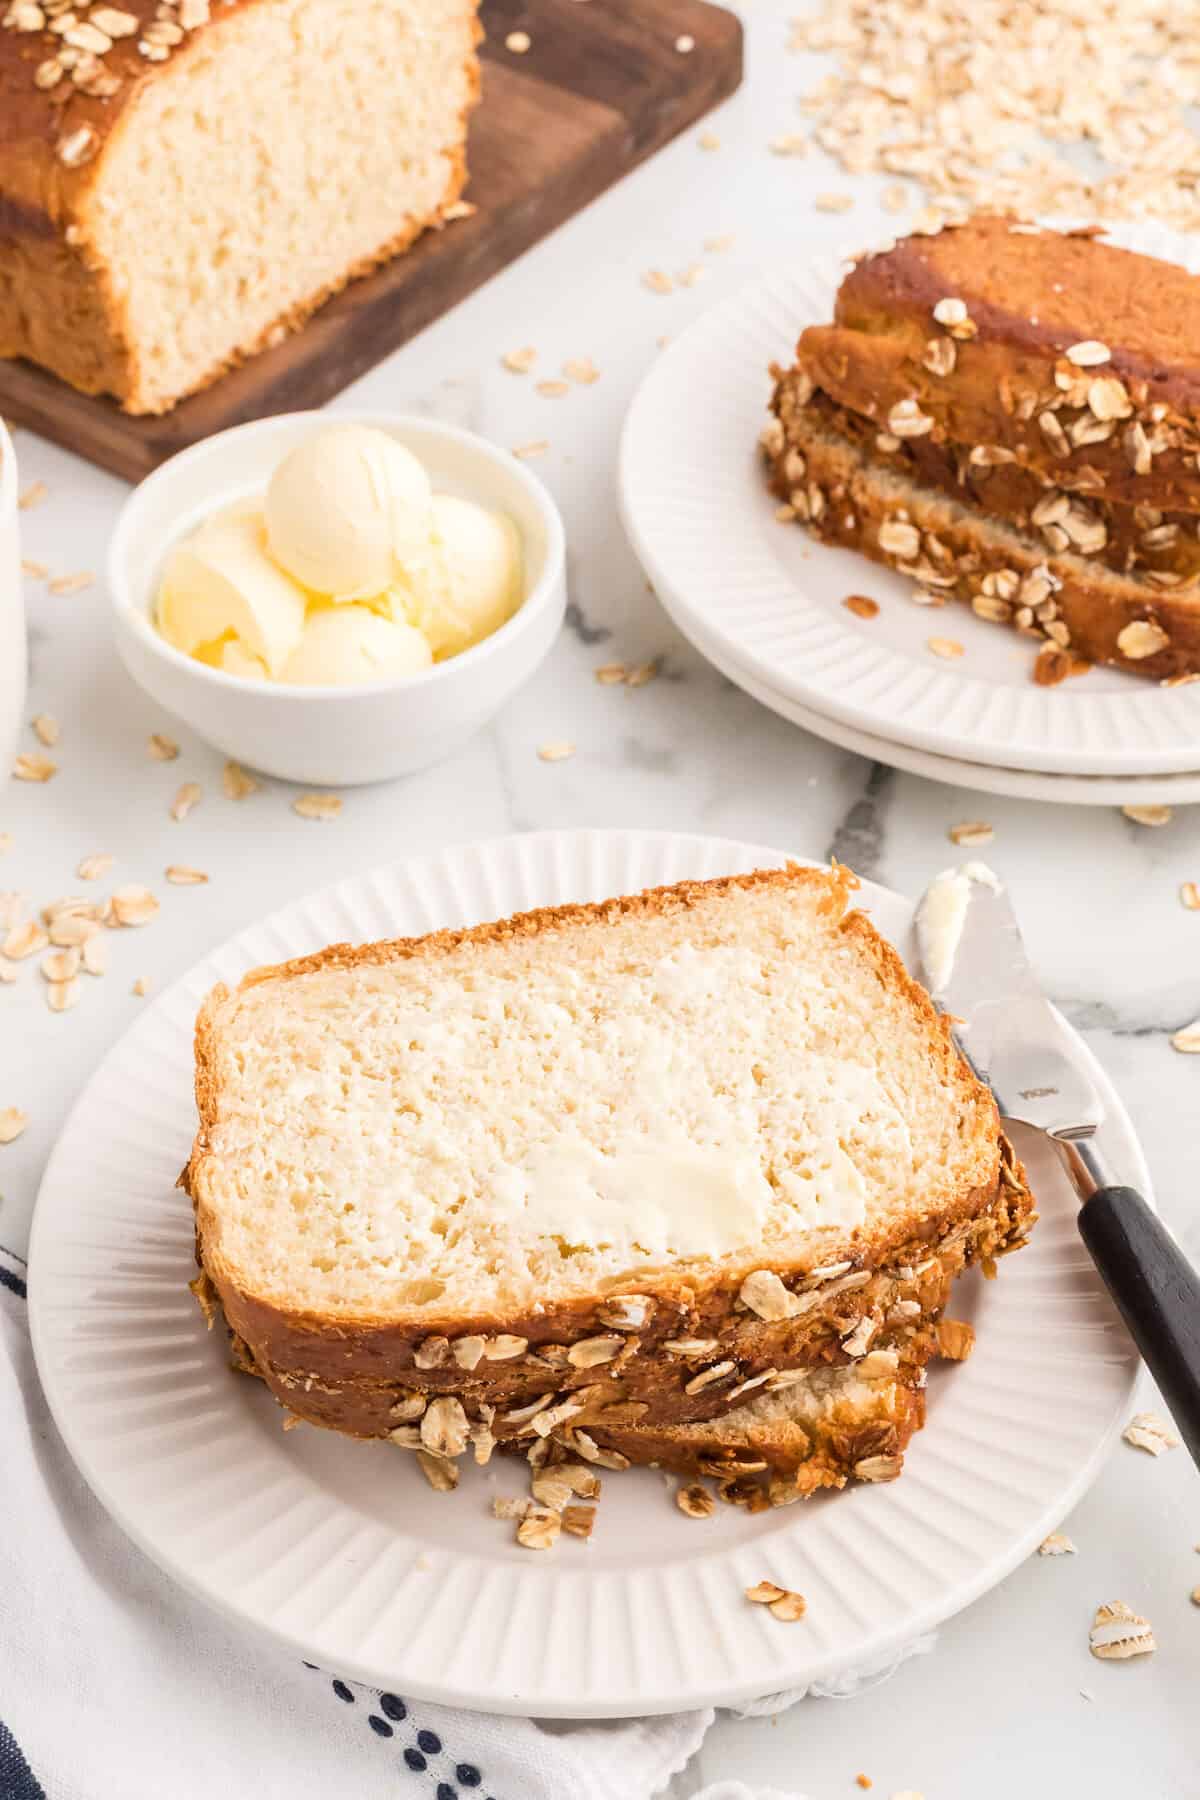
Spread butter over top of fresh baked slices, use it for sandwiches, serve with soups or stews, or enjoy all on its own!
Its so good!!
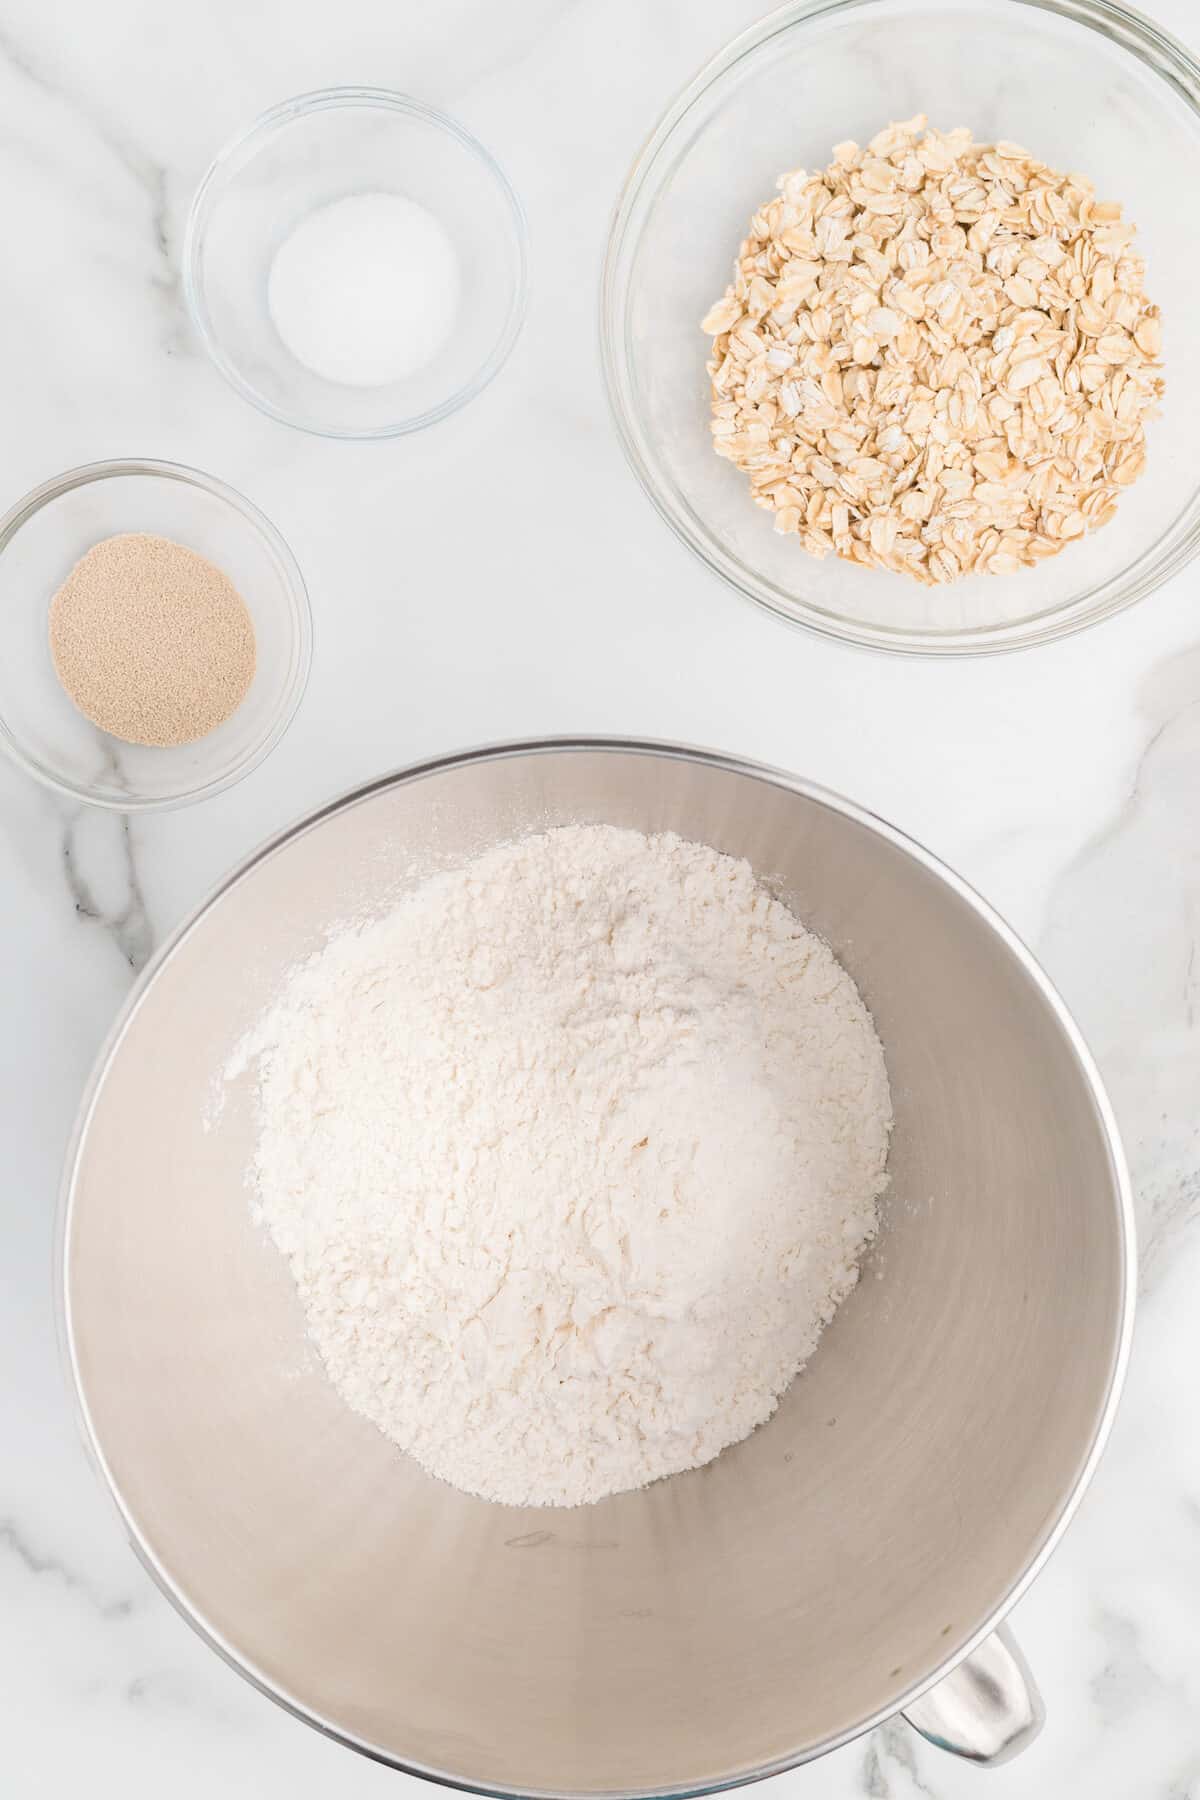
Ingredients
Homemade bread is much more satisfying than store-bought bread. Throw together the ingredients for this easy recipe and you’ll have a new favorite bread recipe!
And this recipe uses just a few pantry staple ingredients.
Here’s what you’ll need:
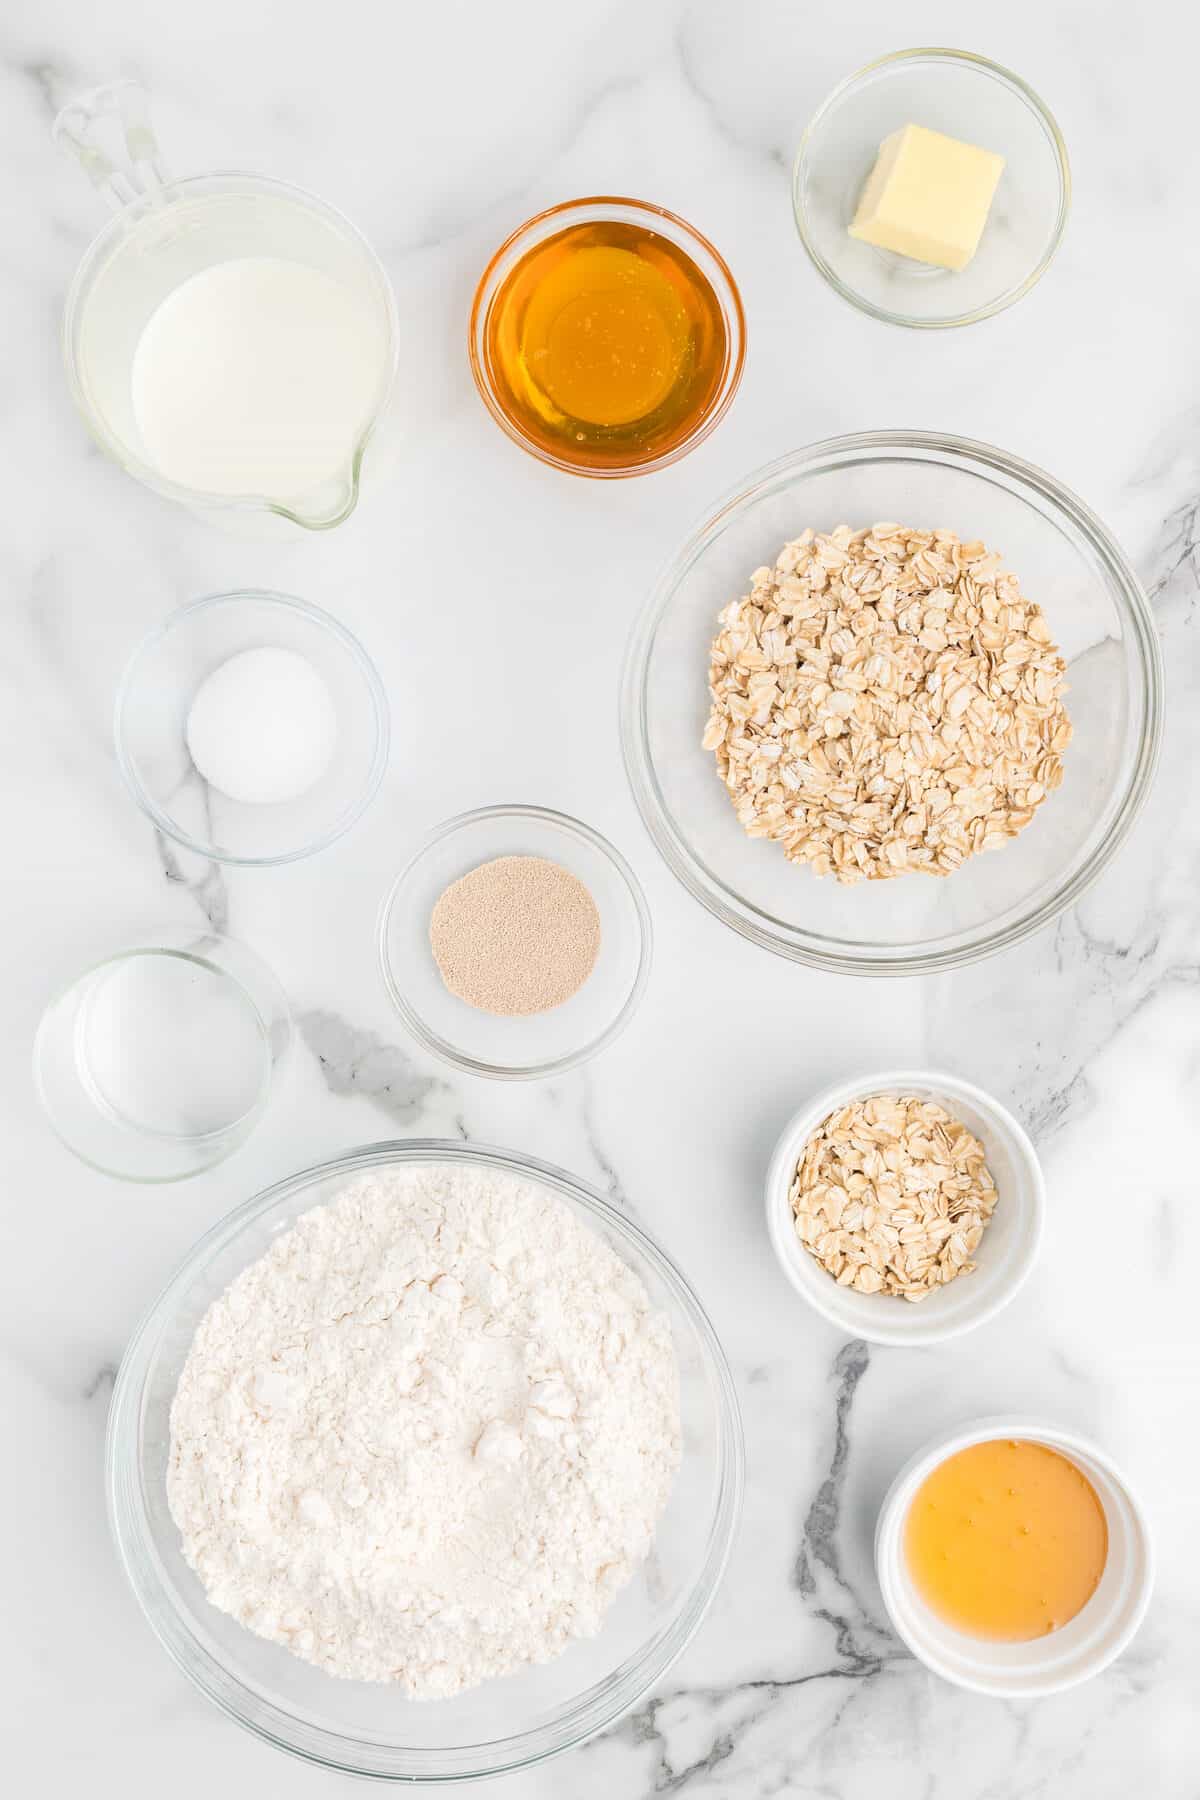
- all purpose flour
- old fashioned rolled oats
- dry active yeast
- fine sea salt
- butter
- whole milk
- lukewarm water
- raw, natural honey
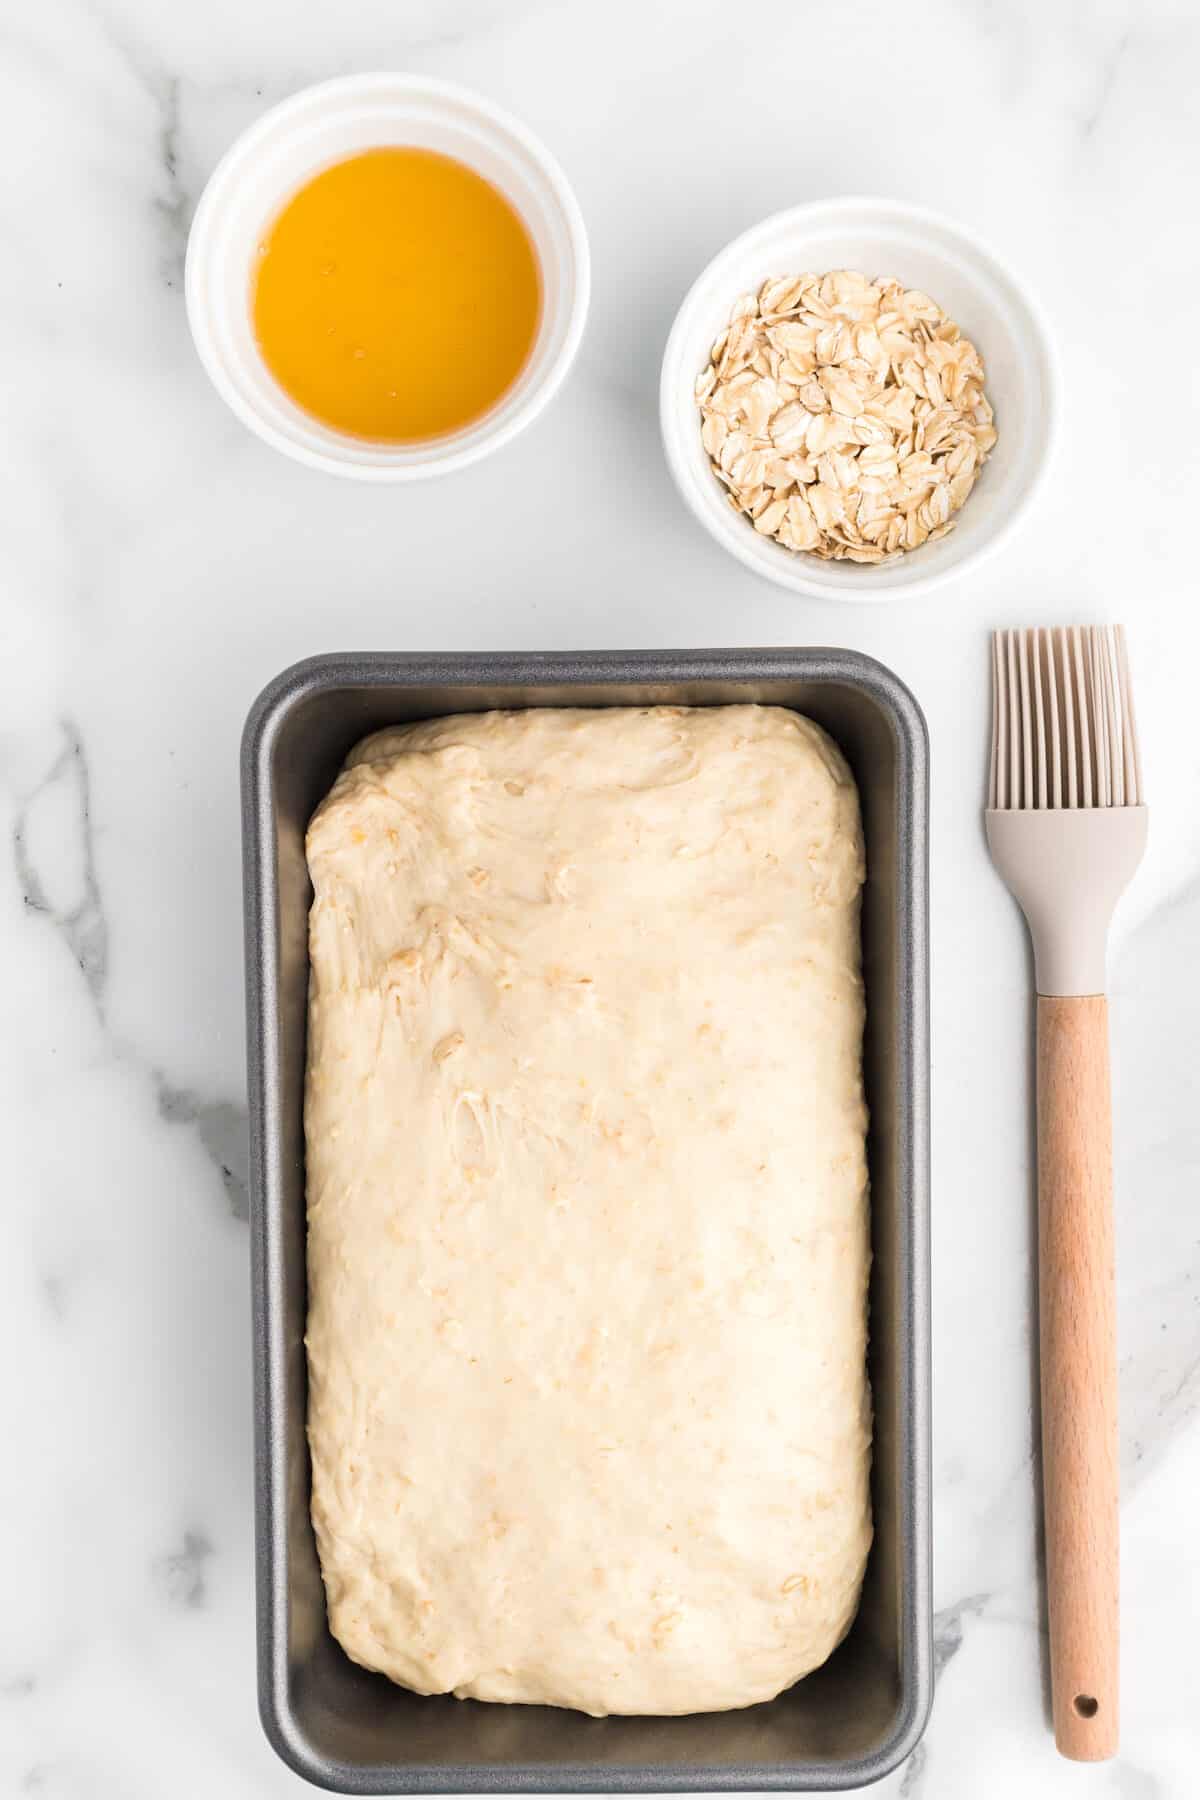
- For the top of the bread: 2 tablespoons honey, 2 tablespoons oats
Instructions
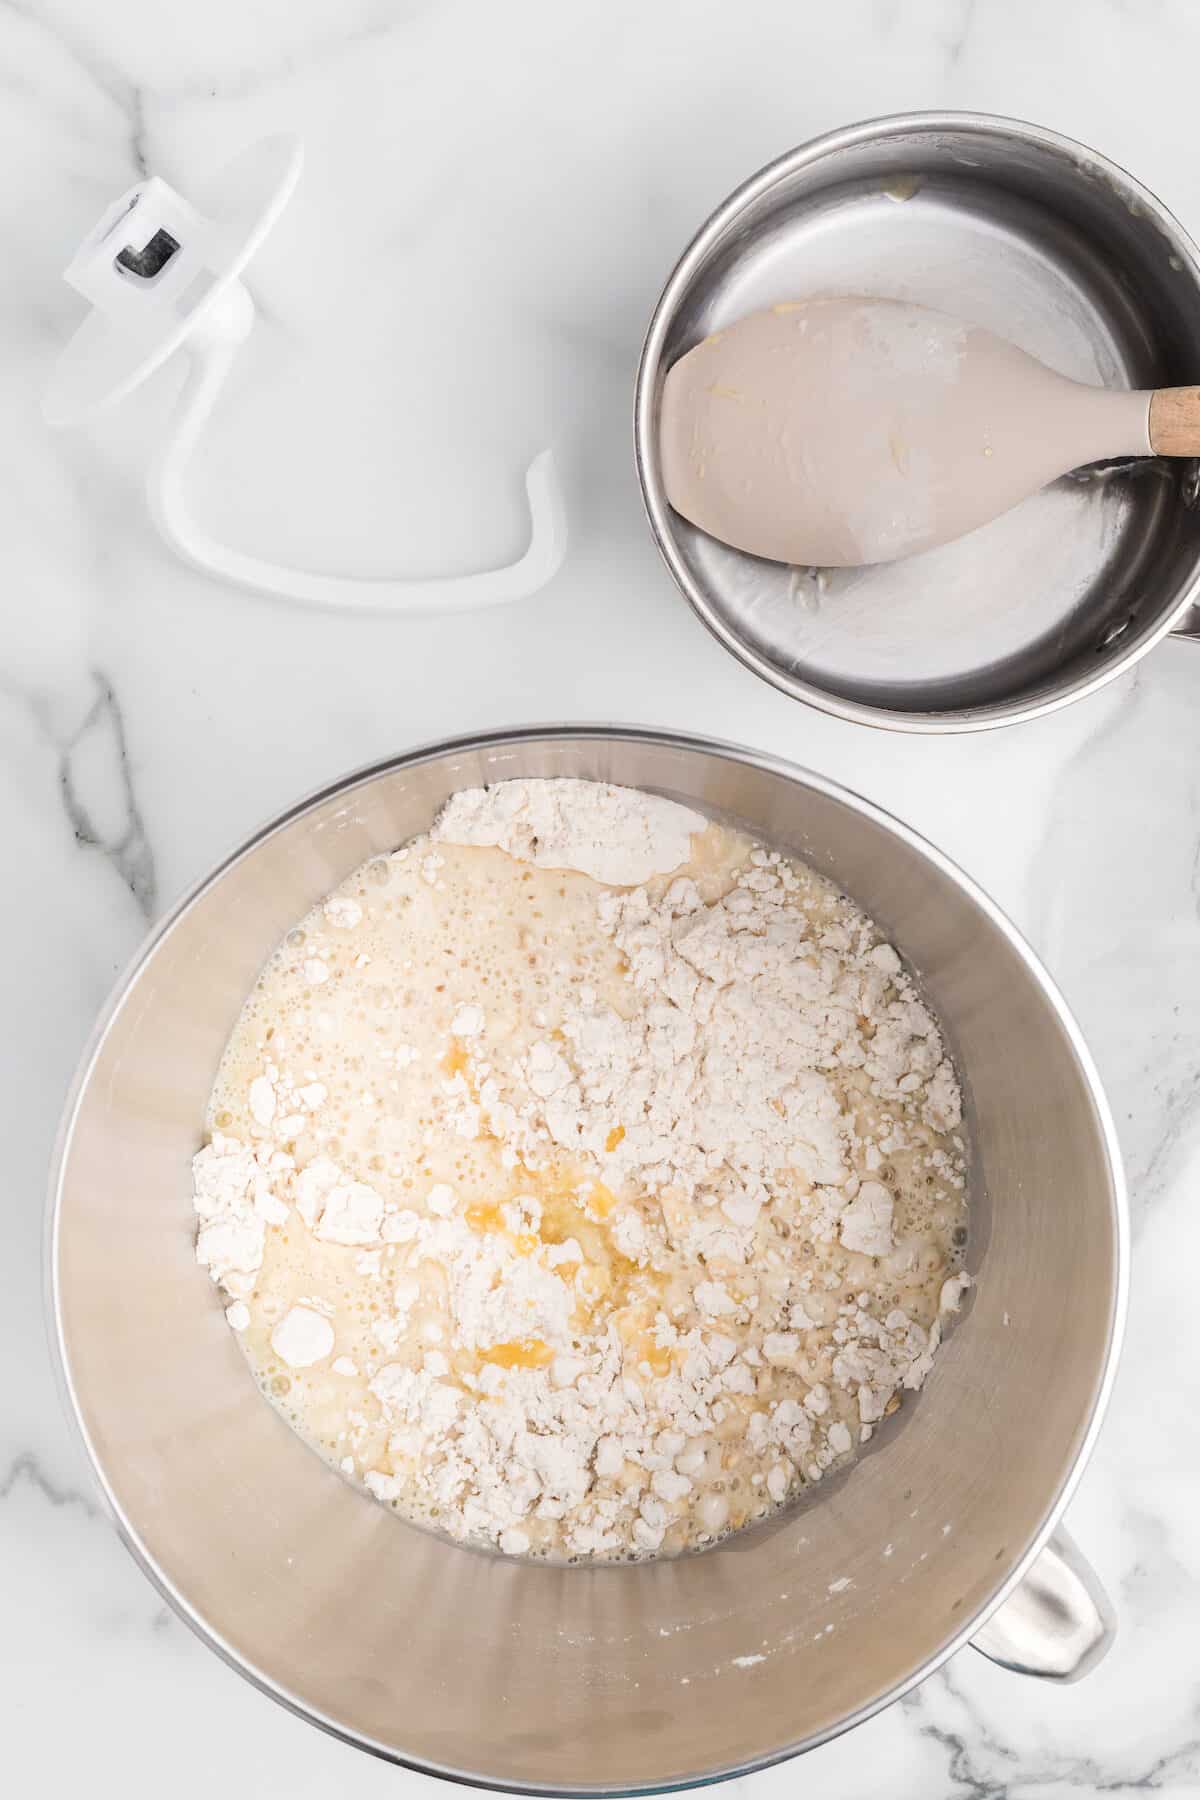
Begin by combining the dry ingredients into a large mixing bowl or in the bowl of a standing mixer.
Next, add the milk and butter to a small saucepan over medium low heat. Heat just until the butter melts, but don’t allow to boil or scald the milk. Stir in the honey and water.
Add the milk mixture to the flour mixture. If using a stand mixer, use the dough hook attachment. Check often to make sure it isn’t becoming over kneaded. And knead for about 6-8 minutes.
Want to save this?

If kneading by hand, you’ll notice this bread is very sticky and may require more flour. Add a small amount at a time, approximately 1 tablespoon at a time, until it isn’t very tacky, but don’t allow to become too dry.
Knead the bread for about 10 minutes.
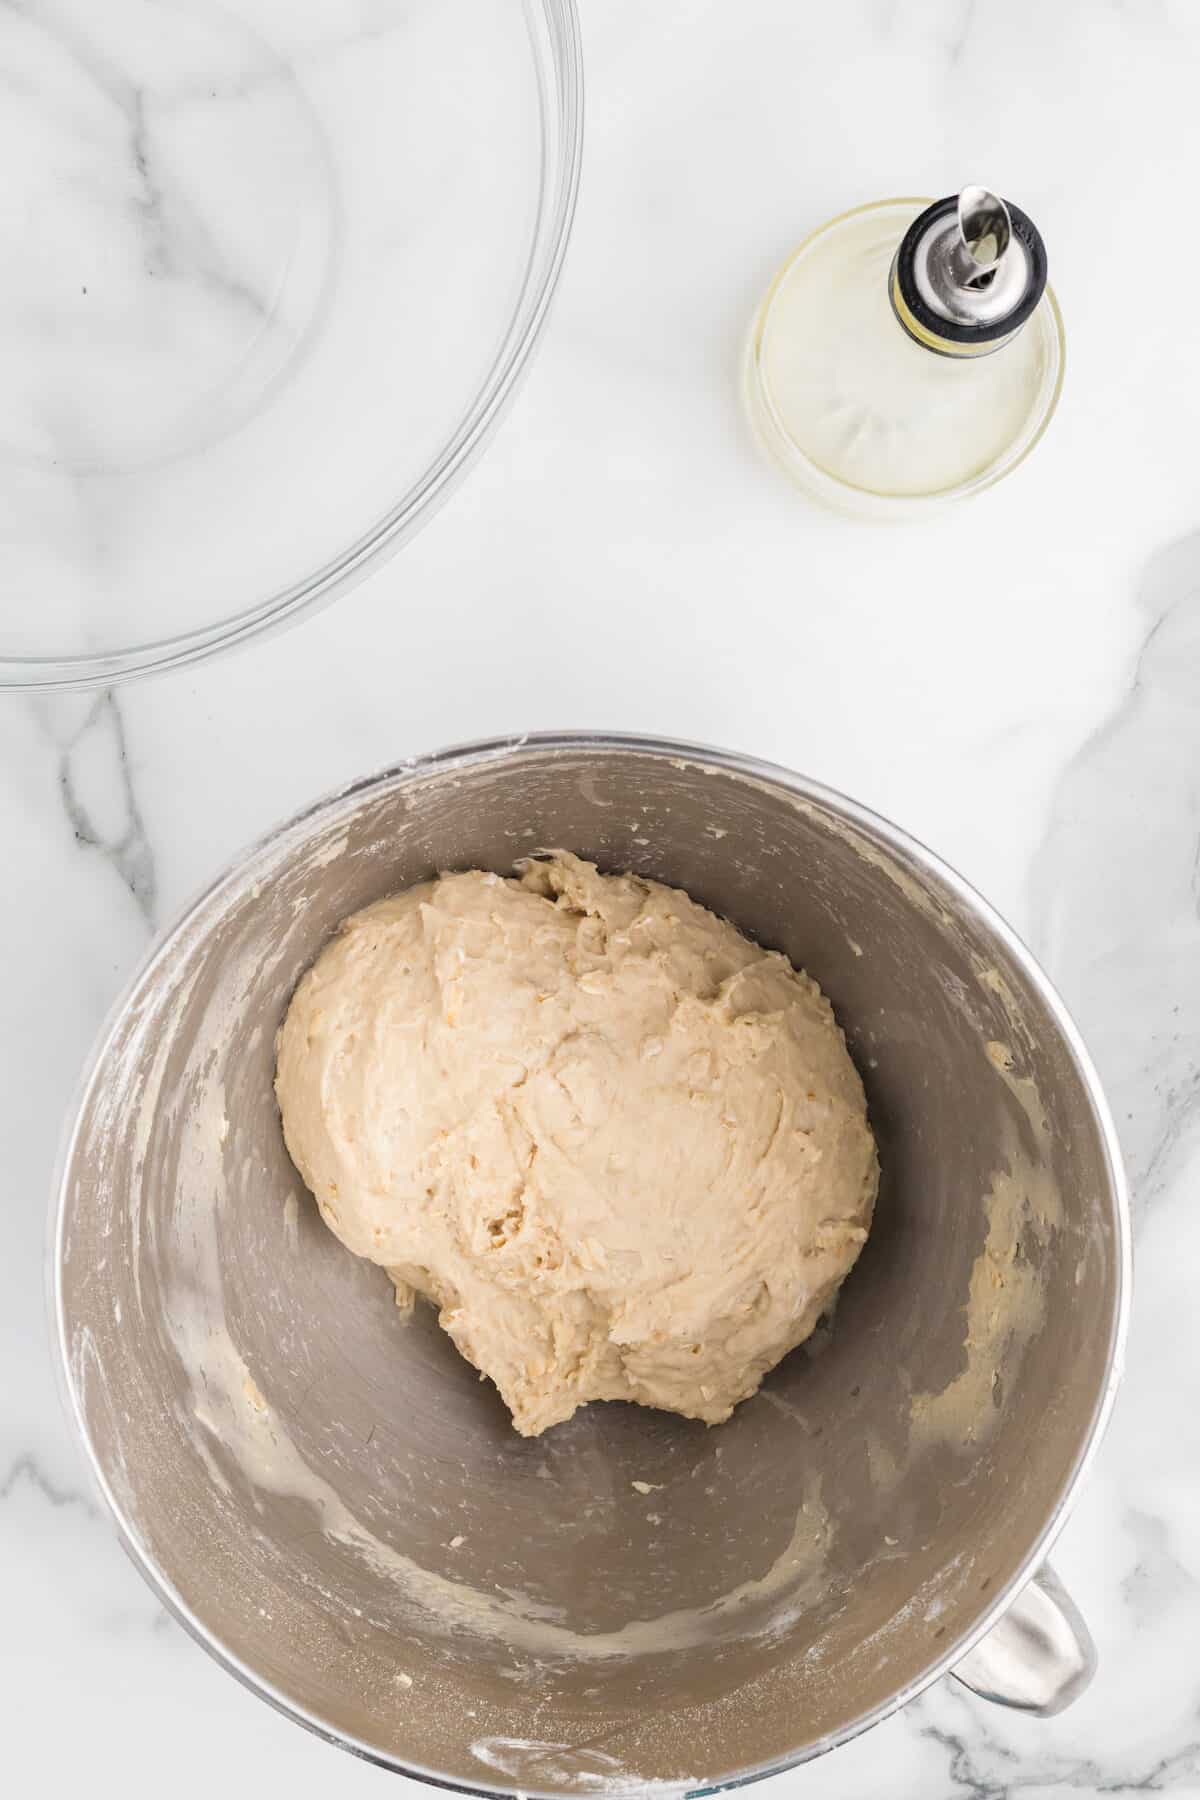
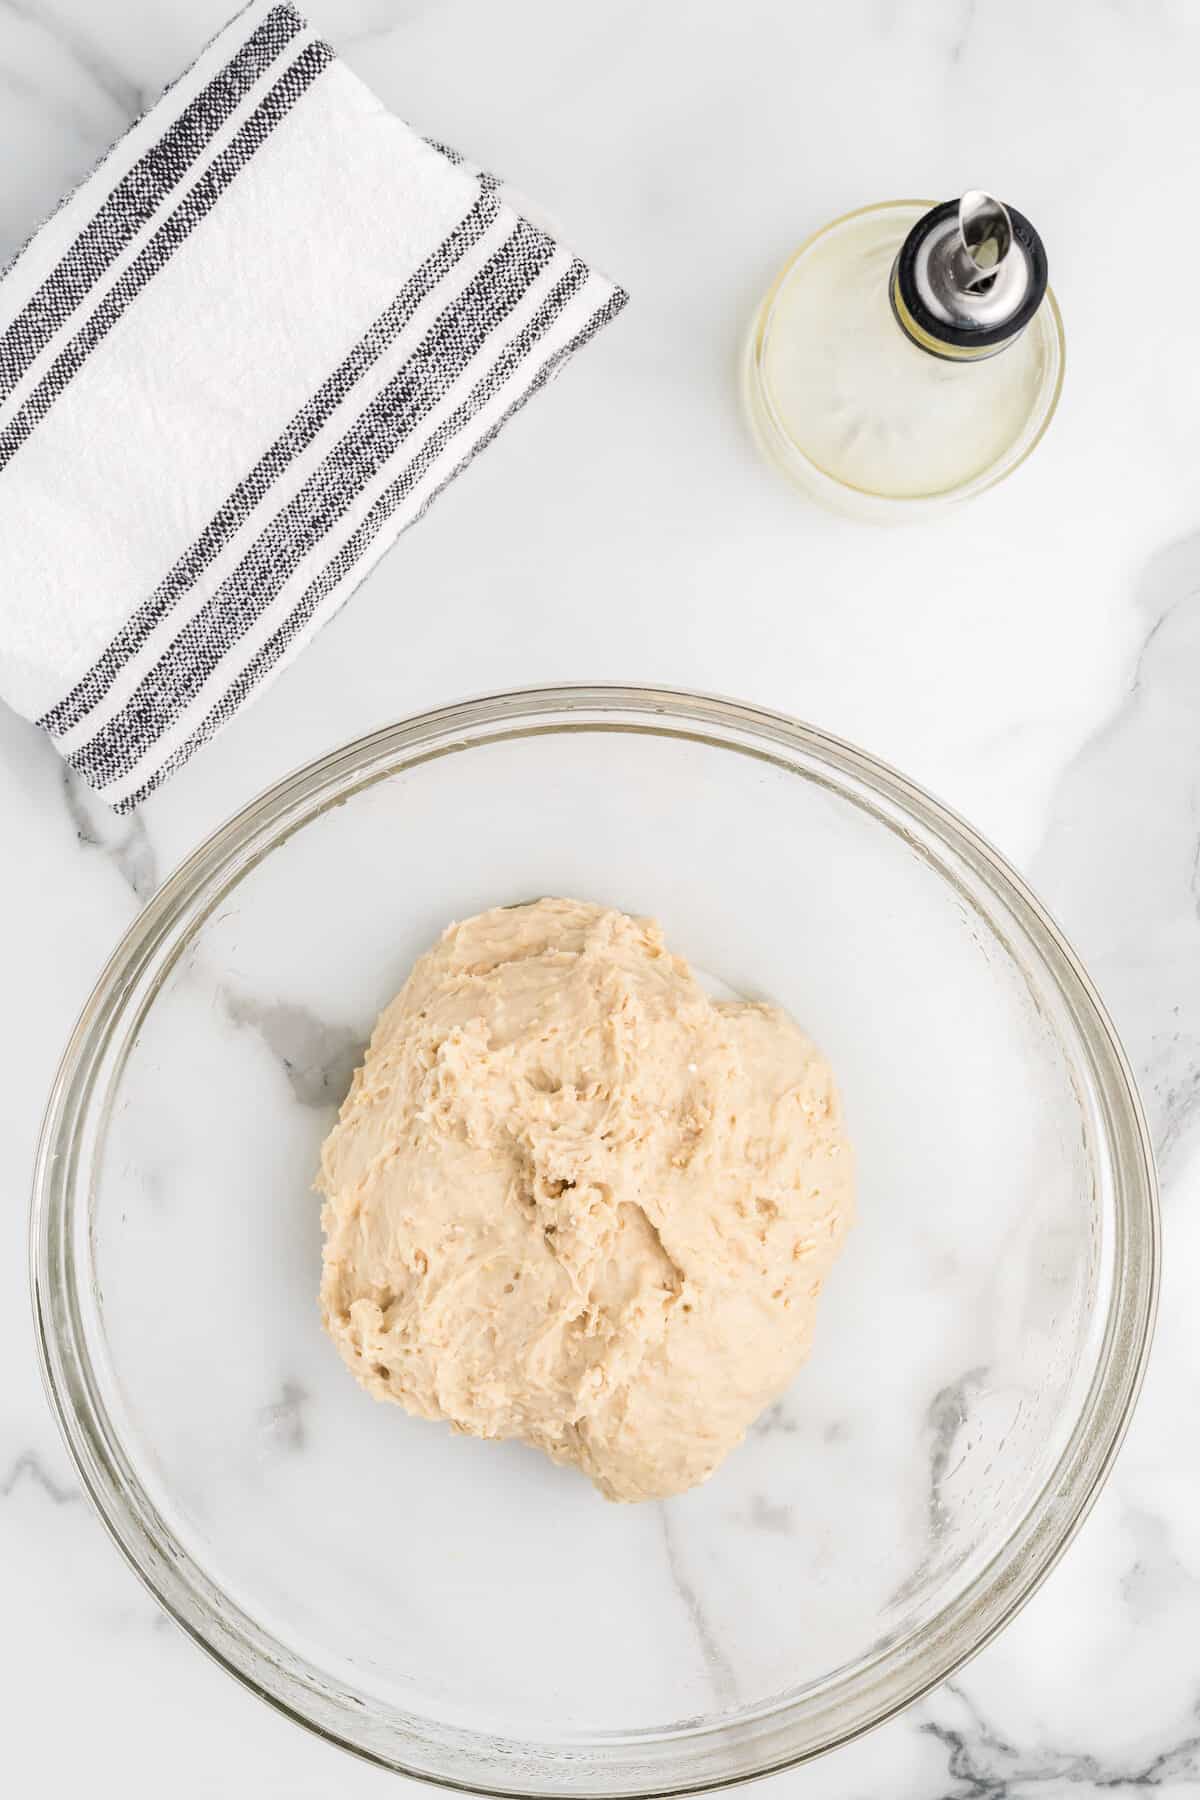
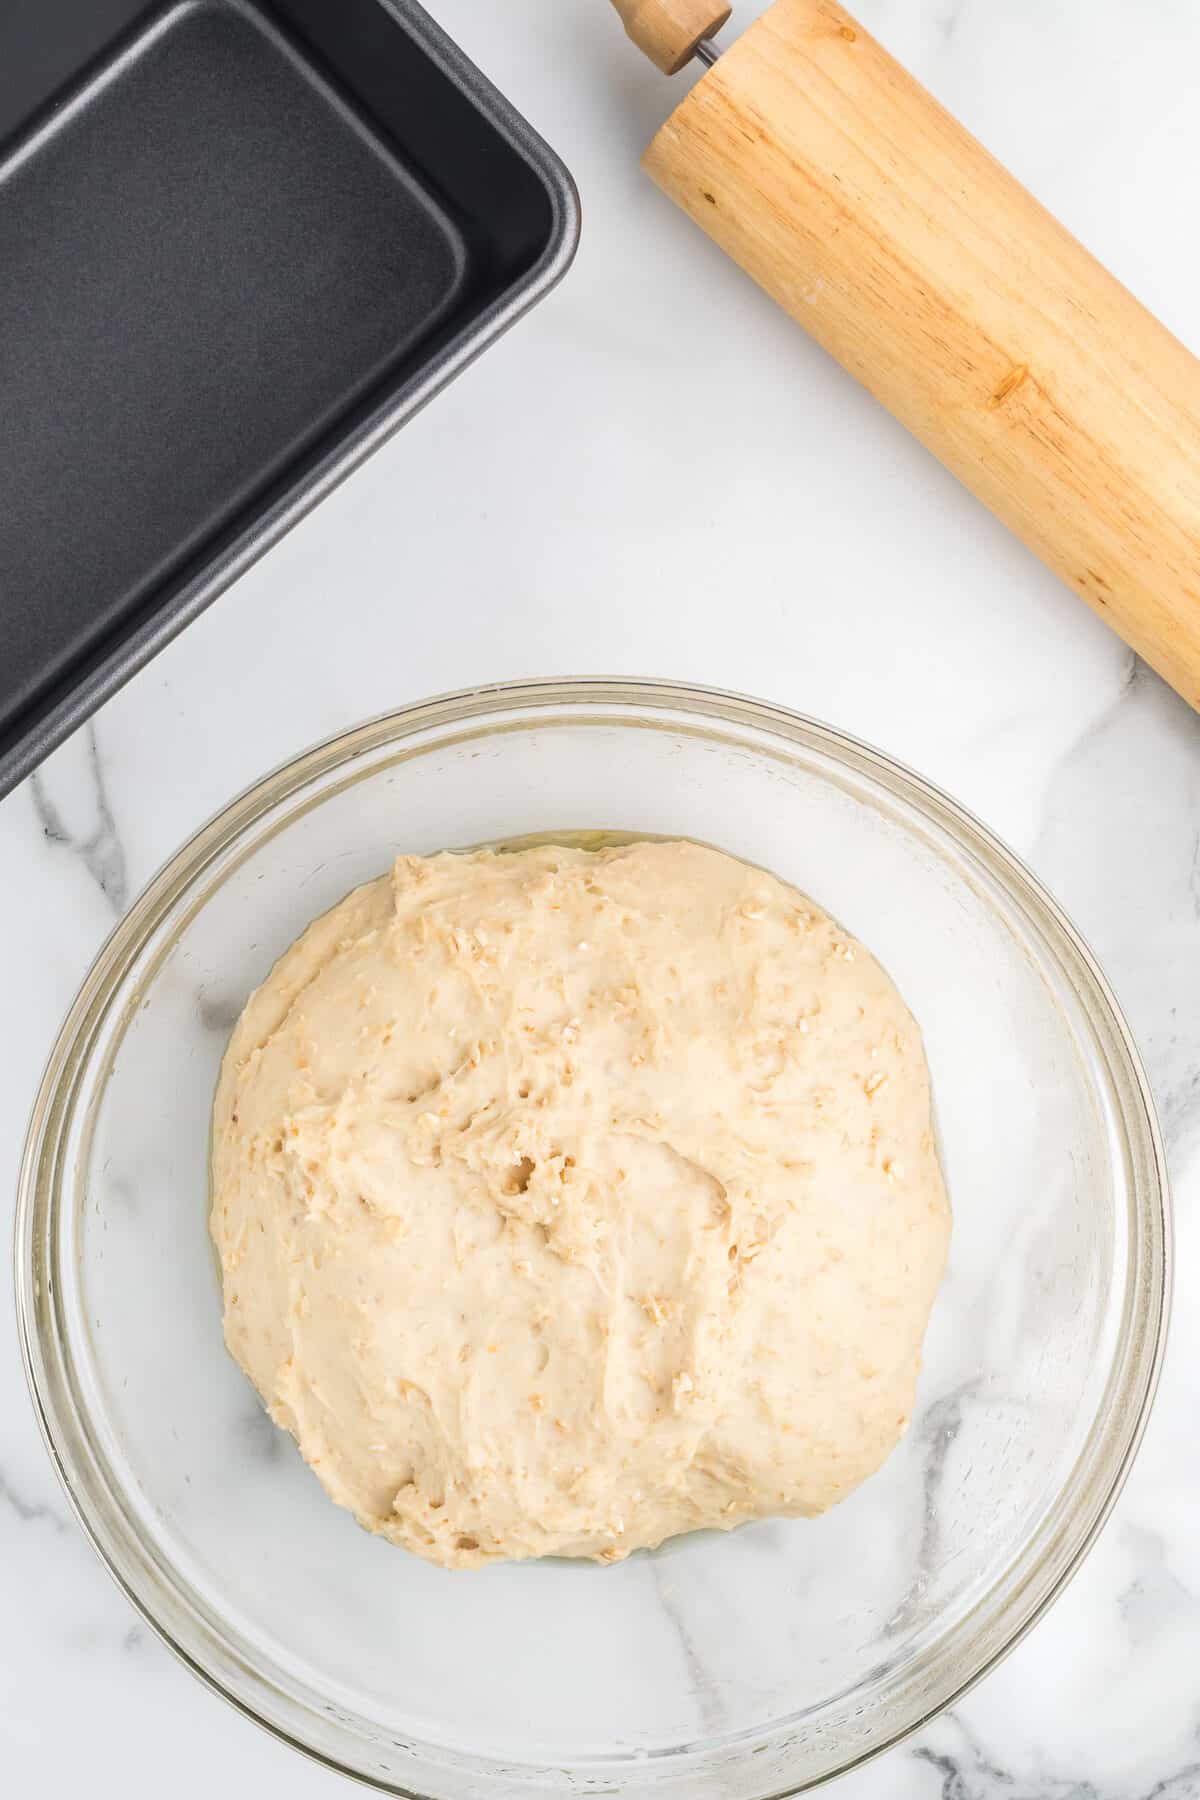
Place dough in an oiled bowl, cover with clean dry kitchen towel and allow to rise until doubled in size – approximately 1/2 hour to 1 hour.
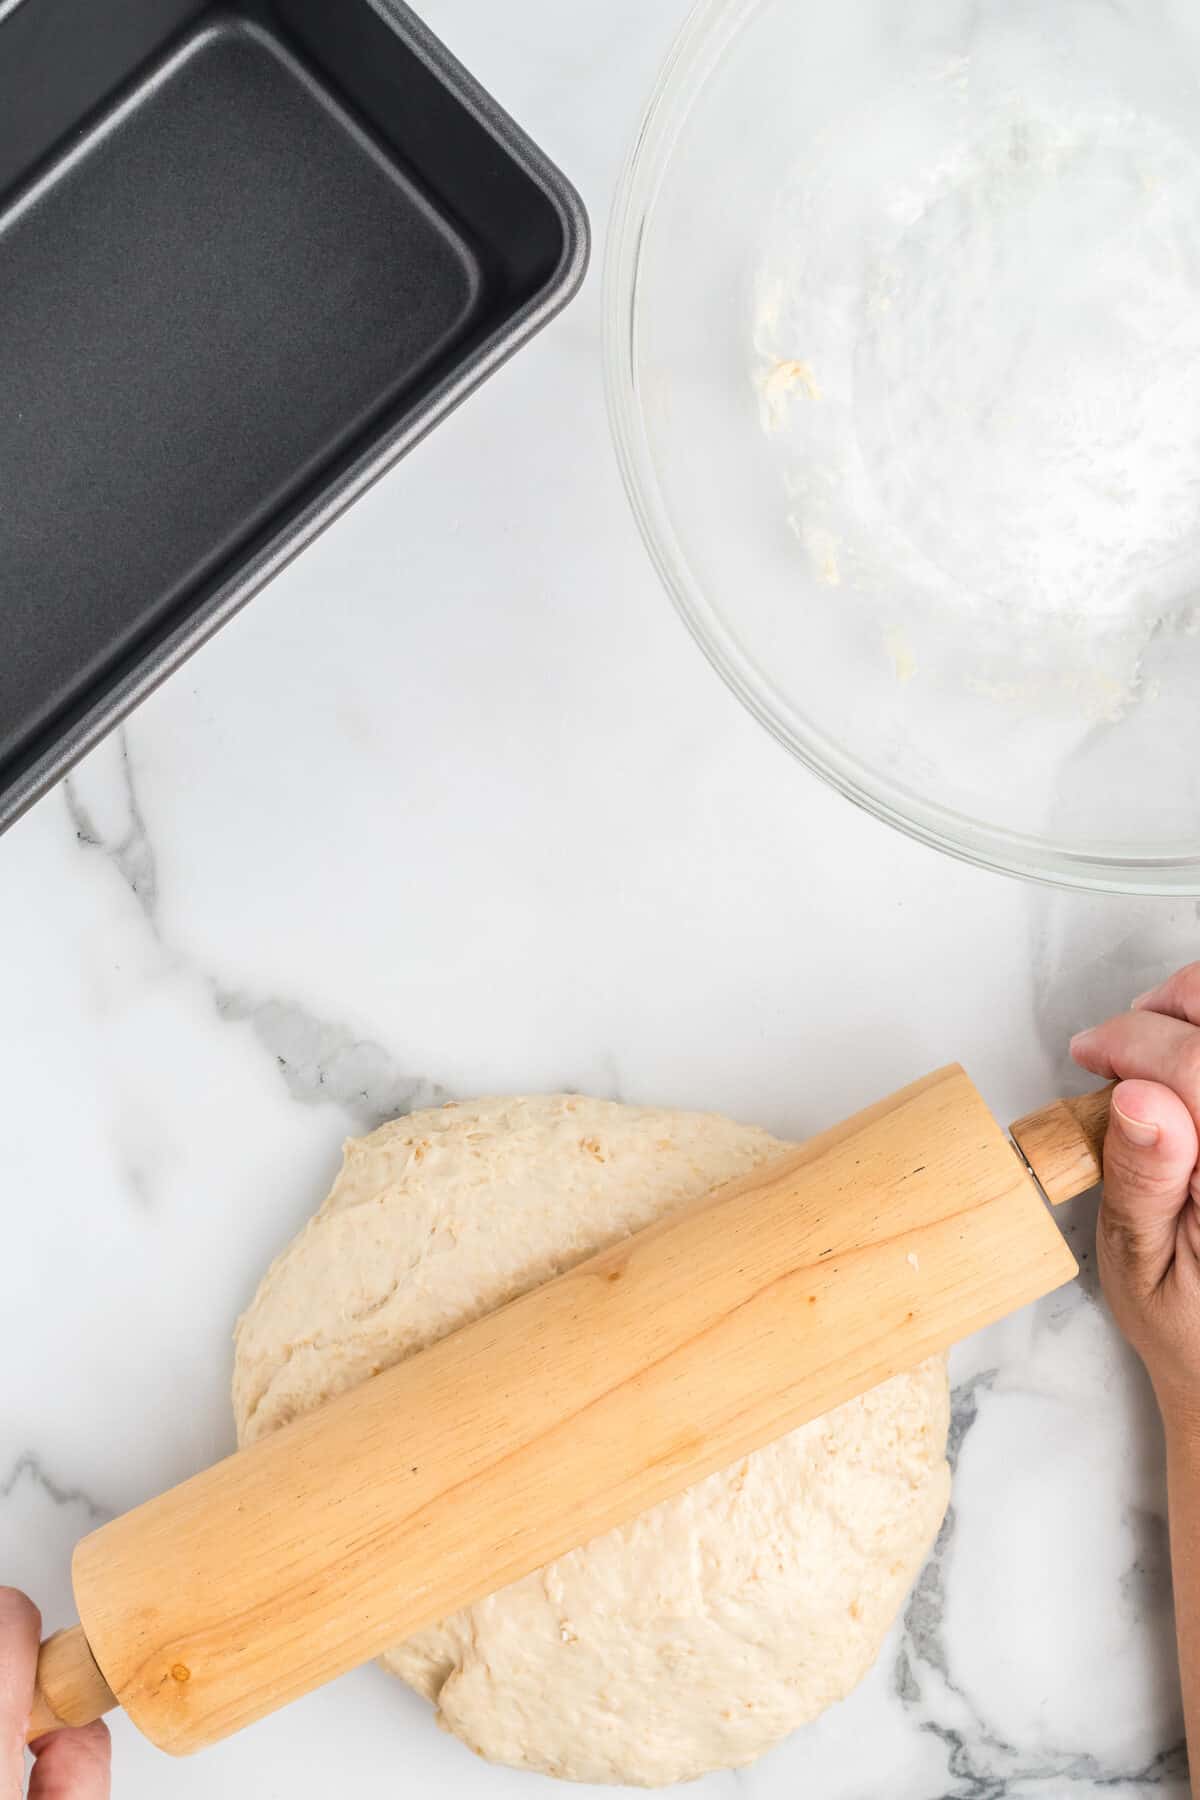
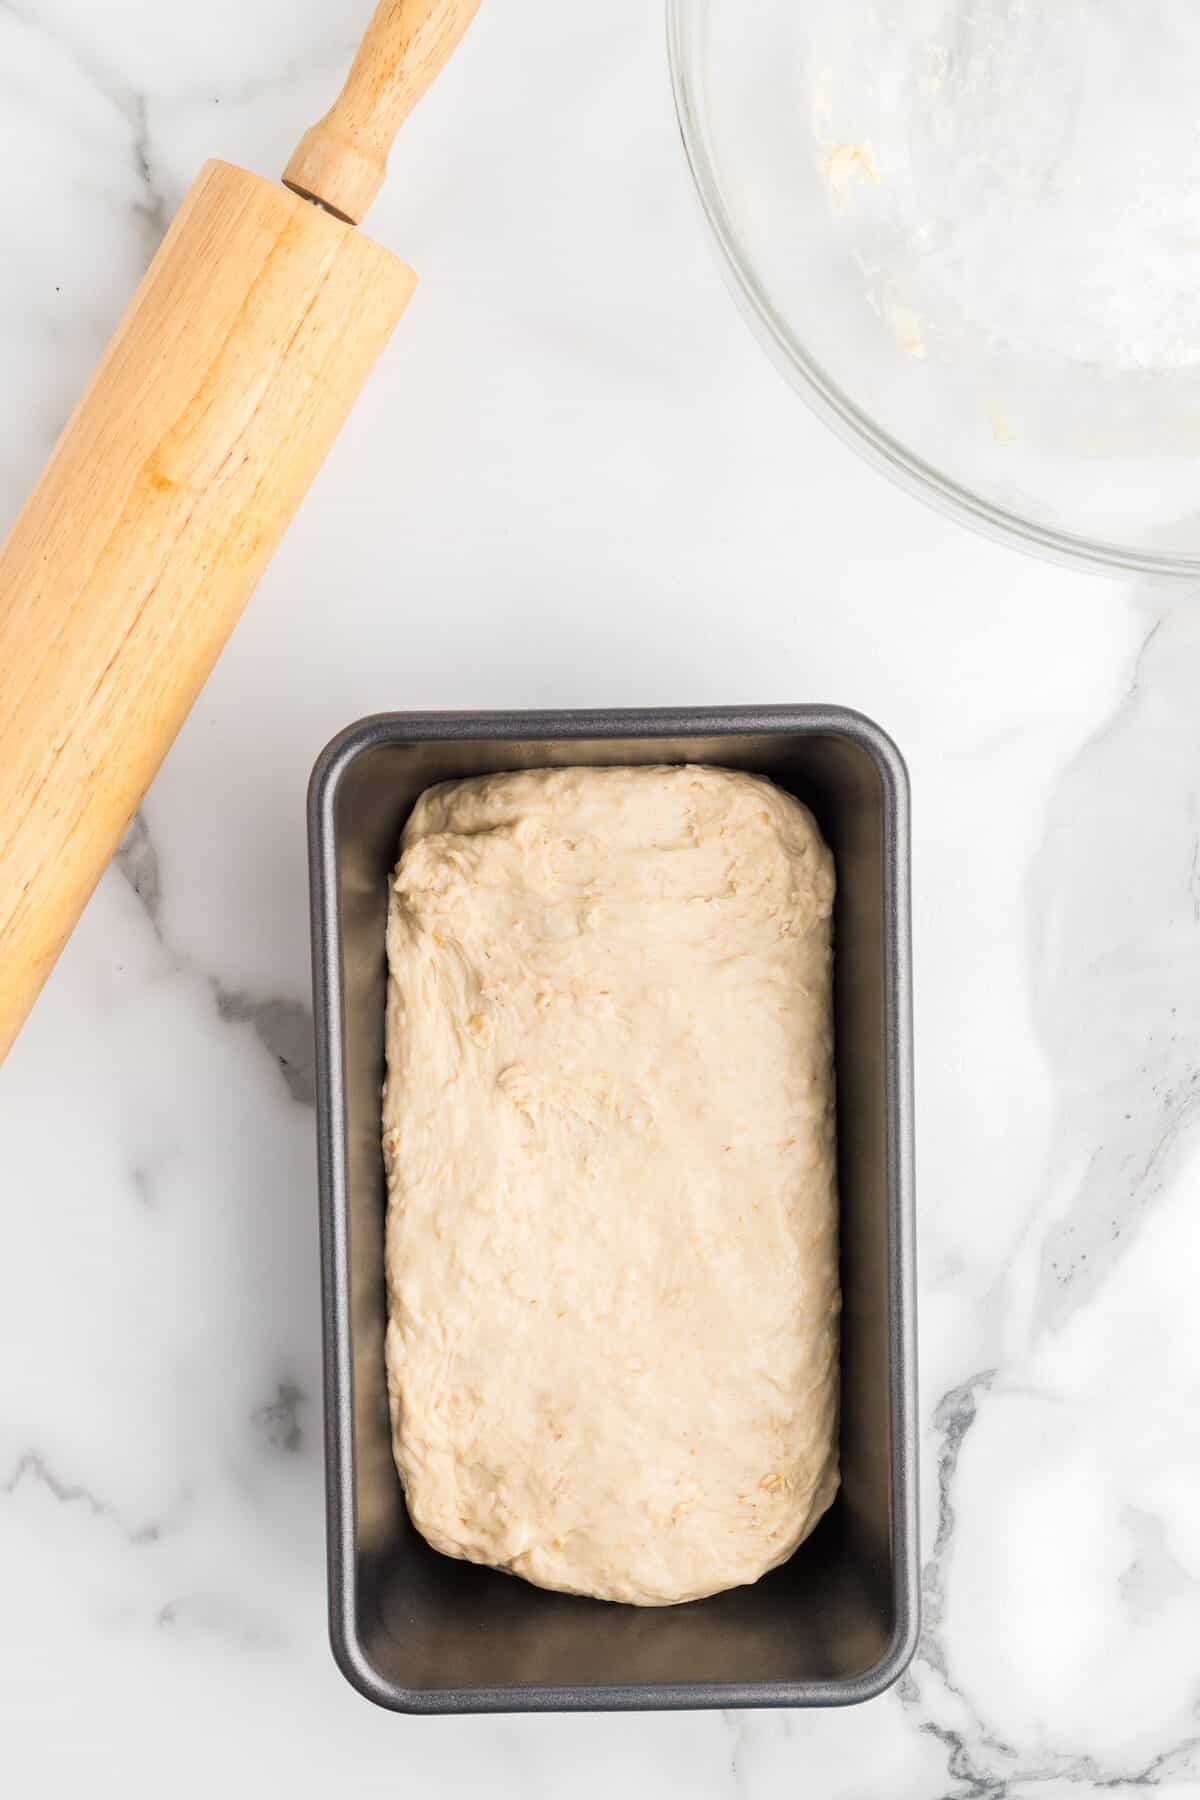
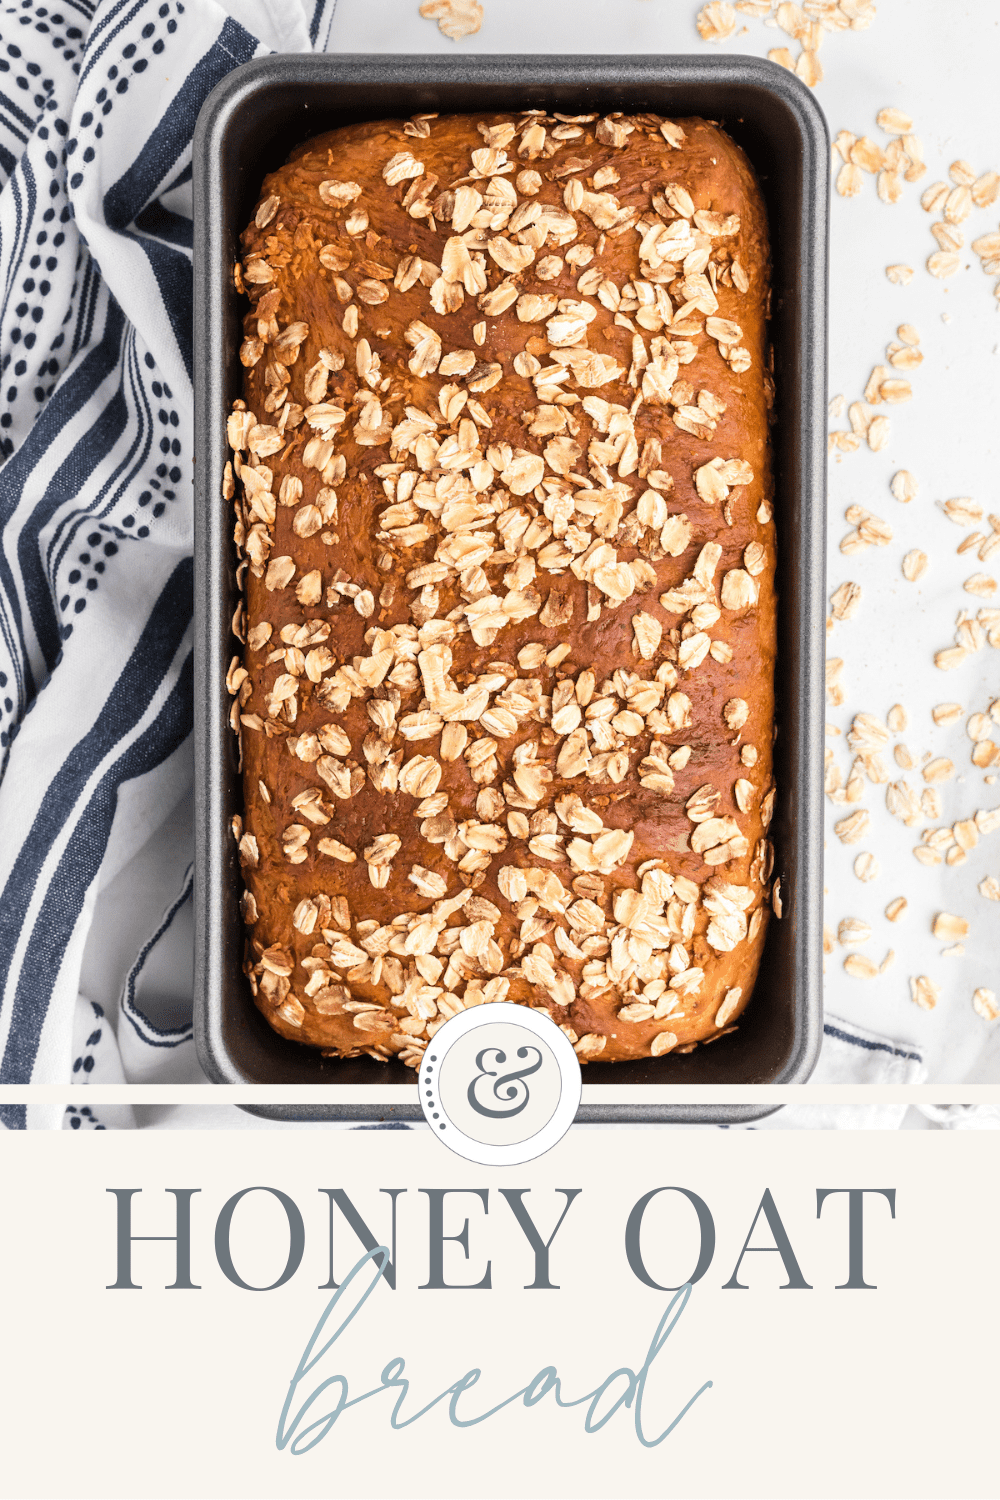
Add the bread dough to a lightly floured surface and roll dough out into loaf size and place in pan, seam side down.
I use a standard 9×5 inch loaf pan. Allow to rise again until doubled inside of the bread pan. This rise time is again for approximately 1/2 hour to 1 hour.
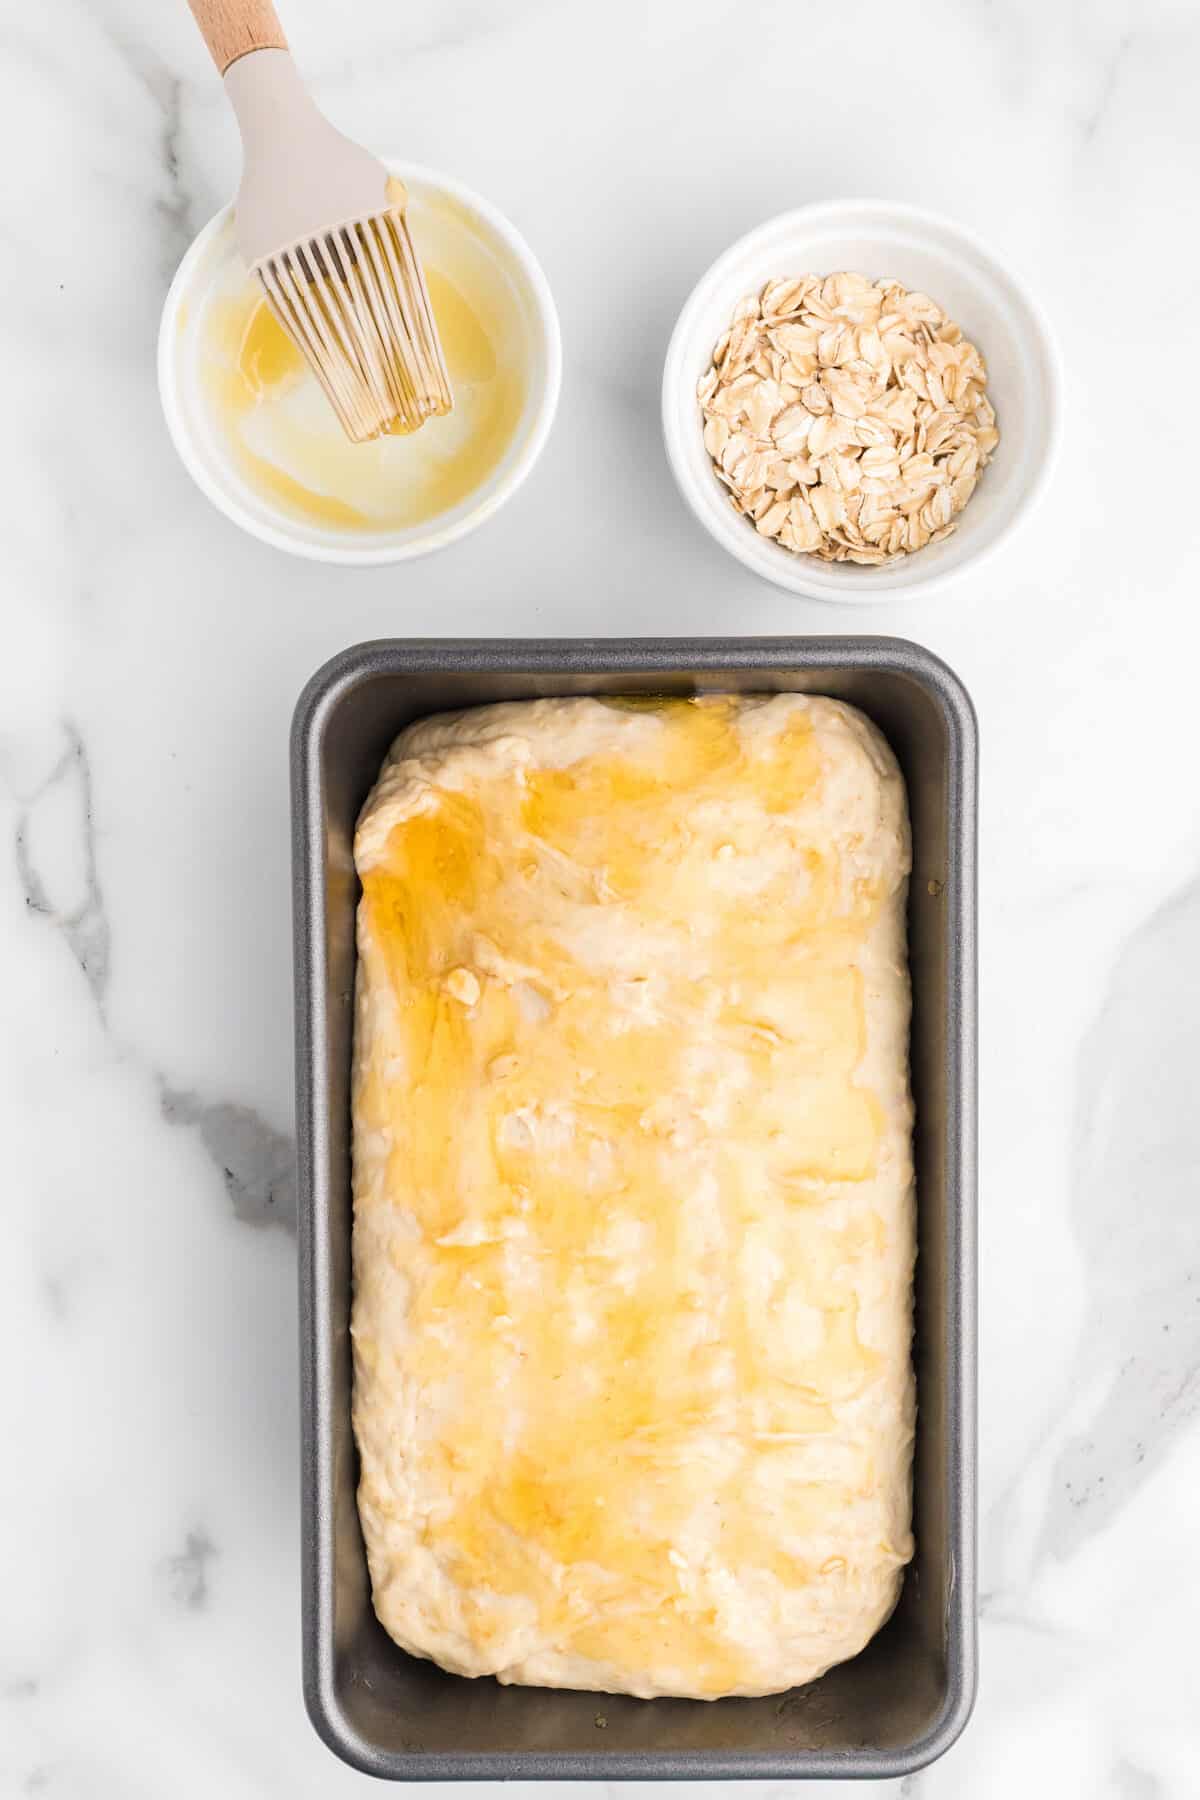
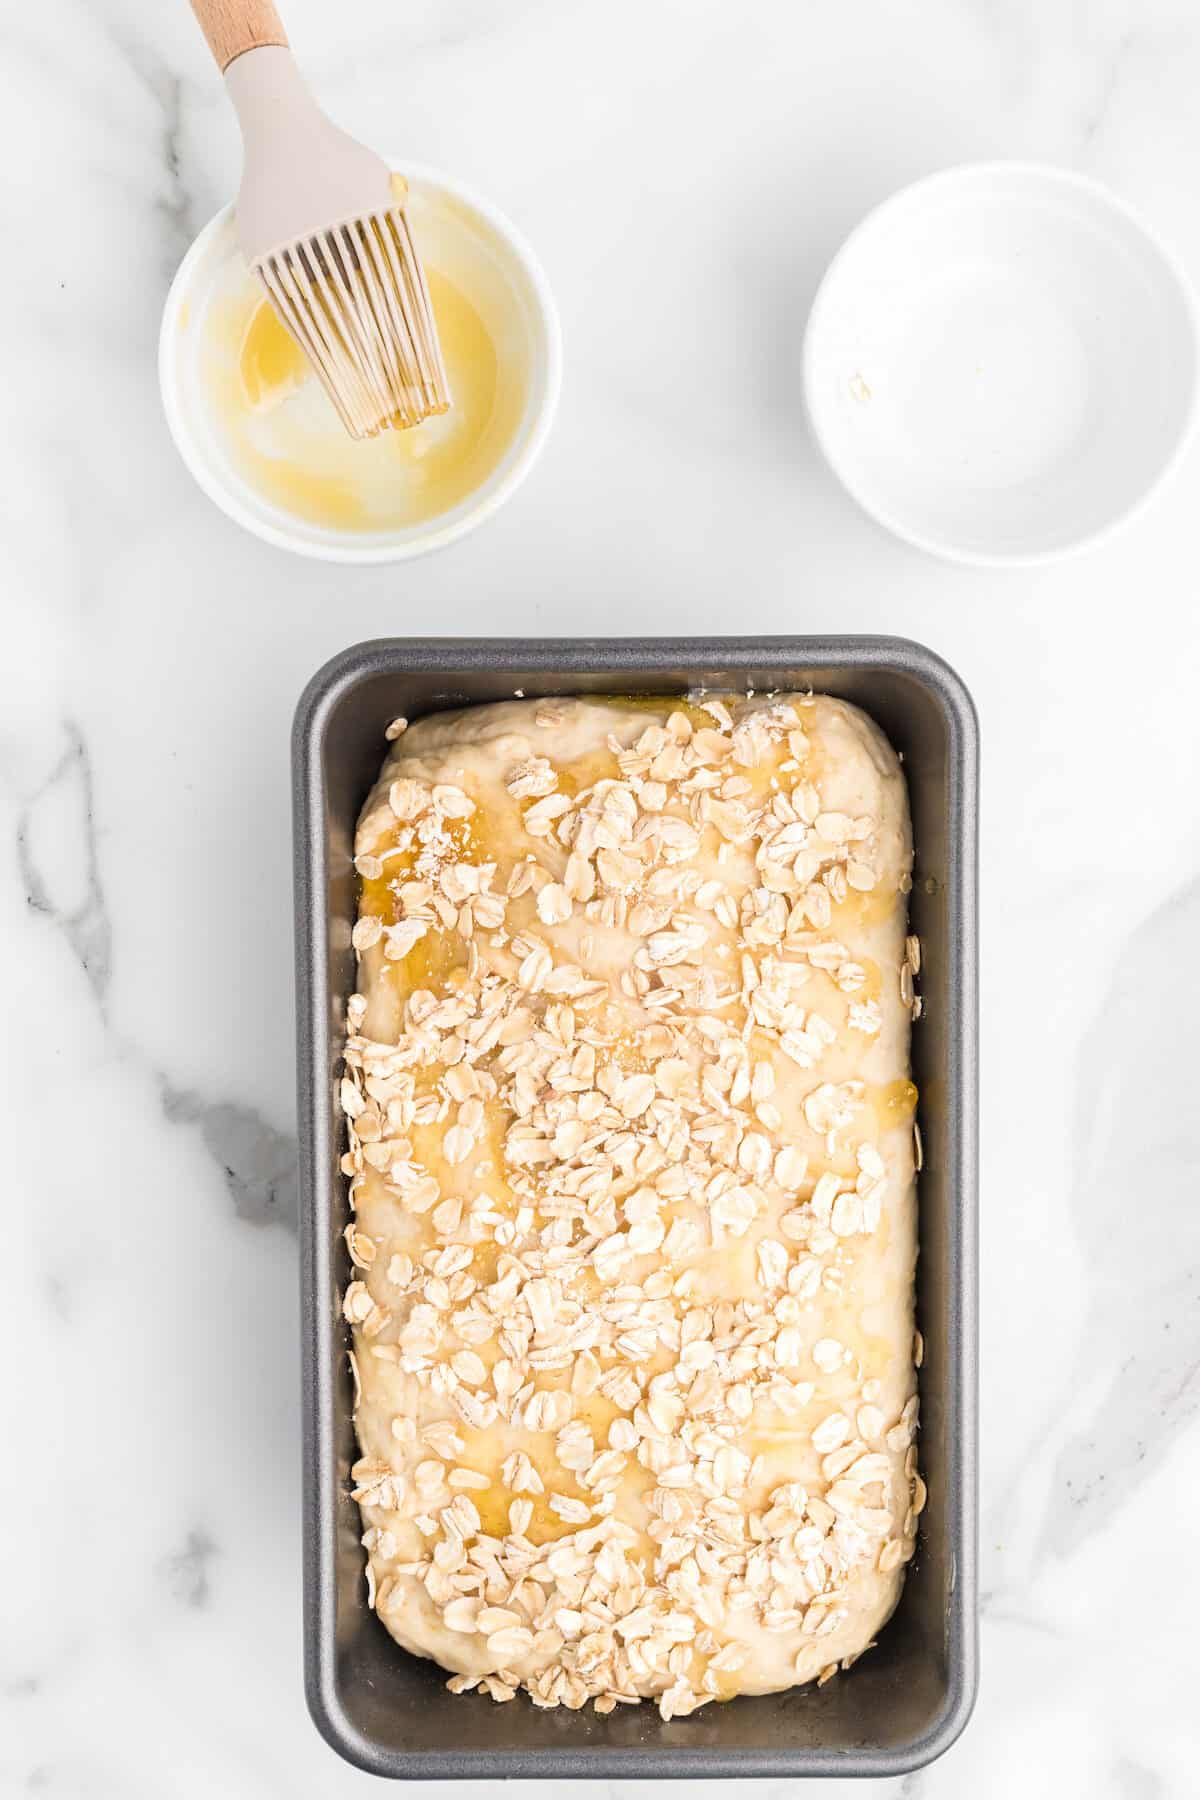
Brush the top of the bread with the honey and sprinkle with the remaining oats.
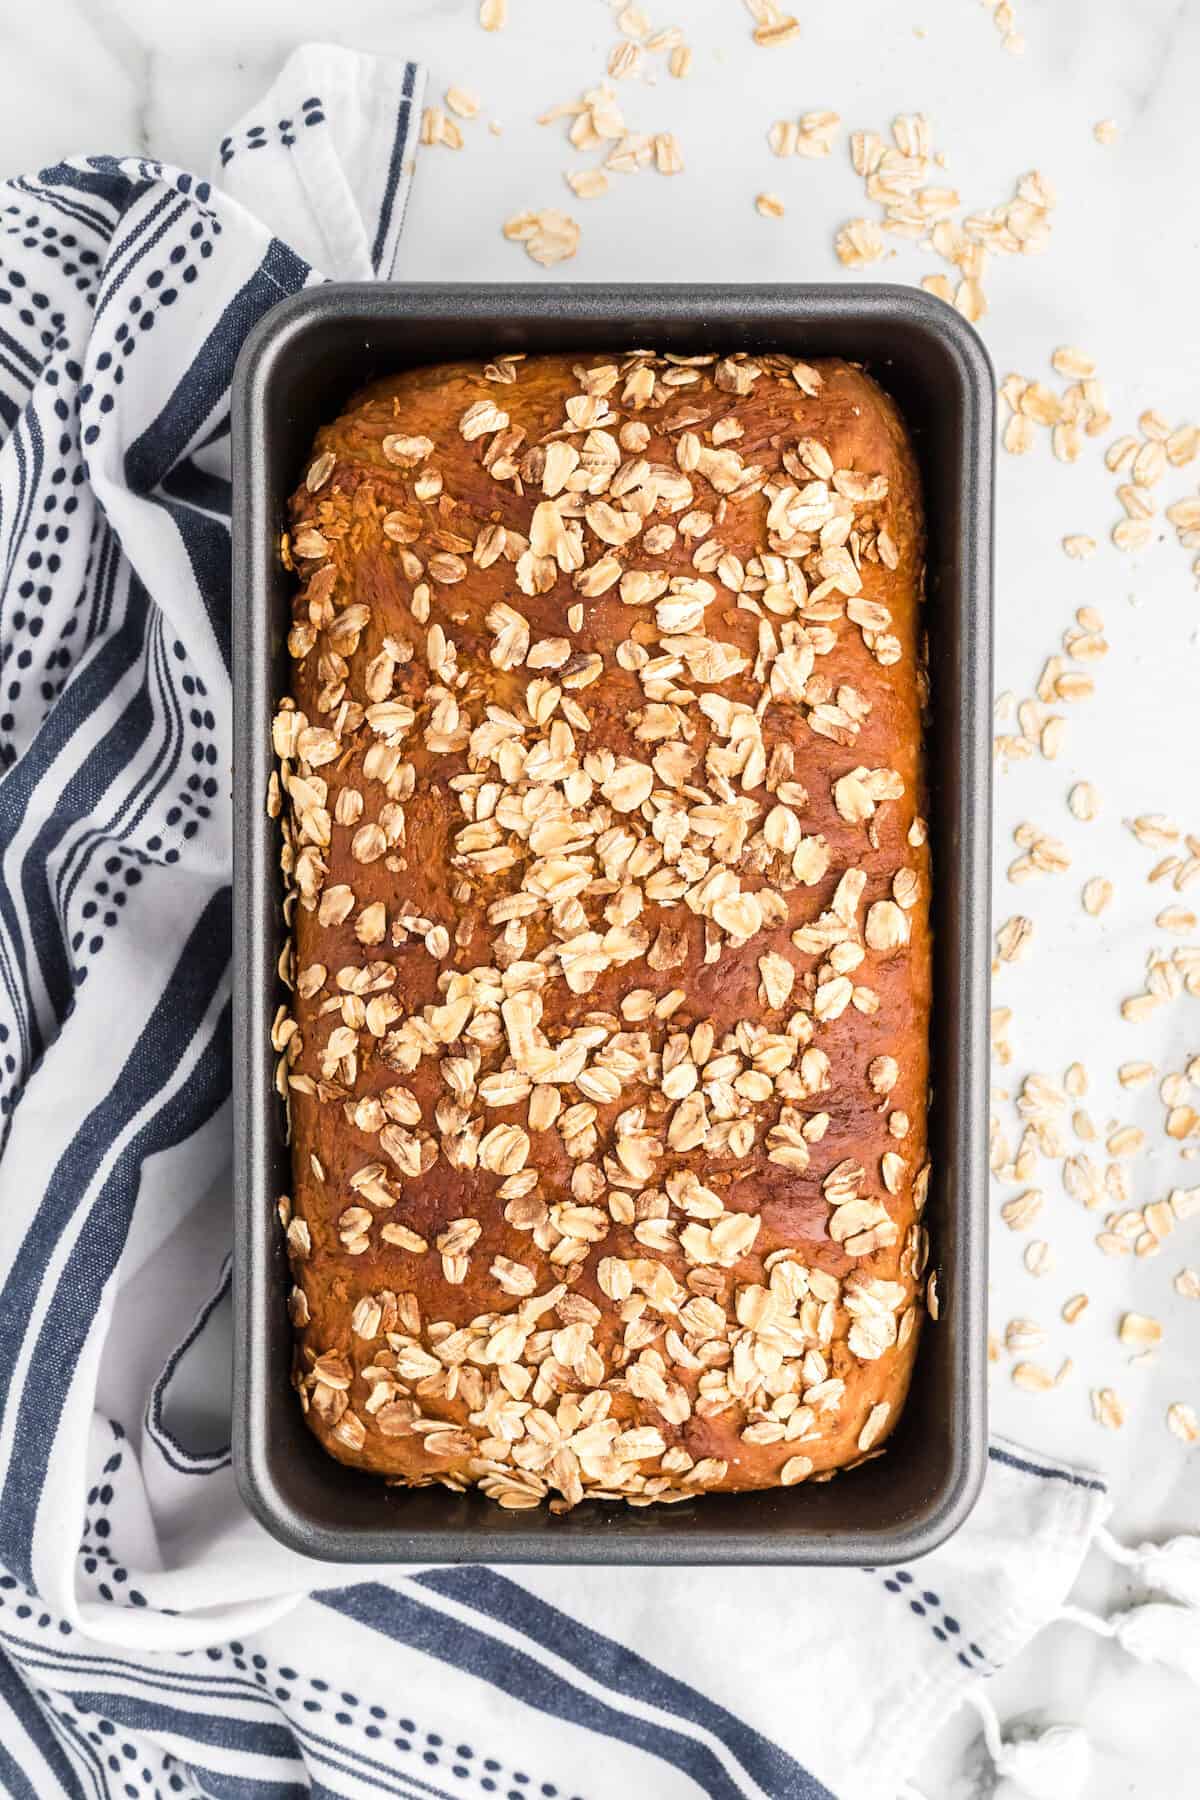
Bake bread in a preheated oven until golden brown. (see the complete recipe instructions in printable recipe card below)
How to store homemade bread
My favorite way for storing homemade bread is by wrapping the loaf in a bread bag and storing in a bread box. Our family goes through bread fairly quickly so this option works great for us.
If you need to store for longer term, wrap the loaf in a resealable bag or silicone storage container for a more natural option. You could also use an airtight container or wrap in aluminum foil.
Homemade bread can also be stored frozen. My favorite way to do this is to keep the bread in a loaf shape and place in a freezer bag.
Pro tip: when storing frozen bread, be sure to allow the bread to cool after baking before moving it to storage.
Tips & Tricks
- When making this bread, I usually use whole milk. But I have also had success with using nut milks like almond and coconut.
- I like to hand knead bread so I can get a feel for when it is ready. But sometimes, I’m pressed for time so I will use my stand mixer with the dough hook.
- It is important to stop and check it periodically when using a stand mixer to ensure it isn’t being kneaded too much.
- When baking this loaf, check on it every now and then. I recommend “babysitting” homemade bread. It isn’t something that you can just throw in the oven and call it good.
- Oven times vary for most people. If the bread starts to brown on one side more than the other, rotate it.
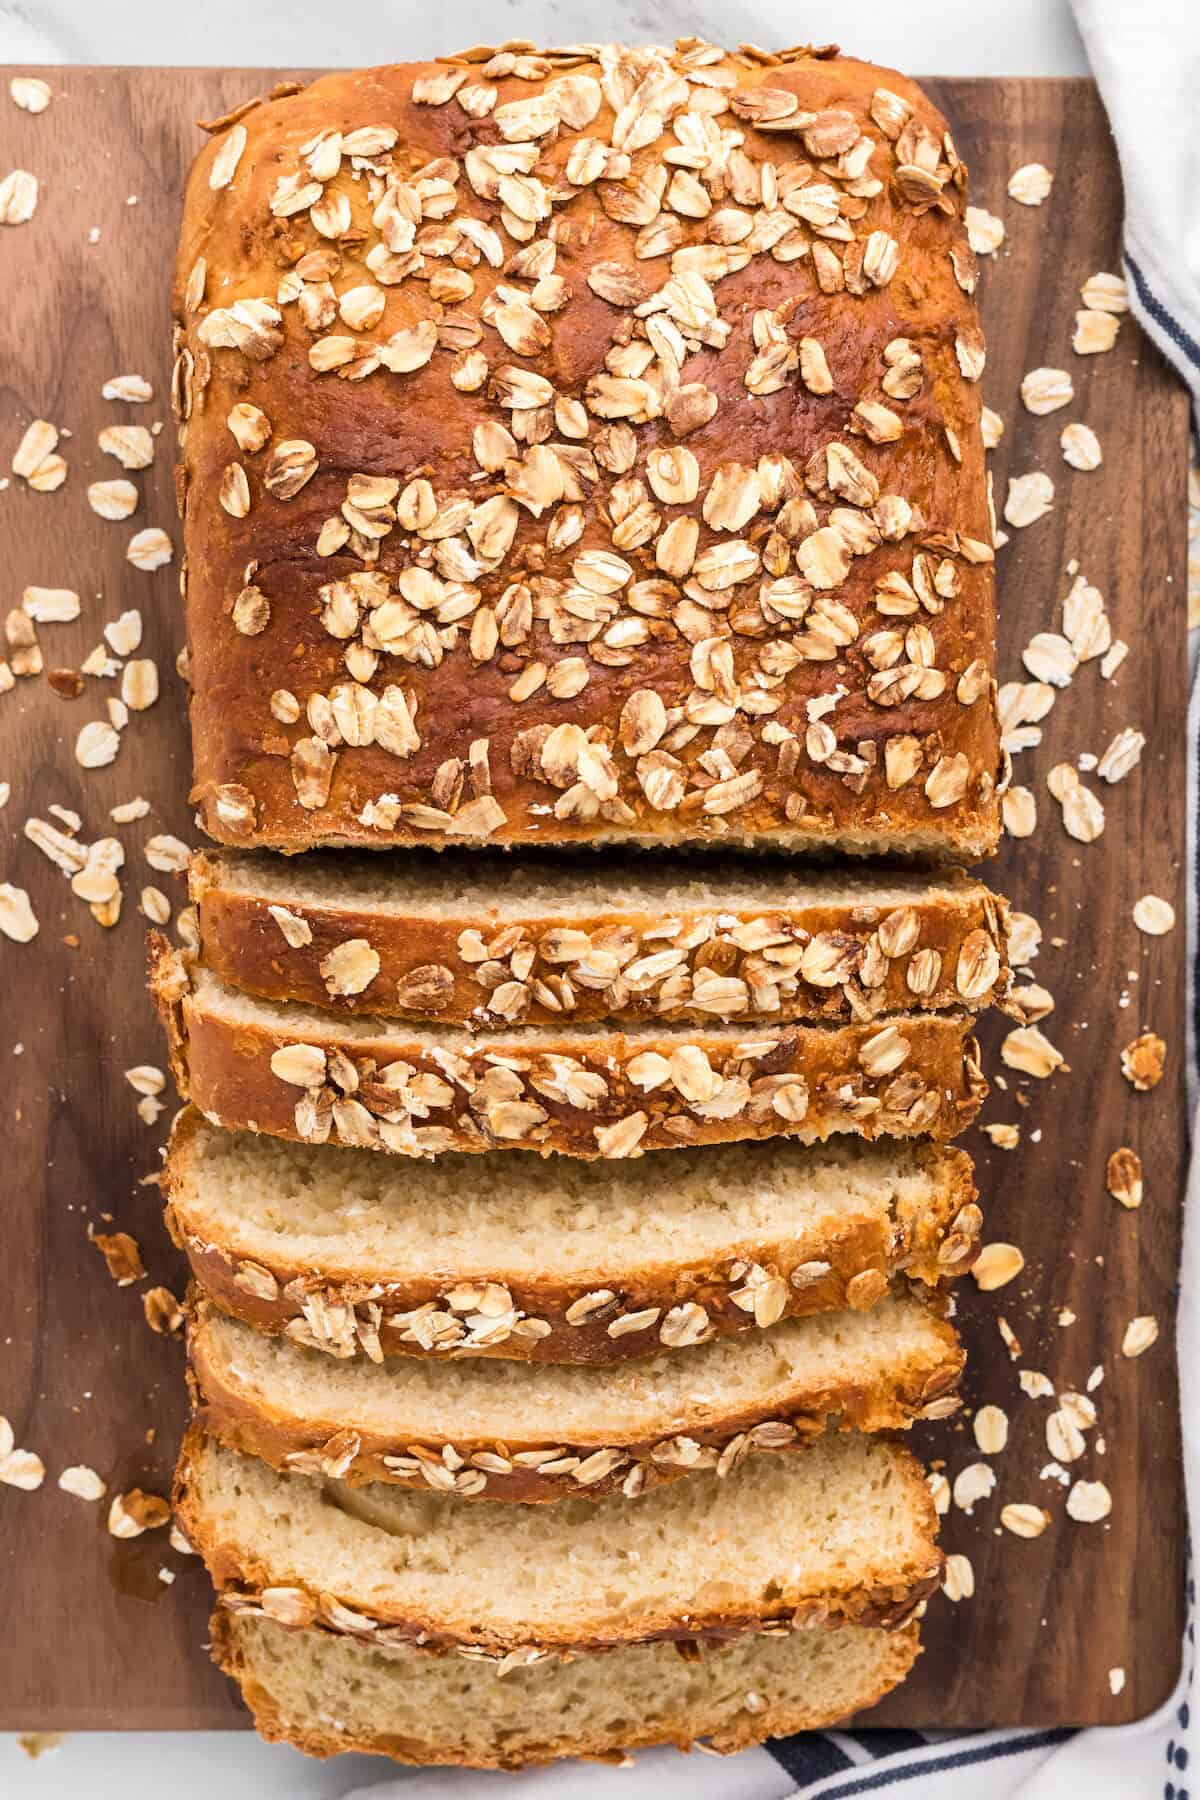
- Allow the bread loaf to cool on a wire cooling rack before slicing.
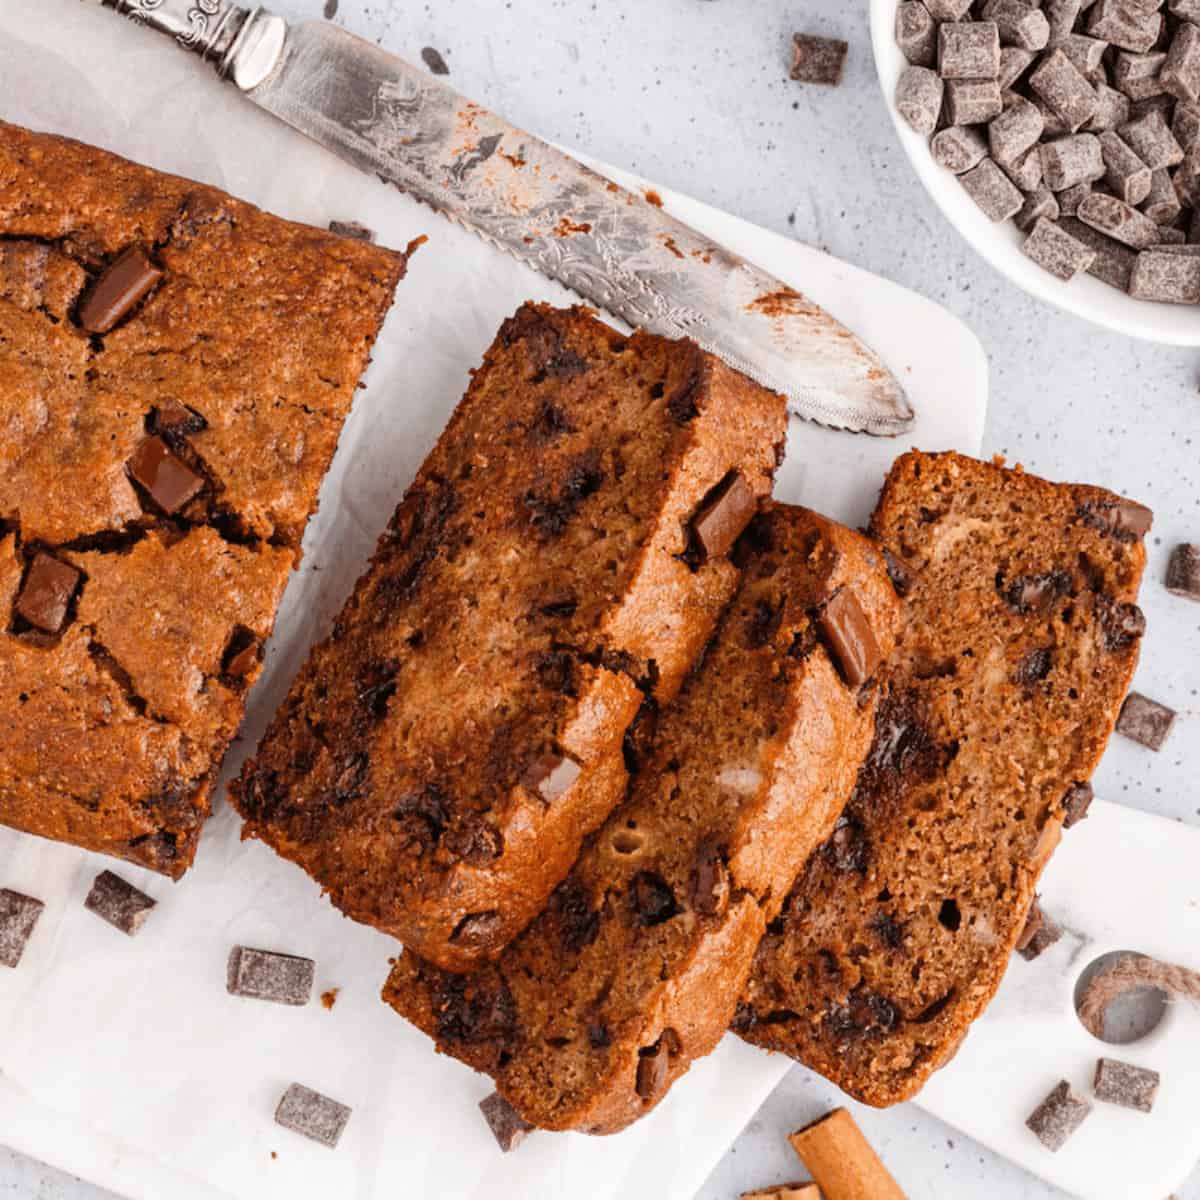
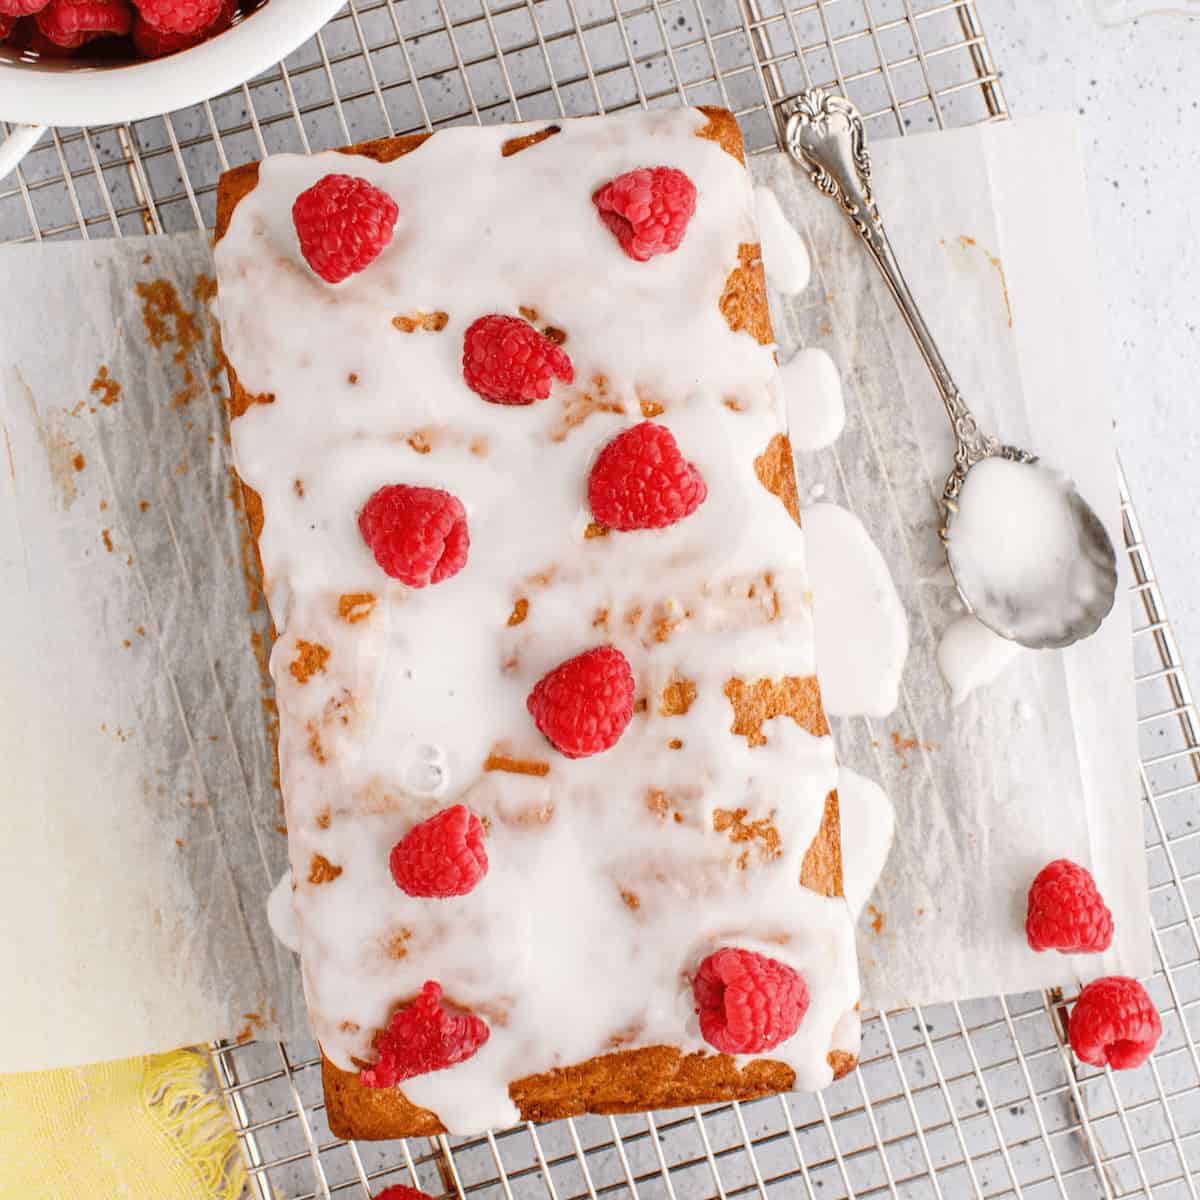
More favorite bread recipes
Here’s a few of our favorite bread recipes that we think you’ll love too!
FAQ (frequently asked questions)
Yes, absolutely! I’ve used both coconut and almond milk in this bread recipe with great results.
Yes, allow the fresh homemade bread to cool before storing. Then store in a freezer bag or other freezer safe container for about 4 months.
want more recipes?
Check out the recipe index where you can discover more homemade recipes from my homestead!

Did you make this recipe?
Let us know your thoughts on this Honey Oat Bread by leaving a star rating below or sharing it on Pinterest!
Thank you! ~ Mary
want more recipes?
Check out the recipe index where you can discover more homemade recipes from my homestead!
Honey Oat Bread
Ingredients
- 3 cups all purpose flour
- ¾ cup rolled oats
- 2 ¼ teaspoons active dry yeast
- 1 ½ teaspoons salt
- 2 tablespoons unsalted butter
- 1 cup milk
- ¼ cup lukewarm water
- ¼ cup honey
For the top of the bread
- 2 tablespoons honey
- 2 tablespoons rolled oats
Instructions
- In a large bowl or stand mixer bowl, combine the dry ingredients.
- In a small saucepan, add the milk and butter. Heat just until the butter melts, but don’t allow to boil or scald the milk.
- Stir in the honey and water.
- Combine the milk mixture to the flour mixture. If using a mixer, use the dough hook attachment. Check often to make sure it isn't becoming over kneaded. Knead the bread for about 6-8 minutes.
- If kneading by hand, knead for about 10 minutes. You’ll notice this bread is very sticky and may require more flour. Add a small amount at a time, approximately 1 tablespoon at a time, until it isn’t very tacky, but don’t allow to become too dry.
- Place dough in a lightly oiled bowl, cover with clean dry kitchen towel and allow to rise until doubled in size – approximately 1/2 hour to 1 hour.
- If dough is still too sticky, lightly flour your working surface and roll dough out into loaf size and place in a bread pan seam-side down. I use a standard 9×5 inch loaf pan. Allow to rise again, this time inside of the bread pan until doubled in size for approximately 1/2 hour to 1 hour.
- Preheat oven to 350° F.
- Brush the top of the bread with the reserved honey and sprinkle with the remaining oats.
- Bake for 40 minutes.
- Allow to cool completely (if you can!)
- Slice up and enjoy!


I’ve been on the look out for a good bread recipie. I’m going to test this in my bread machine, I still haven’t mastered baking bread on a wood stove!
You’ll have to let me know how it comes out in the bread machine! 🙂
I am new to baking bread and tried this wonderful recipe. Unfortunately, I don’t know if this turned out the way I had hoped. Is this bread suppose to be light and fluffy or a little more dense?
Mine turned out so dense. Please HELP!!!
Thank you so much for reaching out! I’d love to try to help you troubleshoot it a bit. It should be only slightly dense. This could be from not kneading the dough enough. Here’s a post that might help: https://bootsandhooveshomestead.com/bread-making-for-beginners/
Mine did too. Following the directions, the dough was very dry. Next time I will add maybe 1/4 cup more of milk and honey.
Perhaps I’m missing it but where in the instructions do you let the yeast proof?
There is not an extra step to proof the yeast. It will proof during the rise time.
Hi there, I was wanting to make this for a farmers market. Are you able to freeze the baked bread?
I don’t have any butter only olive oil, I might still give it a shot?!
Made this in my bread machine, using the dough setting. I had to add 2 more tablespoons of flour.
After the dough setting was done, I poured the dough out onto the counter and shaped into a loaf. Next I put this in a traditional loaf pan, covered with a damp towel, and let rise about 45-60 minutes. Then I baked it in a hot 375 degree oven for 20-35 minutes.
After I pulled it out of the oven I wrapped the loaf in a towel to cool.
Absolutely delicious !
DELICIOUS, EASY AND A FAMILY FAVORITE!
Hi! Can you use rapid rise yeast?
Have you tried this with rapid rise? I was wondering the same thing!
I used rapid rise and it worked well!
Love this recipe as I am about to begin proofing my bread for the second time! Great bread dough absolutely no problems no need for extra flour! One thing I noticed tho not to do with the fabulous recipe
is that the 1 – 2 hours of proofing time wasnt added to the total recipe time . thank you I can’t wait to try this bread thank you
Thank you and great reminder! 🙂
Very good recipe thanks
Hi there! If I’m a little short on honey, do you think I could substitute maple syrup??
Great taste! Very very dense bread. I did not overmix. Kneaded for 6 min. Had to add a few tablespoons of flour during the kneading as it was very sticky. Any way to make this lighter and fluffier?
I’m not sure why it would be dense. Maybe too much flour?
This recipe looks great! I plan on making it with chili. I was curious if you can make it with all or half wheat flour? Thanks!
This was my first time making bread, and it turned out beautifully! No joke my husband said it’s the best bread he has ever had. Sliced warm with a little butter out of the oven…wow. I hand kneaded the dough and added 4TBSP flour in that process. I will double the recipe next time so I have one in the freezer. Thanks so much for the recipe!
So glad to hear that! Thank you for sharing 😀
Just starting my bread making journey. Can this be baked in a Dutch Oven or on a stone?
Hello! It should be made in a bread pan. Thank you! 🙂
You do not say anywhere when to add the yeast?
It is listed as part of the “dry ingredients” in this recipe.
My family loves this recipe. I make it once a week!
Thank you for sharing! 🙂
I have made this bread twice for my family and we are IN LOVE! This is by far the best bread we have ever had! We have decided to make this weekly now. I use almond milk and it turned out amazing. The sweetness of the honey is the best. Thank you for the recipe 🙂
this was truly the best recipe i have ever used. i did mine as you did except added more honey , red pepper flakes , about a 1/4 cup, no honey or oats on the top. and used those 6×3 bread tins for future finger sandwiches. awesome out come, BABYSITTING lol, yep i did. at 350 only took 20 mins not the 40. whew glad i read that part. the last one i dod was french bread , let it in there fro allotted time and had hockey pucks. thanks again.
Thanks for sharing! I’ve never thought of using red pepper flakes in this recipe, glad you liked it! 🙂
I make this bread every week! And make it dairy free by using oatmilk and vegan butter! Tastes great and we use it for sandwiches throughout the week. I love that I can make this bread very quickly. We double the recipe and go through two loaves a week!
Thanks for sharing your experience with making it dairy free! So glad that you guys love it! 🙂
Oh my goodness, this is the MOST TASTY bread I have ever made..and I make all sorts of types of bread. Thank you! This is a family favorite for sure!
My dough sat for an hour and did not rise at all. Wondering if the milk/butter/honey/water was too hot and killed the yeast??
Yes, this sounds like the case. I’m sorry to hear you had trouble with it. For best results, use water that is heated to 110 – 115 degrees Fahrenheit and use a thermometer to ensure its not too hot. I usually always stay at 110°.
I have made this recipe twice now with almond milk, and it is literally the best bread I have ever had!!
This is the best tasting bread.
This bread is delicious! It was very easy to make and turned out beautifully! I am going to make this on a regular basis! Thanks for the recipe!
This is one of my absolute favorite beads to make both for my family and for taking to others. It is always a hit! Thank you for sharing the recipe!!
So do you use instant yeast and add it to the dry ingredients?
Yes, regular active yeast is used and added to the dry ingredients. This recipe does not require the yeast to be proofed ahead of time.
Awesome recipe. Fast and delicious! Step by step instructions were so helpful!
What is the 1/4 cup like warm water for?
The warm water helps to activate the yeast.
This is a great recipe- I loved it! It was so easy to follow and the bread came out beautifully. My whole family loved it. Thank you!
I’ve never commented on a recipe before, but this is THE BEST bread recipe! The honey and butter (I use plant-based) add such a satisfying blend of sweet/savory, and the oats help provide a great chewy texture. I can’t tell you how many people request this bread! I’ve even started to gift it to people.
Thanks for the recipe!!!
I’ve had this recipe saved and finally decided to try it it was so easy and it Rose to the occasion was beautiful taste wonderful with a little butter my husband can use it for sandwich bread next week for work thank you for sharing this I’m glad I tried it
Hey! If I move the little serving size dial will it help make the measurement to make in bulk !( one bread says 8serving size ) so if I move the dial to 32 it should change every thing to make 4 loafs correct?
Also made this today !!!AMAZING
I Love how easy this bread is to make
My family loves how good it tastes
Win win
Can this be made with whole wheat flour?
Do all of your recipes that use einkorn flour have einkorn in the recipe title?
Yes, any einkorn specific recipes will have einkorn in the title.
This is my first bread that I have been making since Thanksgiving this year. I just made another loaf this morning, which would be #5, for this week of Christmas. This bread is so easy to make, and it is scrumptious to eat that it appeals to everyone who has had an opportunity to eat it. I never thought I’d ever be making bread from scratch. If you are on the fence about trying to make your own bread, this is the recipe you need to try first! It will catapult you into trying more and more recipes!