How to Build a Greenhouse (free plans!)

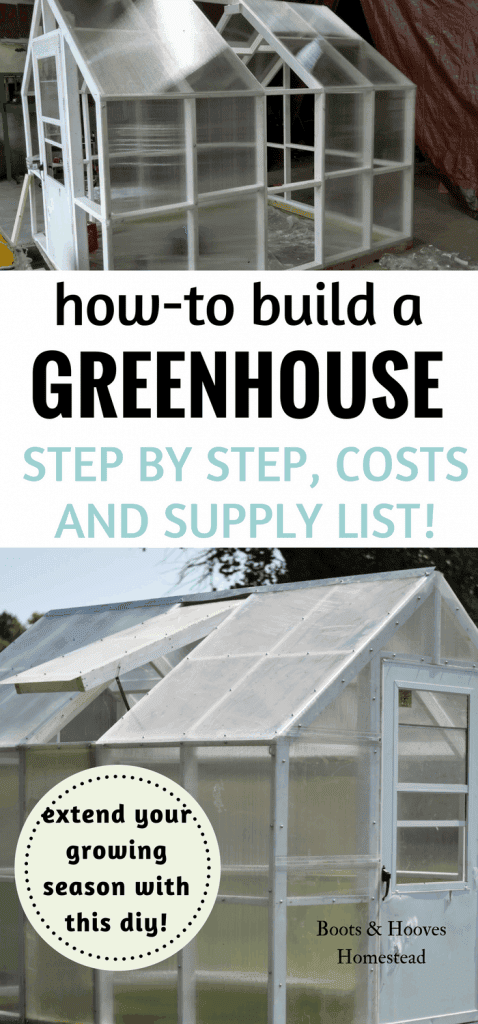
How to Build a Greenhouse for a small farm or homestead. Plus, free plans that can be printed.
I have desired my own greenhouse to extend our growing season for quite awhile. My husband did a lot of research and came up with a plan on just how to build a greenhouse that would work on our small homestead.
And those of you who may not know, a greenhouse will extend the growing season because it stays warm inside even during the winter. Now, if you have extreme winters like we do, adding in an outdoor safe heater and grow lights may be beneficial.
This last spring my husband finally listened to all of my hints and started to build my dream greenhouse.
Gosh, I love him.
Ya know, I would have been satisfied with a simple hoop house, but my very loving husband had other ideas.
When he started to research and come up with a plan, he decided to “do it right” as he says. And what this means, I’m not entirely sure. But I do know that he built this thing pretty solid.
And boy, am I glad he did. It is super cute! And it’s built tough which should withstand some of those crazy Nebraska winds.
How to Build a Greenhouse
Not only does this greenhouse make my dreams come true. There is a lot of practicality involved here. Extended growing season, for one!
I’m currently planning out our fall garden with the some of the cold sensitive plants inside. This season, we will have homegrown lettuces and fresh herbs ready just as the weather starts to cool down.
I will no longer need to start all of my seeds in random places throughout the house, seeking out the best lighting and flat surfaces where they are free of toddler curiosity.
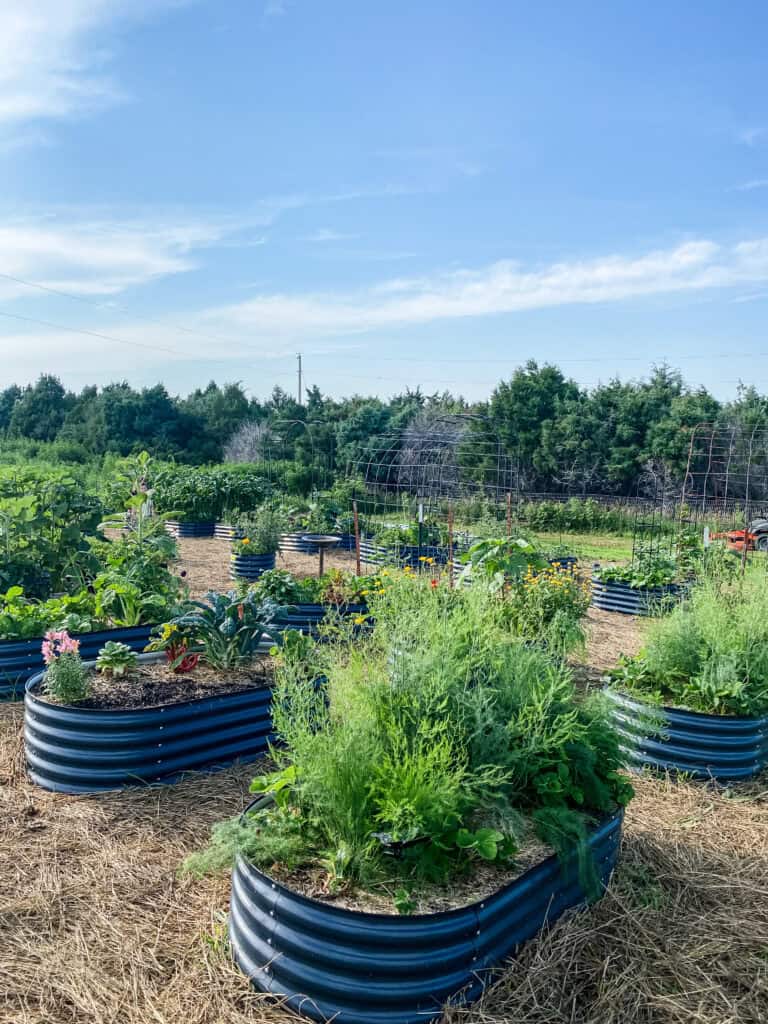
We have been on a mission to grow as much of our food as possible and this small greenhouse is perfect for growing plants to help contribute towards this goal.
Free Greenhouse Plan
This greenhouse project wasn’t exactly cheap. We splurged on it because we wanted something that would last for many years to come.
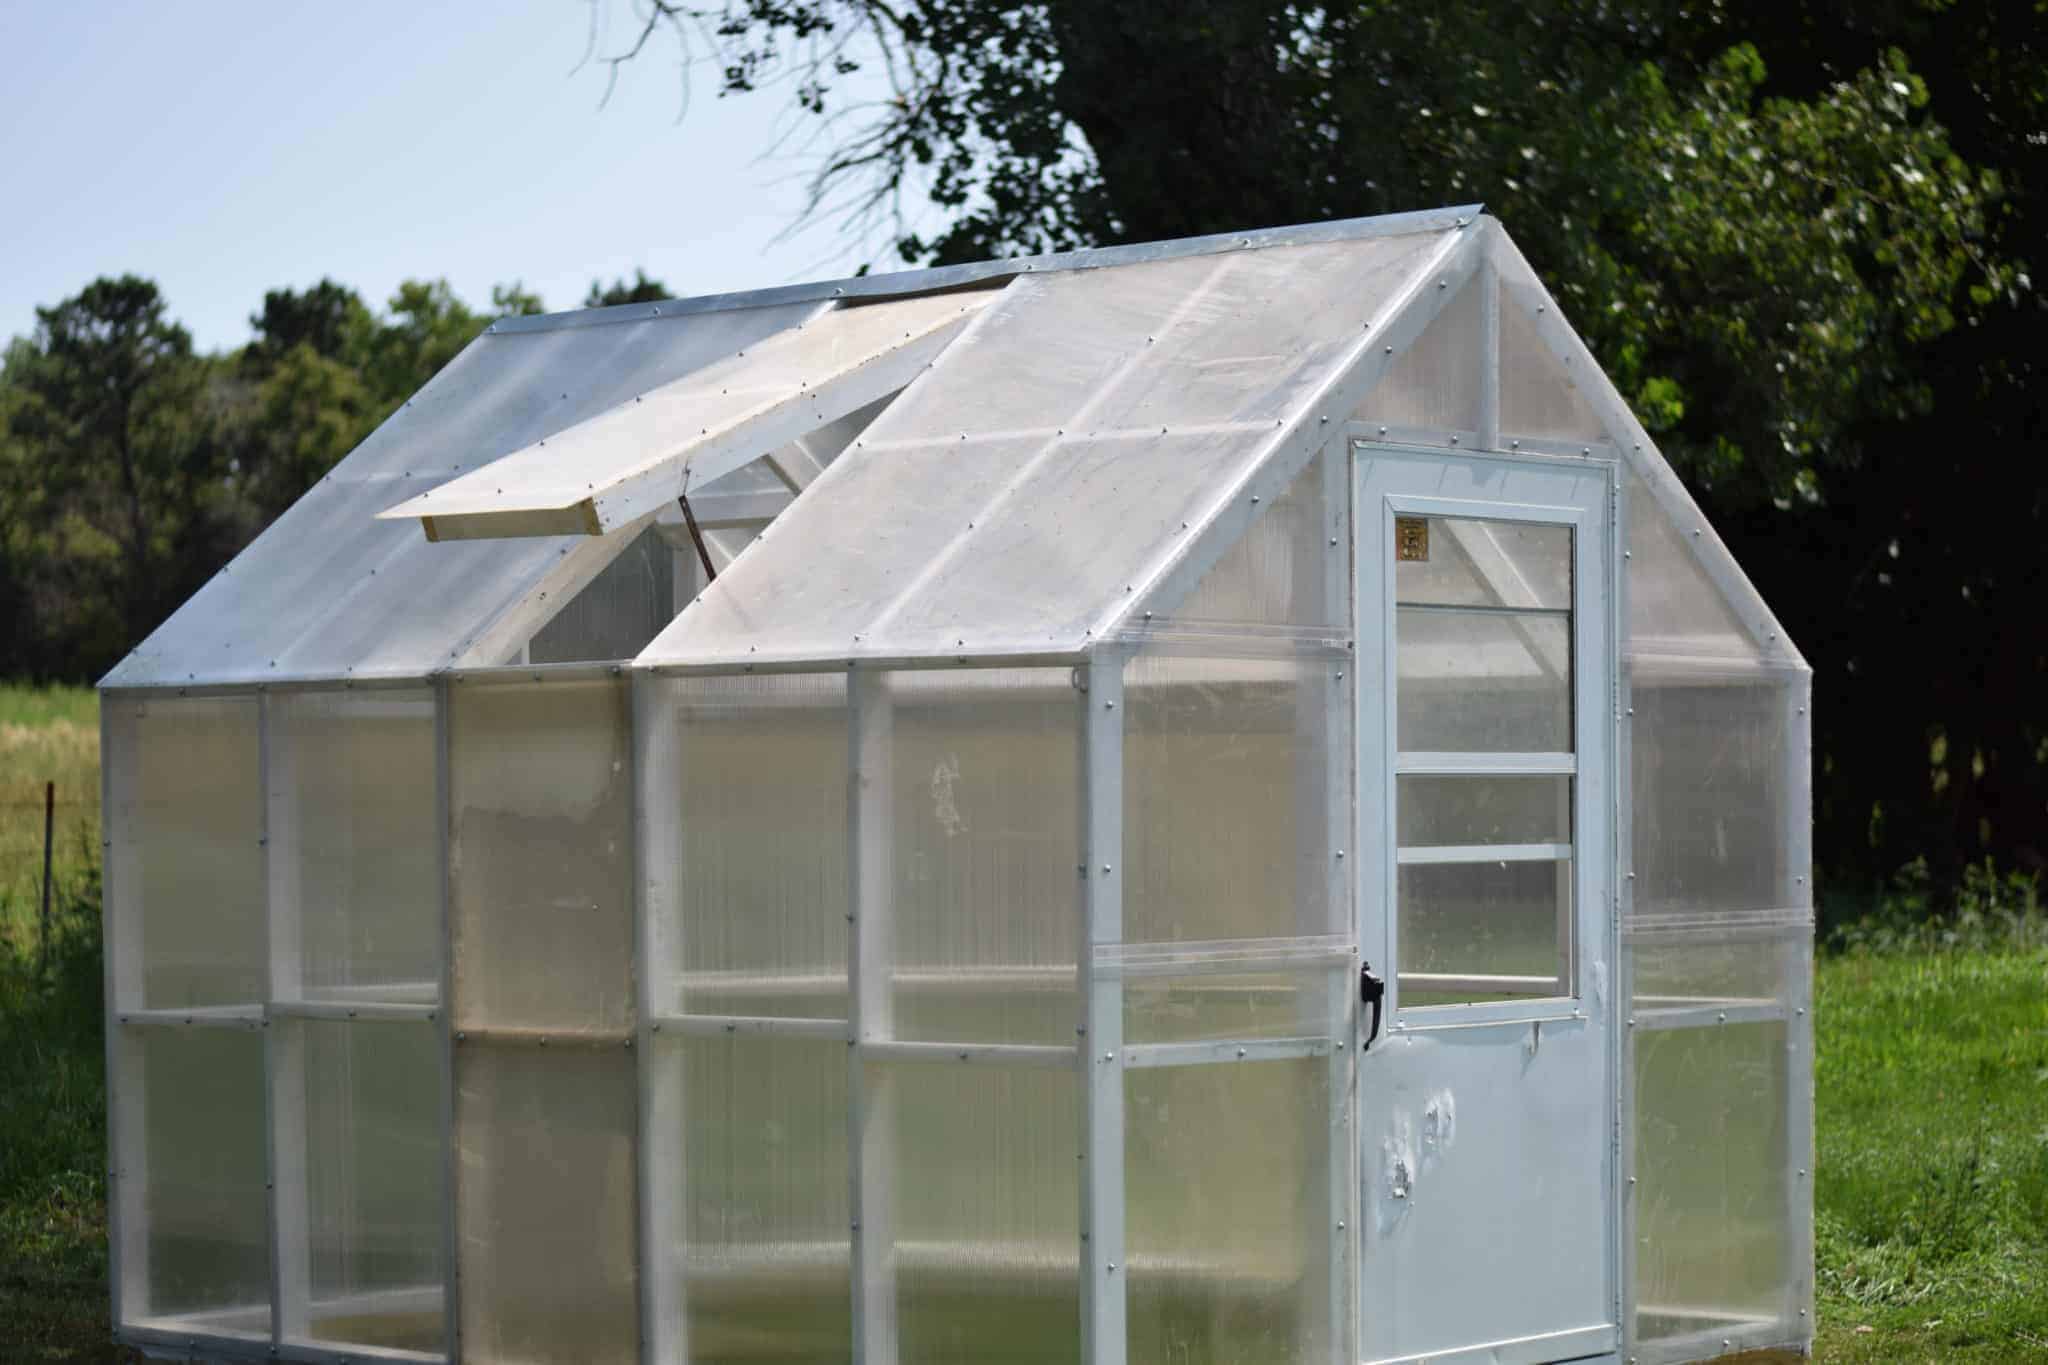
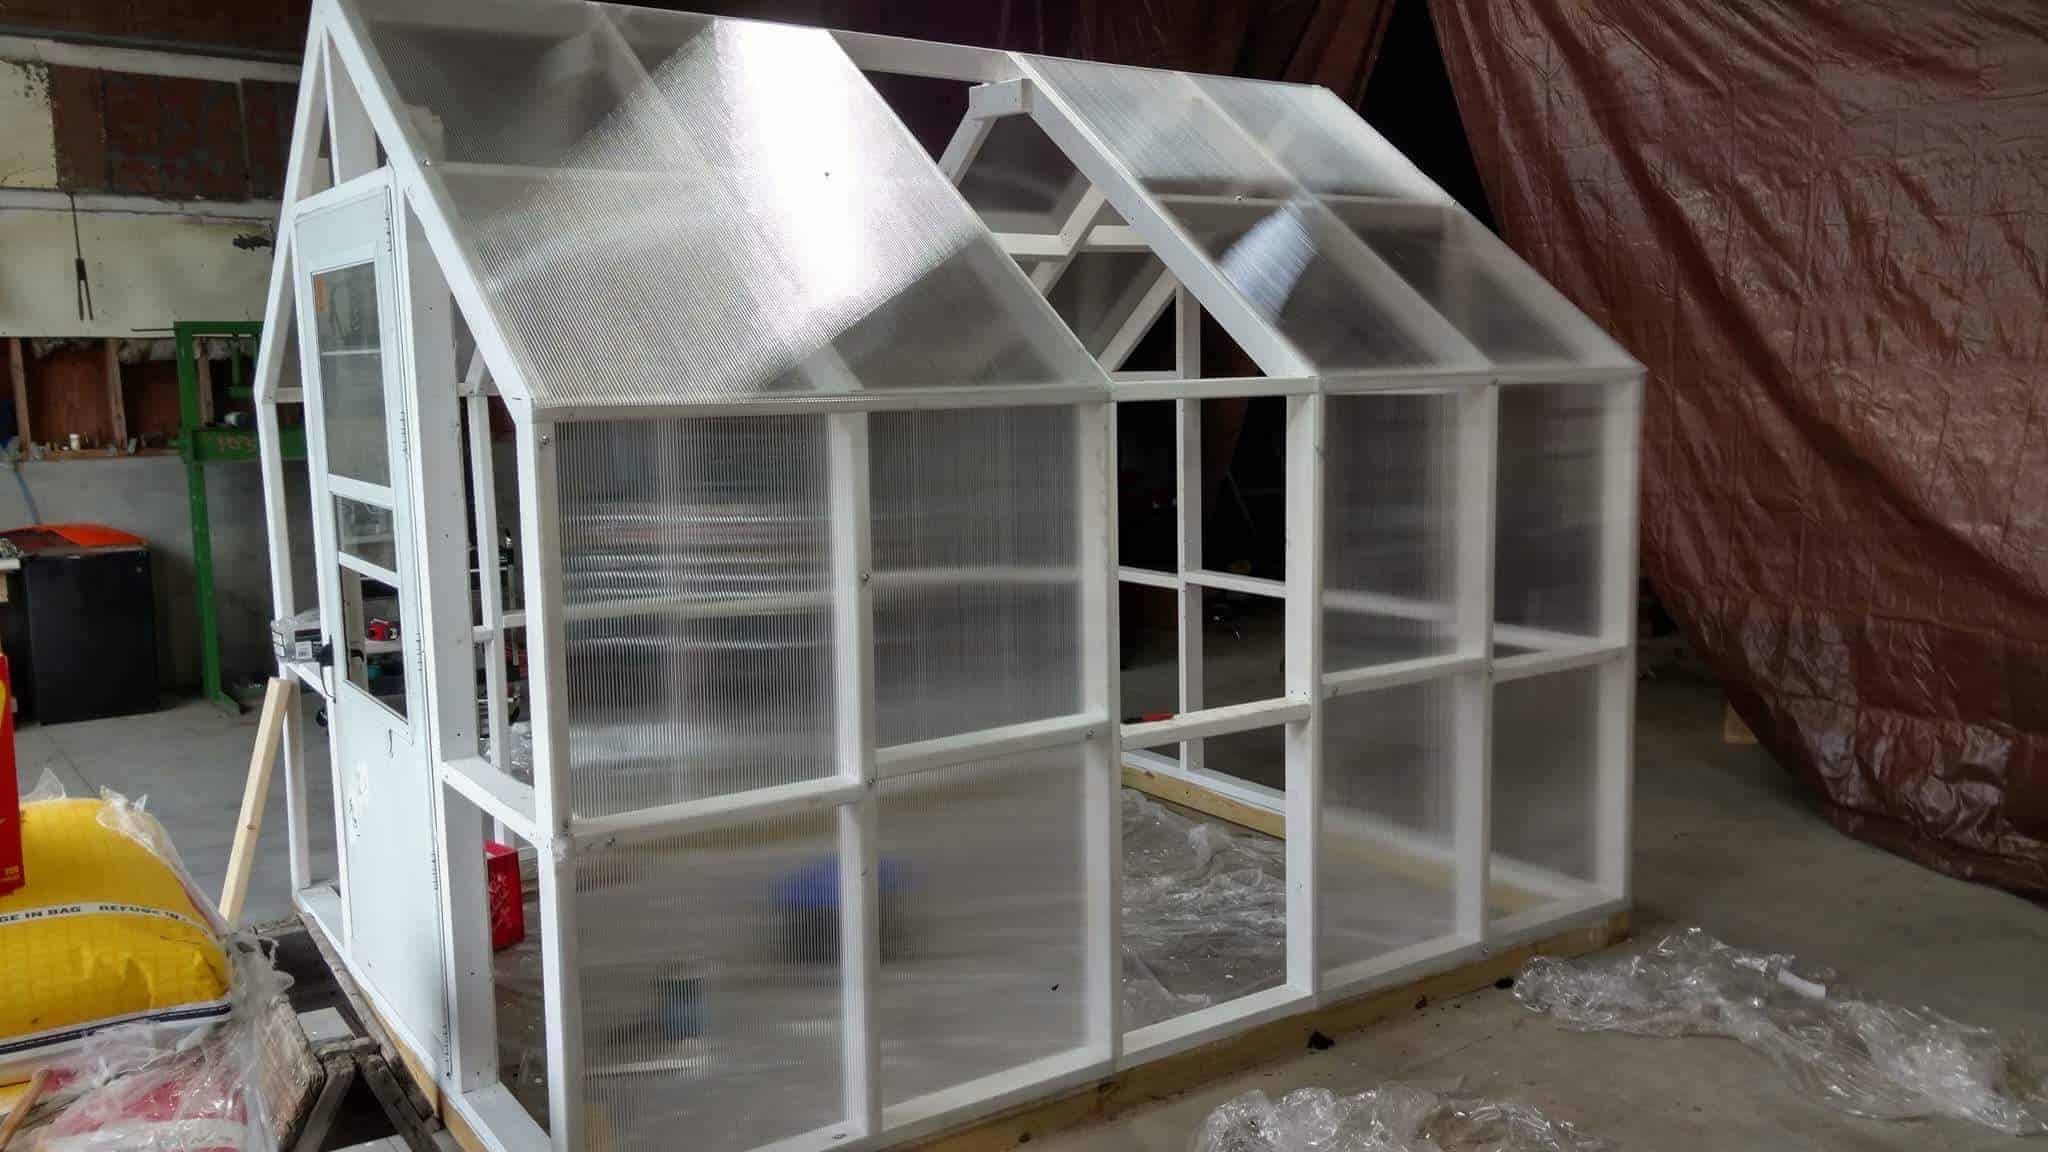
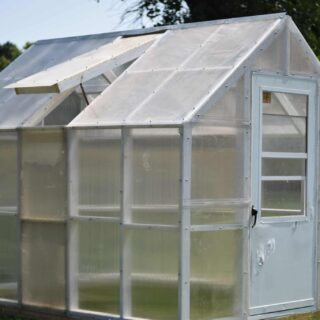
We opted to use Polycarbonate Sheets for our greenhouse. Good call, husband. I love the look!
Our greenhouse isn’t too large, but is the perfect fit for our family’s home garden. And a welcome addition to our other garden plots.
The dimensions are 10′ by 8′ and stands about 8 1/2′ tall.
All in the greenhouse cost was slightly above $750. The most expensive pieces were the plastic sheeting that we chose. But we needed something durable that would withstand the strong winds.
You could save money on using some other greenhouse plastic, but in my opinion you might as well go with the stronger polycarbonate sheets. Because you’ll have to replace it less often and overall it’ll save you some moolah.
Here’s the supplies we used:
- (12) 8′ long, 6 mm greenhouse polycarbonate sheets
- (4) 16′ 2×4
- (4) 16′ 4×4
- A really good drill! (This is the drill my husband uses for all of his farm projects and he loves it!)
- And misc other tools as needed.
Approximate dimensions:
These were 4×4 timber
- 2 base ends, dimensions 3 1/2 x 3 1/2 x 96″
- 2 base sides, dimensions 3 1/2 x 3 1/2 x 113″
And these were 2×4
- 2 sole plates ends, dimensions 1 1/2 x 3 1/2 x 89″
- 2 sole plates sides, dimensions 1 1/2 x 3 1/2 x 120″
- 12 wall stud sides, dimensions 1 1/2 x 3 1/2 x 57″
- 1 ridge support, dimensions 1 1/2 x 3 1/2, 91″
- 2 back studs, dimensions 1 1/2 x 3 1/2, 76″
- 2 door frame sides, dimensions 1 1/2 x 3 1/2 x 81″
- 1 cripple stud, dimensions 1 1/2 x 3 1/2 x 16″
- 1 door header, dimensions 1 1/2 x 3 1/2 x 32″
- 2 knee wall caps, 1 1/2 x 3 1/2 x 120″
- 1 ridge pole, 1 1/2 x 3 1/2 x 120″
- 12 rafters, 1 1/2 x 3 1/2 x 60″
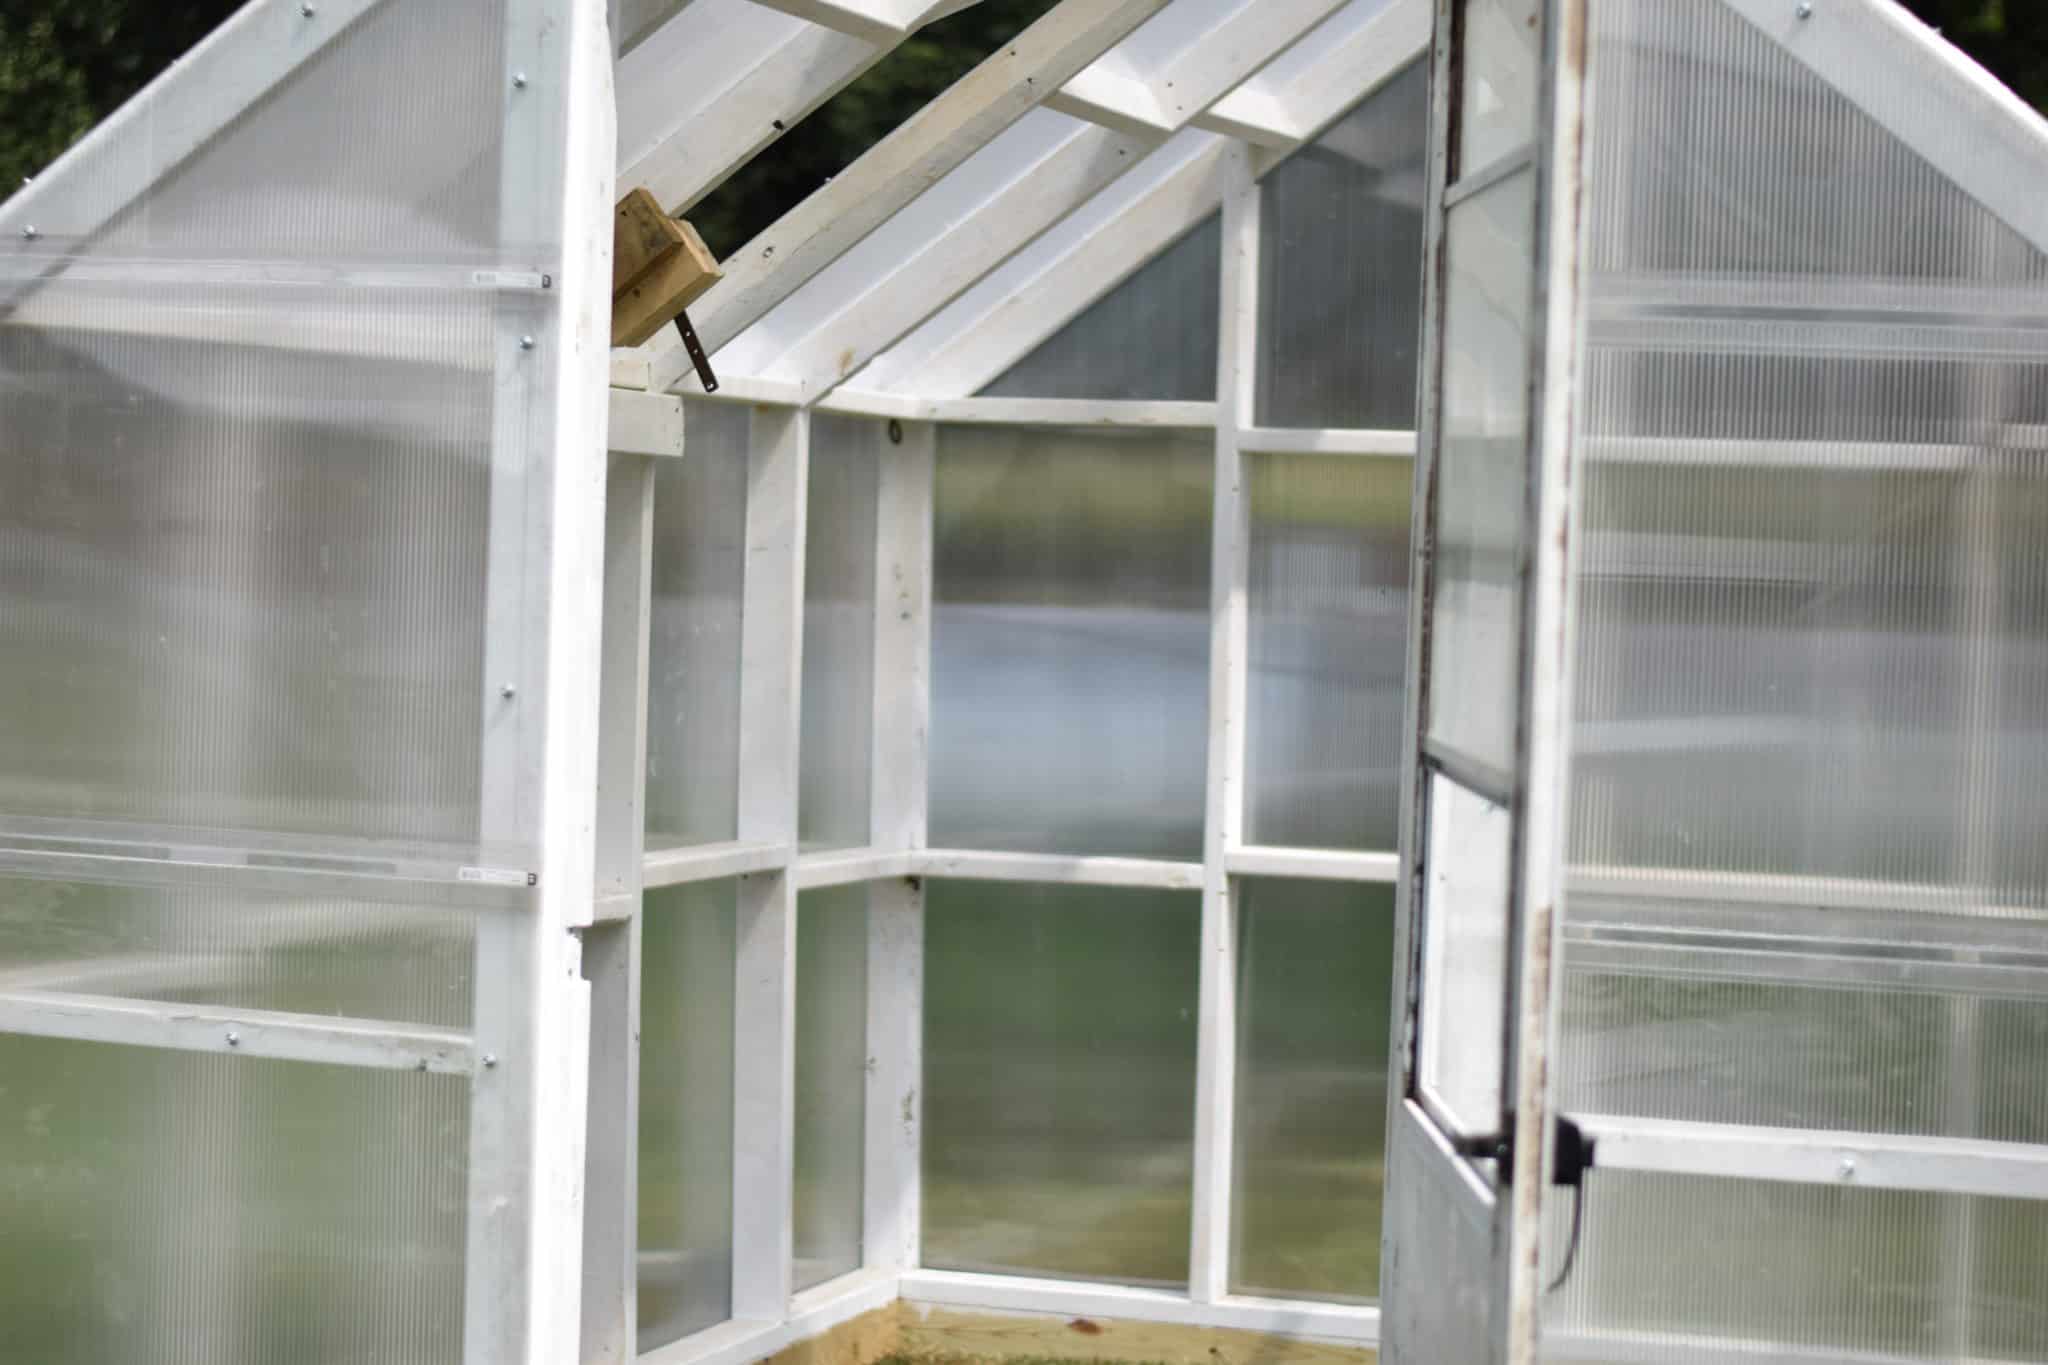
He also made two vents, they were cut to fit inside of the rafters. One on each side and are held up using a metal sheet and pin. I’m sure there’s a technical name for these things, but I’m not exactly sure what.
Approximate dimensions – always take actual length and angle measurements on structure before cutting. There’s a saying and maybe you’ve heard it before. “Measure twice and cut once”.
DIY Greenhouse – Steps
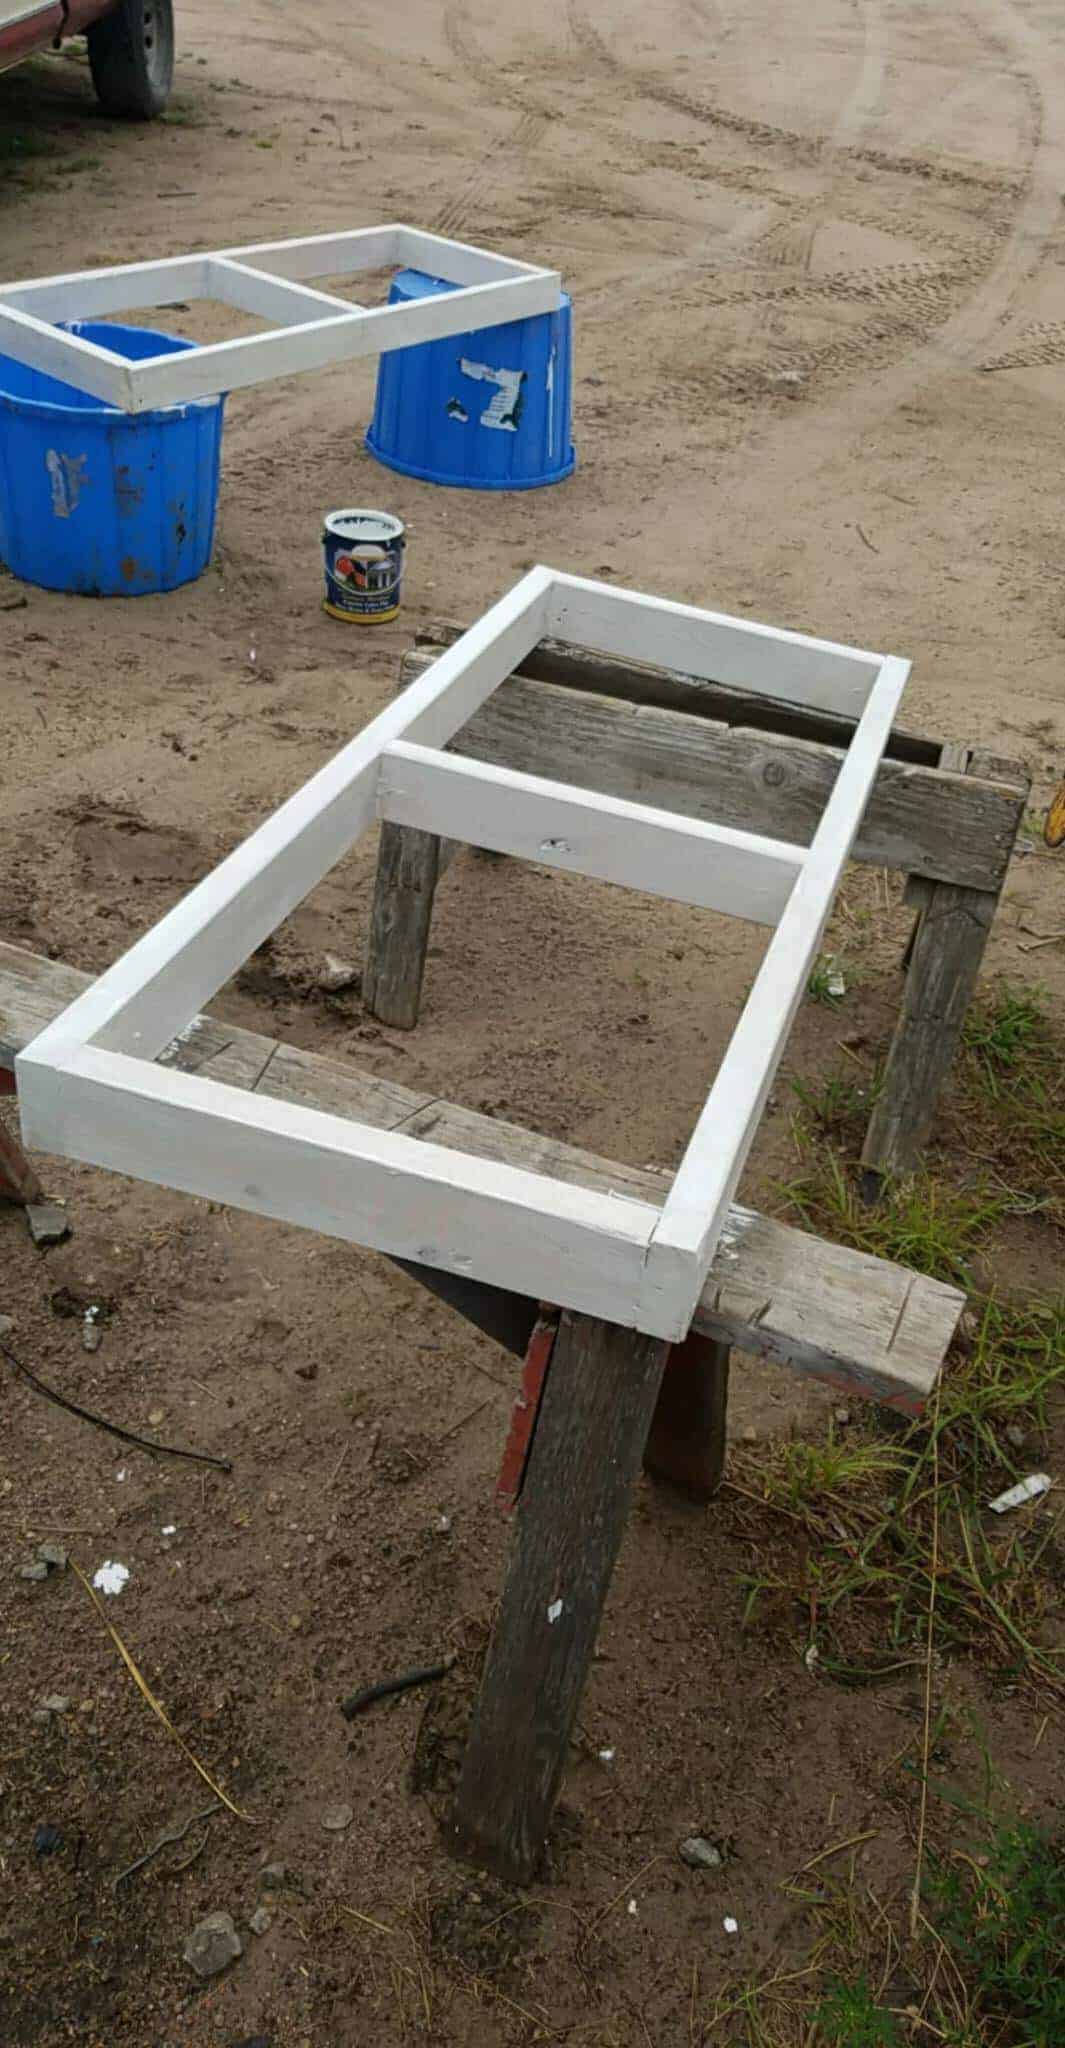
My loving husband decided to build the greenhouse in the shop and move it over to its new location once he finished.
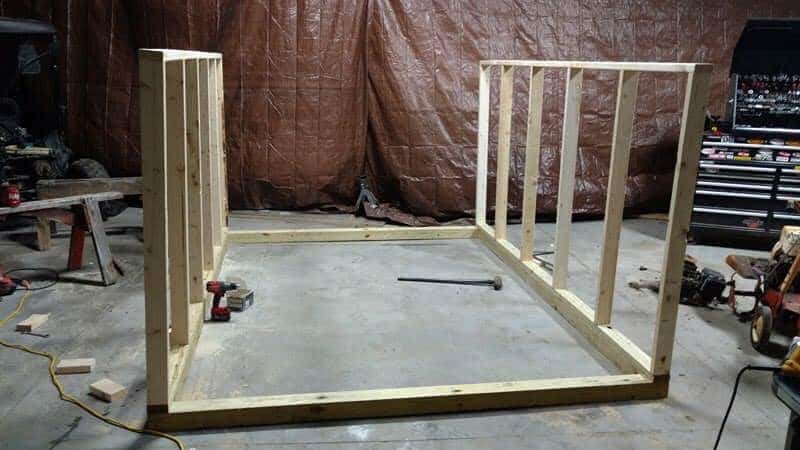
After he measured and cut the pieces, his first step was to build the base and then frame for the wall. Once he built the wall frames, he attached them to the base using those 3″ deck screws.
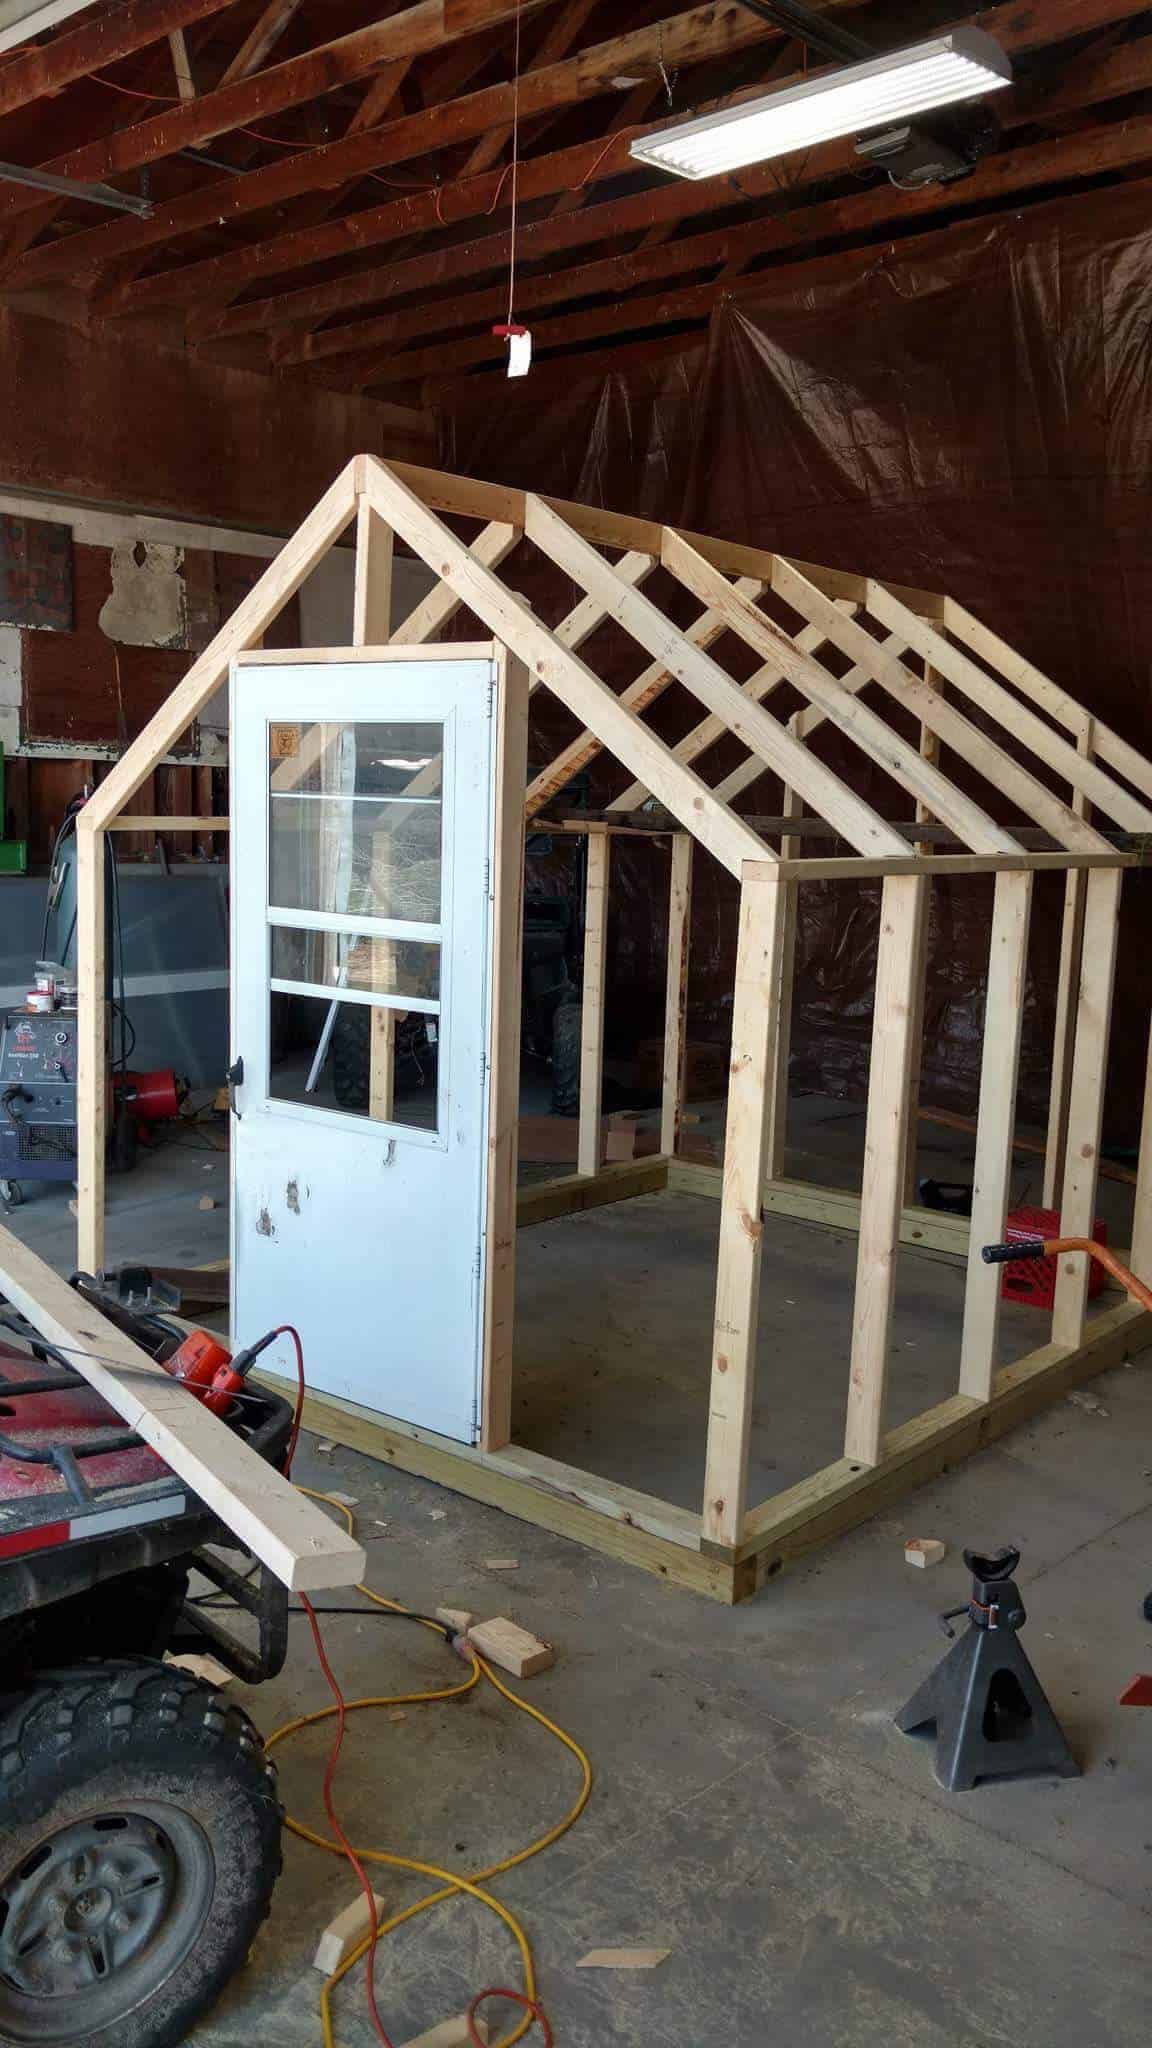
He found an old screen door that my mother in law was no longer using and trimmed the door frame to make it fit. Then he added the rafters.
And because he’s extra sweet, he painted it all white for me. What a guy I have!
Want to save this?
Next, he started adding the plastic sheeting, secured with screws. This sheeting came in 8′ pieces so he cut them to size.
He also cut scrap lumber to size and added them between the wall frames for additional stability. (see photo above)
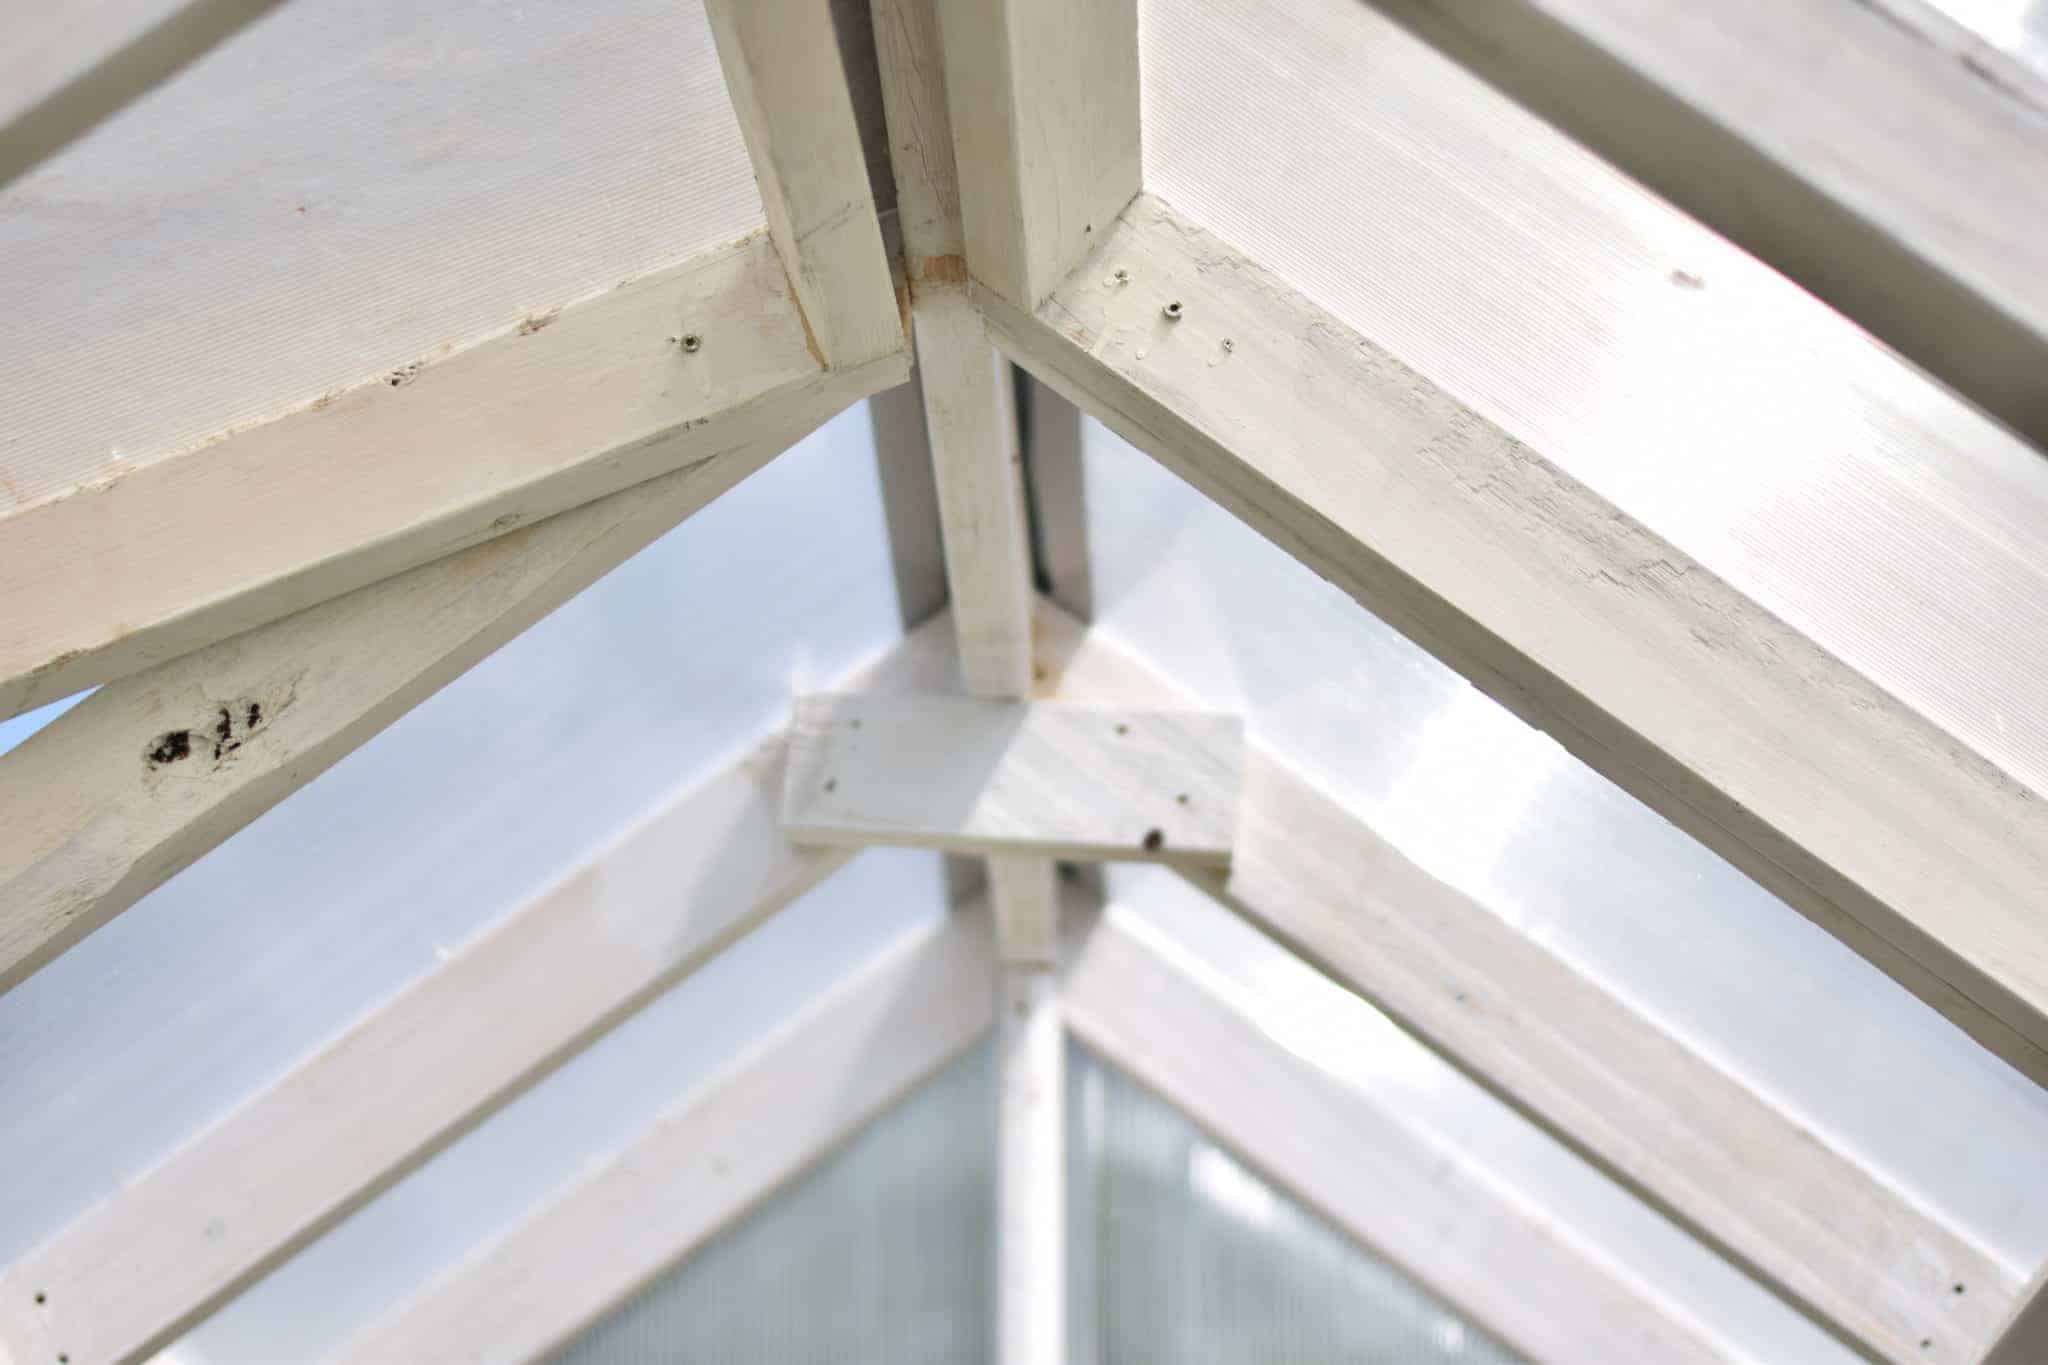
To give it a little more stability, he added scrap pieces of wood on the arches in the rafters.
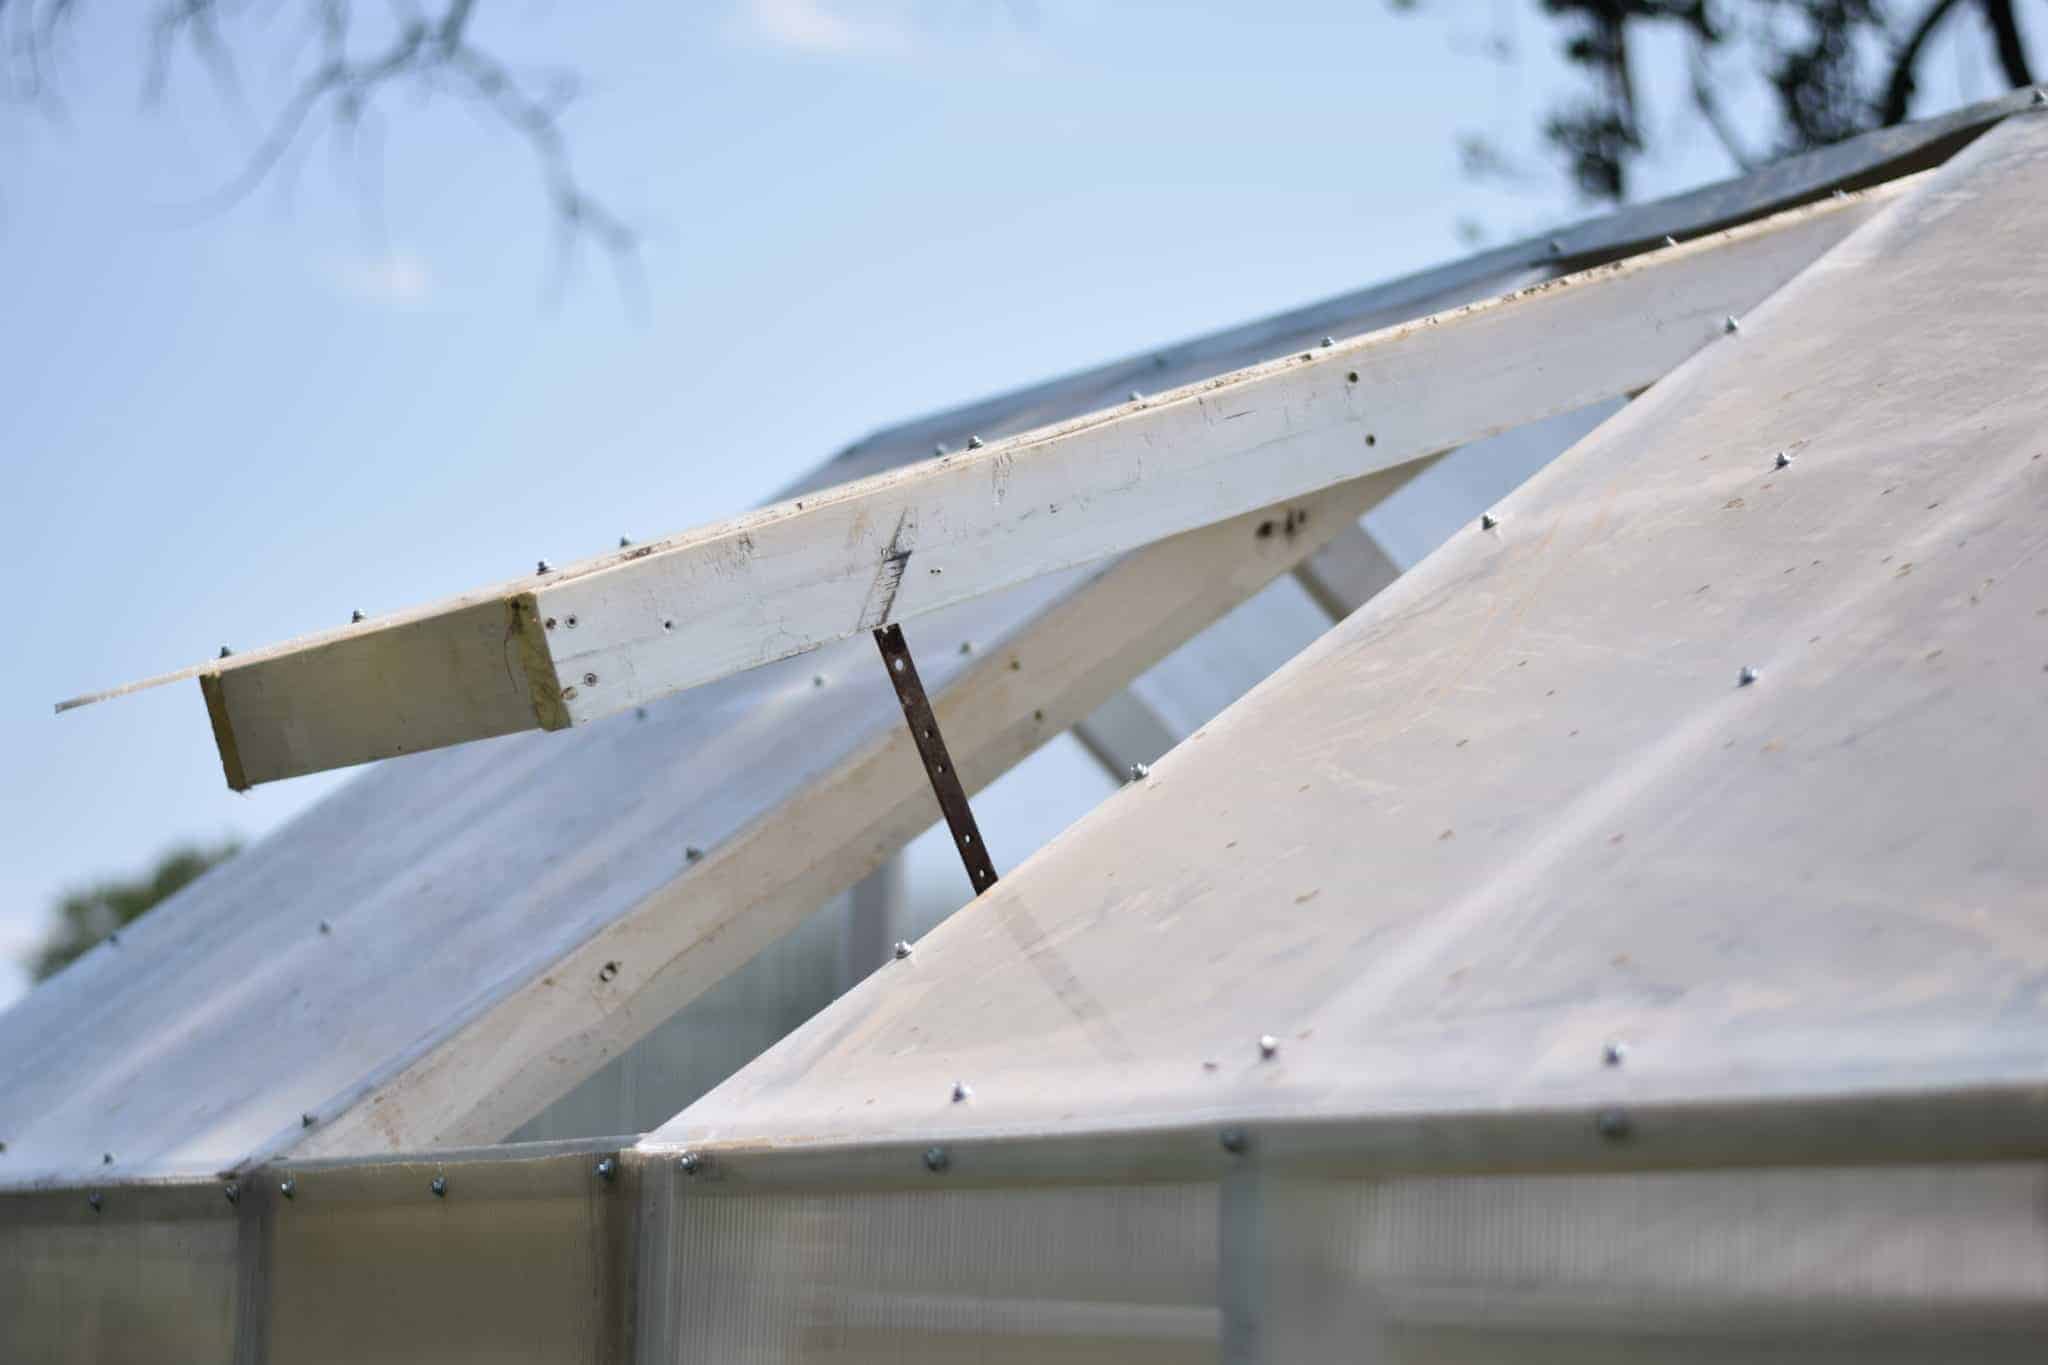
For the vent, he just measured the space between the rafters and made two of these pieces to fit.

From the inside, the vents are being supported by this metal sheet and pin so I can easily open and close it to my height preference.
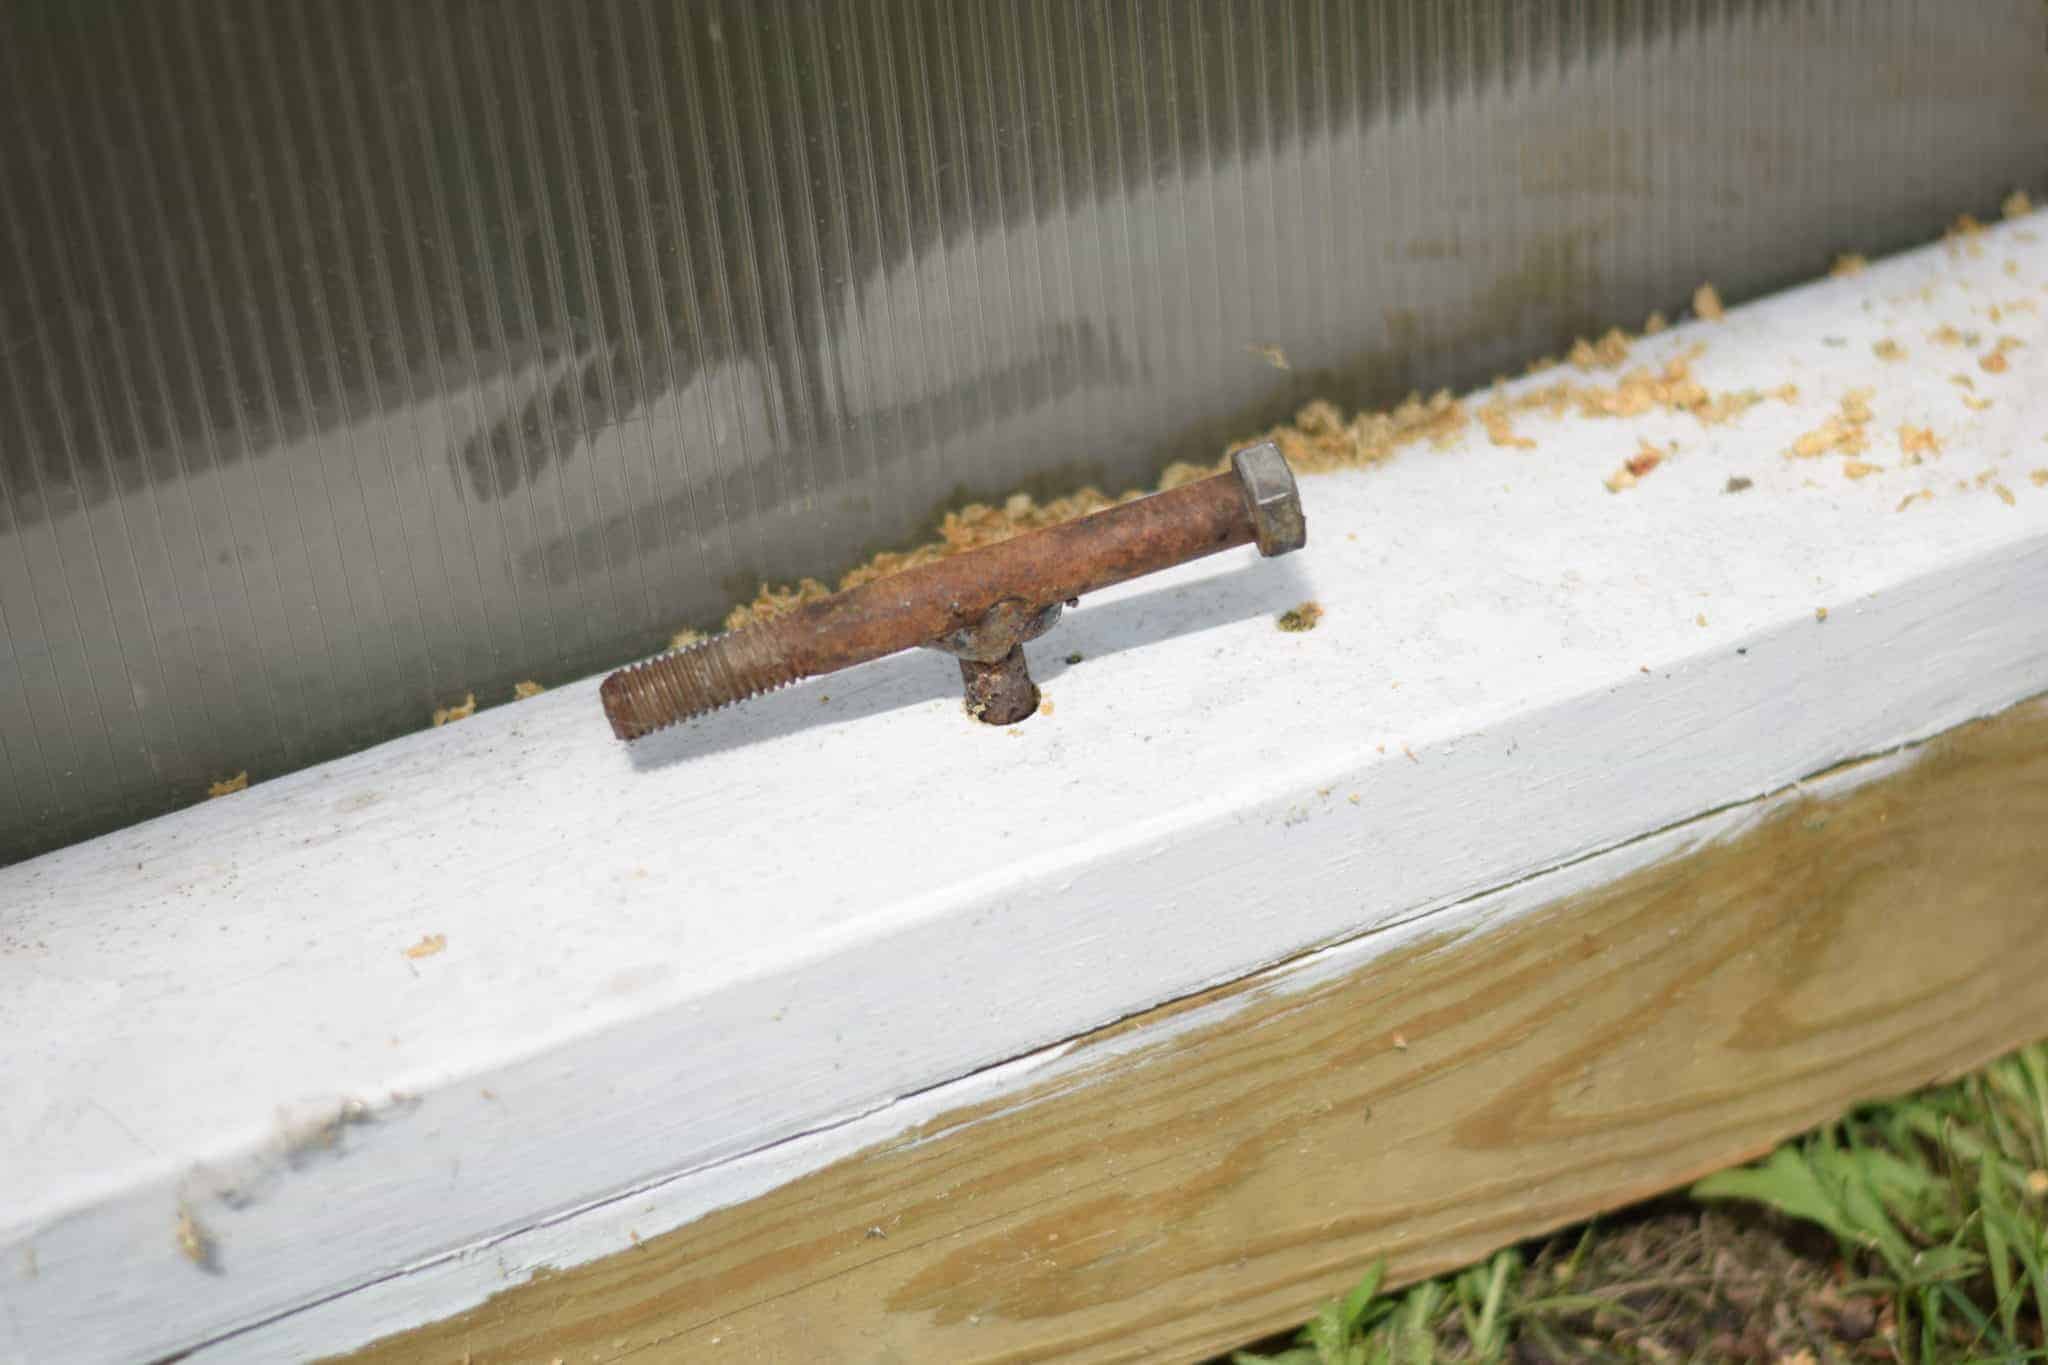
He secured the greenhouse in the ground with these metal rods that are welded into t’s, one on each side.
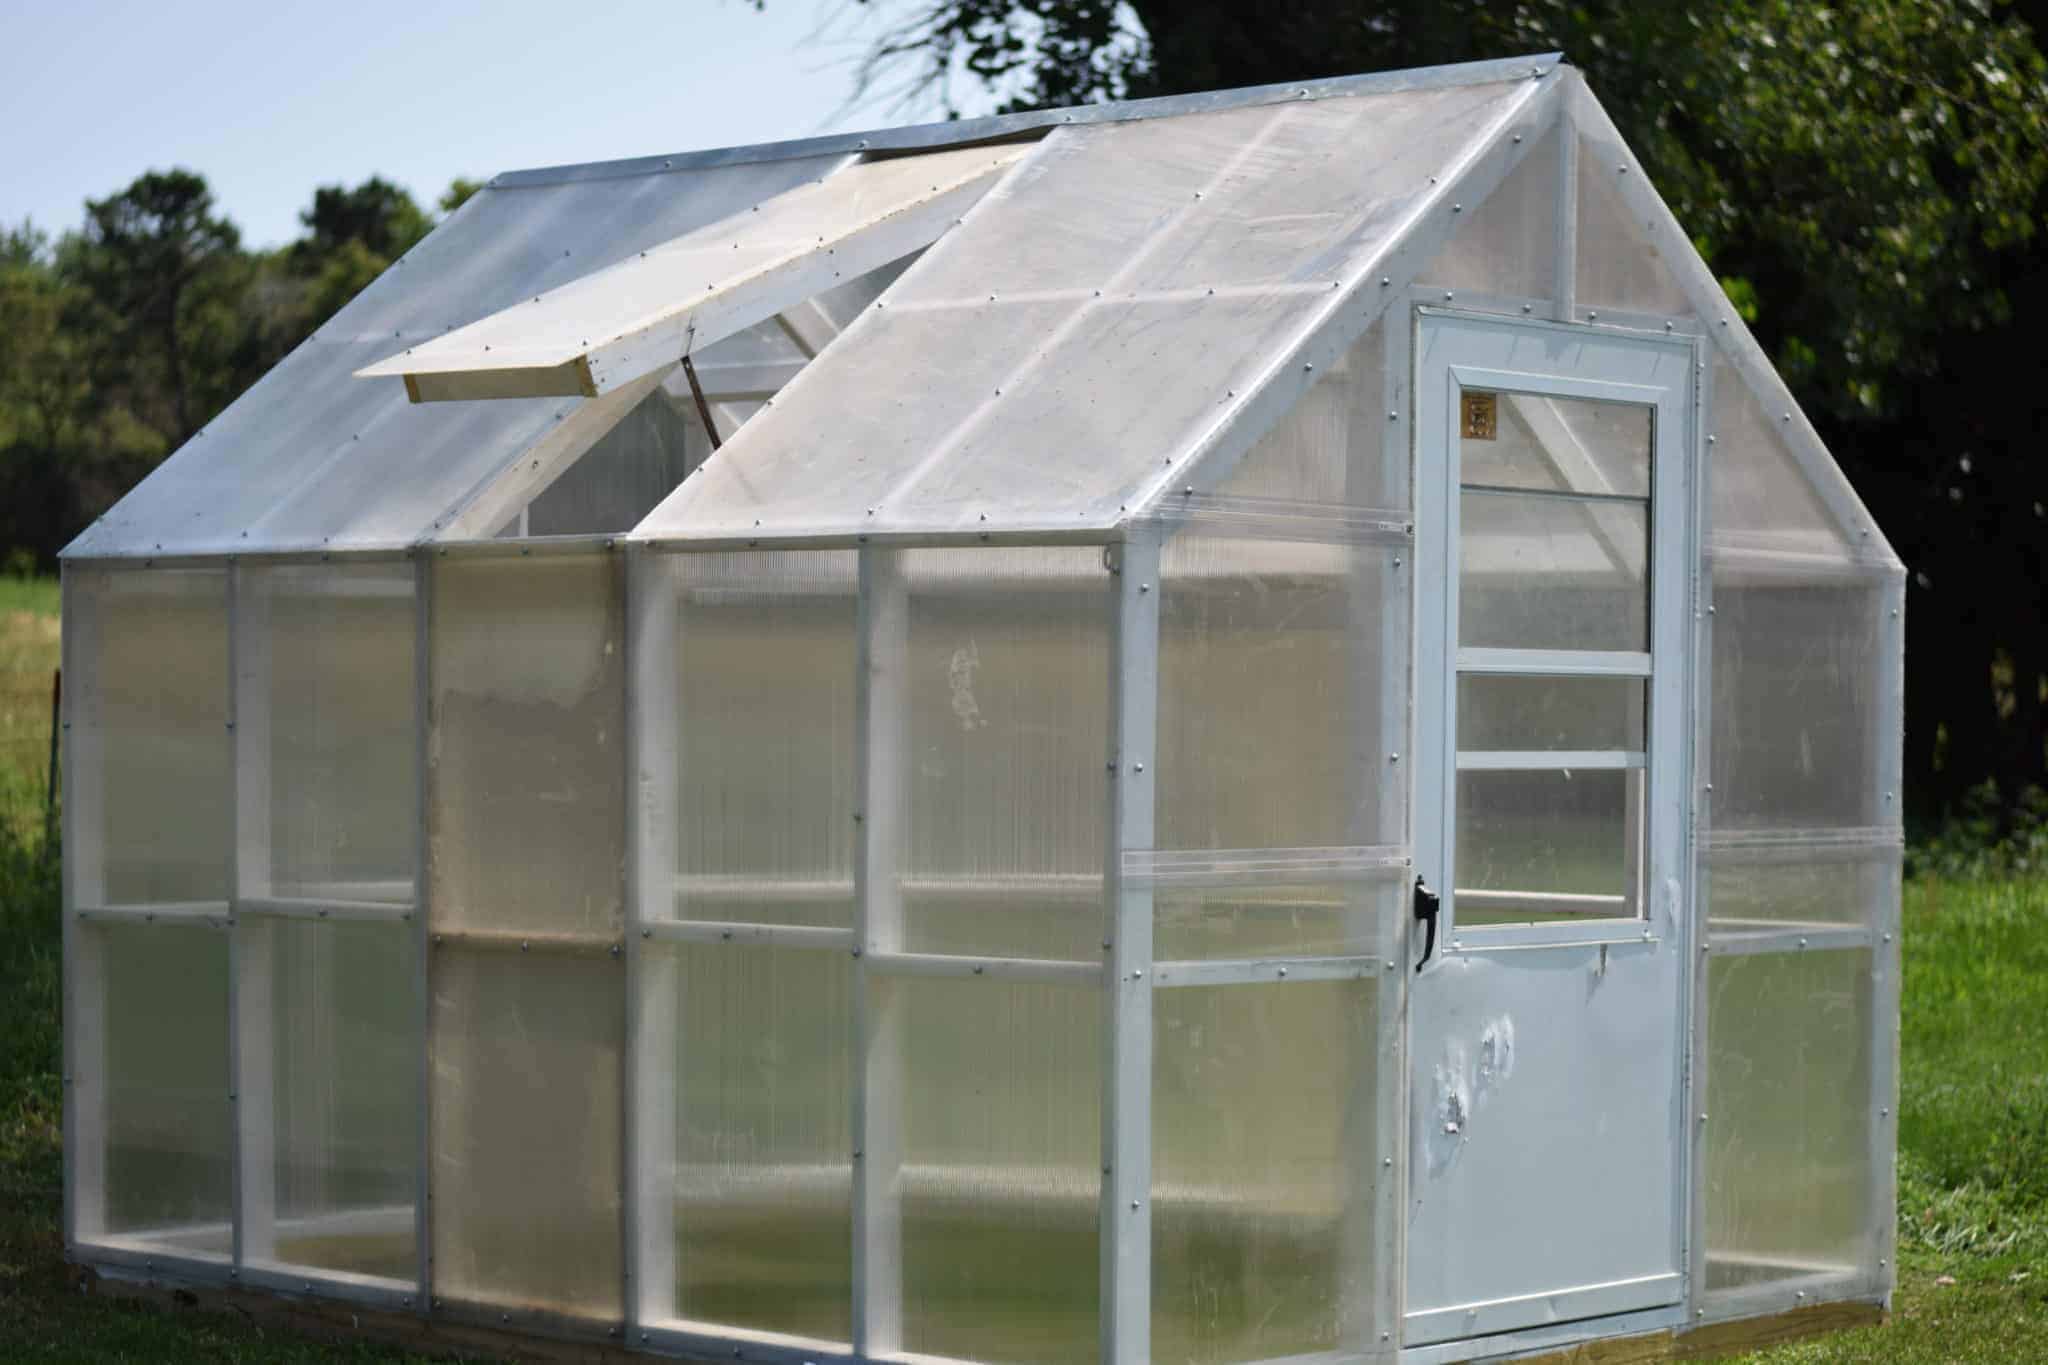
Lastly, he added an 10′ rain cap to the top of the roof to keep the rain out.
You all don’t even know how long I have waited for this greenhouse to arrive in its location so I can use it! If you’re married to a rancher, you’ll understand!
Related: 25 Lessons Learned as a Rancher’s Wife
Between the cows and our extreme weather, this has been many months of me trying to practice patience. And really that looked a little more like nagging on my part.
But it’s here and I love it.
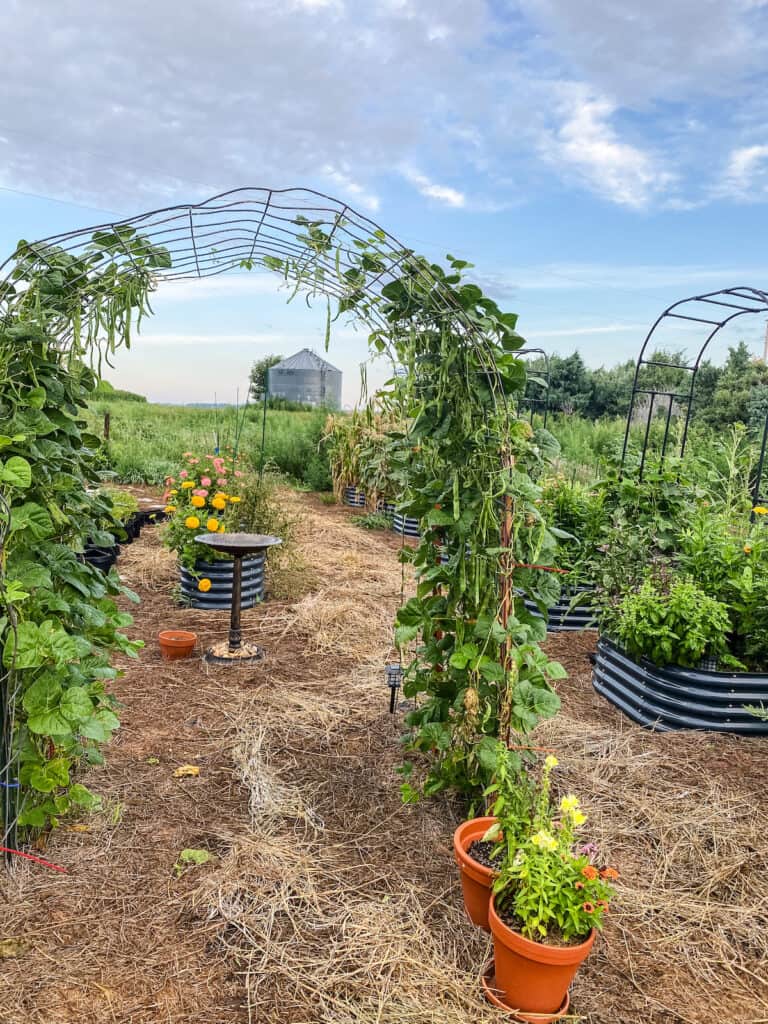
For the interior of the greenhouse, I am adding some shelving and we are building raised garden beds near the outside.
What Can Be Grown in a Greenhouse?
Oh, boy! The possibilities are really endless. But I will share a few of the things we’ve done that has worked well and some of my favorites.
A greenhouse will get really hot during the summer and especially in warmer climates, so making sure that you have vents and a fan if necessary to ensure the greenhouse is getting adequate ventilation.
Some foods can grow well during those hot months or some should be reserved for the cooler growing months. It’s always best to get familiar with your growing seasons. We are a 5a.
You can also grow year round including the winters. Those with harder winters, can supplement with a proper outdoor safe heating element, such as a heater, grow lights, and heat mats.
Herbs and leafy greens are an excellent choice to grow in the greenhouse especially during the cooler weather.
And tomatoes & peppers are my favorite greenhouse veggies to grow in the greenhouse during the summer months.
Related: What to Grow in a Greenhouse
Best foods to grow in a greenhouse during the cooler months:
Here’s a few links to help get you started…
- Herbs
- Onions
- Garlic
- Broccoli
- Cabbage
- Cauliflower
- Microgreens
- Spinach
- Swiss chard
Best foods to grow in a greenhouse during the warmer months:
- Tomatoes
- Peppers
- Zucchini/Summer Squash
- Beans
- Cucumbers
- Melons

How to Build a Greenhouse
Equipment
- A really good drill!
- And misc other tools as needed
Ingredients
- 12 8′ long, 6 mm greenhouse polycarbonate sheets
- 4 16′ 2×4
- 4 16′ 4×4
- 3 ″ deck screws
- 10 ′ rain cap
- APPROXIMATE DIMENSIONS
- THESE WERE THE 4×4 TIMBER:
- 2 base ends dimensions 3 1/2 x 3 1/2 x 96″
- 2 base sides dimensions 3 1/2 x 3 1/2 x 113″
- AND THESE WERE THE 2×4 TIMBER:
- 2 sole plates ends dimensions 1 1/2 x 3 1/2 x 89″
- 2 sole plates sides dimensions 1 1/2 x 3 1/2 x 120″
- 12 wall stud sides dimensions 1 1/2 x 3 1/2 x 57″
- 1 ridge support dimensions 1 1/2 x 3 1/2, 91″
- 2 back studs dimensions 1 1/2 x 3 1/2, 76″
- 2 door frame sides dimensions 1 1/2 x 3 1/2 x 81″
- 1 cripple stud dimensions 1 1/2 x 3 1/2 x 16″
- 1 door header dimensions 1 1/2 x 3 1/2 x 32″
- 2 knee wall caps 1 1/2 x 3 1/2 x 120″
- 1 ridge pole 1 1/2 x 3 1/2 x 120″
- 12 rafters 1 1/2 x 3 1/2 x 60″
Instructions
- Measure and cut your lumber. Approximate dimensions – always take actual length and angle measurements on structure before cutting. There’s a saying and maybe you’ve heard it before. “Measure twice and cut once”.
- The first step was to build the base and then frame for the wall.
- Once the wall frames were built, we attached them to the base using those 3″ deck screws.
- Measure out your door frame. I wanted a screen door on mine, so my husband cut and measured the frame to fit this.
- Next, install your rafters.
- At this point, if you want yours painted, this is a good place to do that.
- Now you can begin to add your plastic sheeting, secured with screws. This sheeting came in 8′ pieces so we cut them to size.
- We also cut scrap lumber to size and added them between the wall frames for additional stability. (see photo above)
- My husband also added scrap pieces of wood on the arches in the rafters.
- For the vent, he just measured the space between the rafters and made two of these pieces to fit.
- Lastly, he added an 10′ rain cap to the top of the roof to keep the rain out.
- You can also use metal stakes to secure it in the ground.

Hi! Great tutorial! We are hopeing to build a high tunnel or green house this spring. How are you liking yours? What have you been growing in it?
Love it! Although, I haven’t had time to plant too much in it like I anticipated, due to a big project. I have some herbs, salad mixes, my bay leaf tree, and garlic growing in there currently. I am excited to get my spring garden starts growing in there next month. Good luck on your project, Ruth! 🙂
Hello! I live in central Iowa and I would love to build a greenhouse on our acreage to use for seedlings in the spring and fall/winter crops.
I have done some research on greenhouses but I haven’t learned a lot about how to keep my greenhouse warm. Like you I also live in zone 5 so as you know springs and winters can be very harsh for small seedlings to grow. So my question is, are you using your green house during those cold months? and if so what are you doing to heat your greenhouse to promote growth?
I look forward to hearing back from you!
thank you!!!
Hi Lindi! I did not continue my fall/winter garden plans this year as there were many unforeseen circumstances that came up. But I do have herbs and garlic growing in containers through the winter in the greenhouse. They seem to be doing great without any added tools. I have a heater, fan, and heat pads on the way so I can grow in the colder temps. Stay tuned for a follow up post on all of this. 🙂 I’ll share what has worked and not worked for our cold weather gardening.
Where did you buy your polycarbonate sheets?
Hi Maria,
We found ours at the local hardware stores..we had to go to a few different locations because we cleared them out! I don’t know what you have for hardware store chains, but I know that Menards carried them when we built this greenhouse.
Thank you for these instructions! The greenhouse looks great!
What a great greenhouse!
My hubby and I have been thinking of tackling this project. You’ve given us some inspiration and help. Thank you!
Beautiful! Can you tell me how you guys waterproofed the 2 vents on the roof? What seals it so rain water doesn’t get in? Thanks so much! We are building one this year!
We actually didn’t do anything special to water proof the vents. And it hasn’t been of much concern for us and I haven’t noticed any troublesome issues with leaking. I’m not sure what you could use for water proofing if that is a concern for your. We also used a rain cap on the very top of the roof to prevent leaking there.
I love this greenhouse! I am looking to build one around my raised bed and this would be perfect. My only question is, do I have to make it that tall or can I bring it down to 7.5 feet tall? If I can what would be the side and end wall measurements for it?
You certainly can change the height. But, you would probably have to change the dimensions of the greenhouse design a bit. My husband would need to figure all of the details out because that is a bit beyond my scope. 🙂
Green house is very important if you want to have fruits and veggies of different seasons. This green house looks so great. Amazing work done, making a green house would be that easy never thought of that.
Thank you so much! 🙂
I love your greenhouse! Your husband did an awesome job!! Now that you’ve had it awhile, I’d really like to know what you think worked well and what didn’t. What changes would you make now that you’ve used it awhile? Any ‘learned the hard way’ advice you and your husband could offer? I’m building my own, and as a senior woman it’s going to be a big undertaking for me. Thank you!!!
Thank you for the sweet words! Honestly, I have only used the greenhouse for one season. I had a lot of things that prevented me from using it. I was on bed rest with my last pregnancy and we recently built a new home. So we are basically starting all over from scratch. The greenhouse came with us, but I need to get our garden established again at the new place. 🙂
I was wondering how the roof vents hold up against the rain. I have an old she that I am going to convert into a greenhouse but I am worried about venting the roof bc I don’t want it raining inside- would love to heRe about how your husband made sure that didn’t happen. TU
They do leak. But only slightly and not enough to cause any sort of issues or concerns for us. Besides, there is a bit of humidity in the greenhouse with the plants. The vents don’t leak a massive amount of water for us to need to go in and prevent it from doing so. Hope this helps! 🙂
HI
love the idea of your green house.
Where did you purchase the polycarbonate sheets? Found this at HD Thermoclear 48 in. x 96 in. x 1/4 in. (6mm) Opal Multiwall Polycarbonate Sheet Cost is $152 each.
Any suggestions?
Mike
What is the dimensions of the finished greenhouse?
I would also like to know the finished dimensions of the greenhouse.
Hello! I’m sorry if it isn’t clear in the post…so, I’ll post it here too. The greenhouse dimensions are 10′ by 8′ and stands about 8 1/2′ tall.
Nice I am building one this I would like to what kind of heater and fan did you get because it get very cold here too. And I would like to grow in the winter for my family
Hi Christy! I actually did not get a chance to purchase these before we lost the greenhouse in a tornado. When we rebuild, I’ll research and share what we settle on for a heater and fan. Hope you find something that you love! 😀
Beautiful green house! I’ve been looking for a tutorial to build a greenhouse that will not only hold up to Colorado winds but the nasty hail we have here. Do you know if the polycarbonate sheets will hold up to hail? If not, do you have another suggestion to sub it with? Thank you for sharing this!
They have not been an issue in our Nebraska weather! I don’t think that it would be too much trouble to replace them on occasion if necessary.
Thanks for sharing free plans this really helps people that don’t have money to purchase big dollar plans greatly appreciated.
From small country ks women.
I know this is an older post but wondering if you had to worry about moisture or anything getting inside the polycarbonate sheets since they are corrugated?
I don’t really recall that, but if you’re concerned about moisture, my husband suggested caulking the edges.
Can you post a link and pic of what the polycarbonate looks like I’m having trouble finding it.
I’m confused… but first let me say thanks for the plans. These are great. I’ve been wanting a greenhouse forever and now I know I can build my own. I do have a question about the amount of 2x4s. You say 4 16’ but I can’t grasp that’s all that’s needed. Is this correct?